CC Switch Hands-On: A Local Routing Tool for Switching AI CLI Models with Your Own API Key in One Click
When using Claude Code or Codex in the terminal, how can you freely switch models, bring your own API key, or use DeepSeek? This hands-on article tests the CC Switch routing tool and walks through how to proxy AI CLIs while managing costs and MCP.
Introduction
When using AI terminal assistants such as Claude Code and Codex, developers often run into official API limits, network latency, or the high cost of official billing. If you can bring your own API key, or even switch the model to a more cost-effective option like DeepSeek or a locally running open-source model in one click, you get much more flexibility while lowering usage costs.
CC Switch is an open-source GUI routing tool built for exactly this. It acts as a local proxy server and can take over and route API requests from multiple AI CLIs with one click. In this article, I will use the macOS version as an example and show how to route Codex models to my own DeepSeek API through CC Switch.
Here is a recording of the actual setup, with DeepSeek successfully running inside Codex:
Why Use CC Switch?
When using an AI CLI, what is the difference between connecting directly to the official service and routing through CC Switch? Here is a feature comparison:
| Feature / Scenario | Using the Official CLI Directly | Routing with CC Switch |
|---|---|---|
| Model Selection | Limited to the official default models | Freely switch between DeepSeek, OpenAI, Anthropic, or local models |
| Billing Method | Billed through the official linked account, with limited payment flexibility | Bring your own API Key and pay based on each provider's actual usage |
| MCP and Skills | Requires manually editing each CLI config file, which is tedious | Provides a unified GUI management panel and one-click sync to multiple tools |
| Cost Tracking | Lacks centralized statistics, with bills scattered across platforms | Built-in dashboard for token and cost statistics, plus detailed request logs |
| Failover | Connection interruptions usually fail directly with an error | Supports automatic failover and health checks, with automatic fallback node switching |
Overview of CC Switch Core Features
- Provider management: Built-in support for 5 popular CLI tools: Claude Code, Codex, Gemini CLI, OpenCode, and OpenClaw, plus more than 50 presets. It supports one-click key import and can sync one configuration to multiple apps.
- Local proxy and failover: The local proxy supports hot switching, format conversion, automatic failover, circuit breaking, provider health monitoring, and request throttling. It can take over requests at the application level with fine control.
- MCP, prompts, and Skills management: The integrated MCP panel supports two-way sync across multiple apps. It also provides a Markdown prompt editor and supports one-click Skills installation from GitHub repositories or ZIP files, removing a lot of manual setup.
- Usage and cost tracking: Provides a dashboard for spending, request count, and token usage, with trend charts and detailed logs.
- Cloud sync for configuration files: Supports WebDAV / cloud drive backup, and supports Deep Link (
ccswitch://) one-click import.
Step-by-Step Installation and Setup
Below, I use a macOS environment as the example to demonstrate how to download, install, and configure CC Switch, then route Codex to the DeepSeek provider.
Step 1: Download the Right Installer
Go to the CC Switch GitHub Releases page, find the latest version's Assets, and download the file for your operating system. macOS users can choose the DMG file for installation.
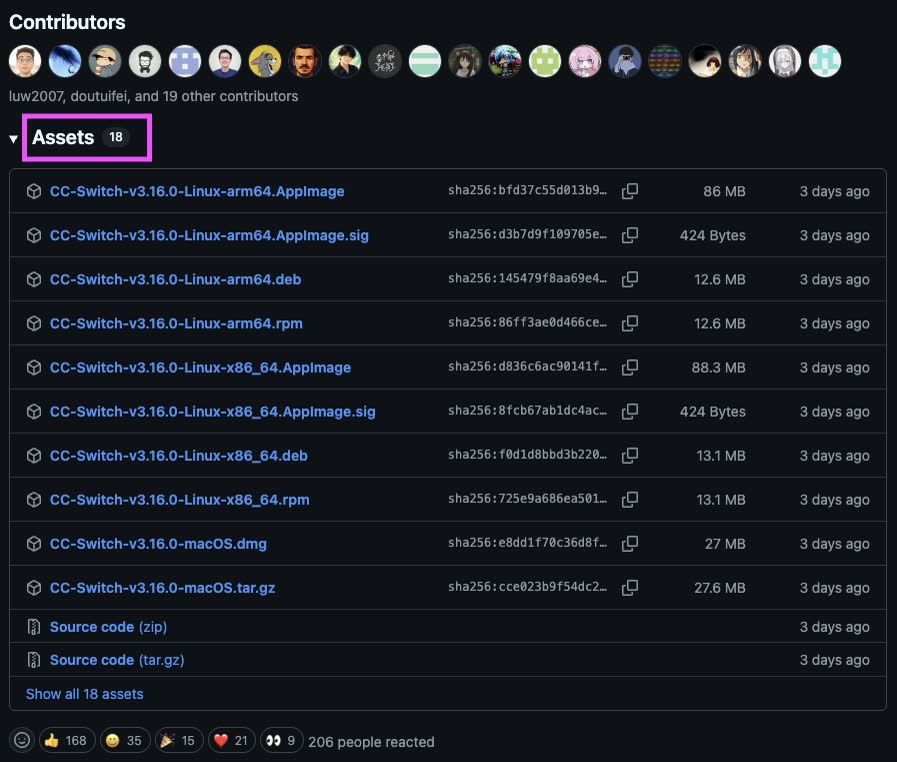
Download the Assets file for your operating system from the Releases page
Step 2: Choose the CLI Tool to Take Over
After launching CC Switch, choose the tool you want to route on the main interface. Here, I choose to take over Codex. Other tools such as Claude Code and Gemini CLI are also supported.
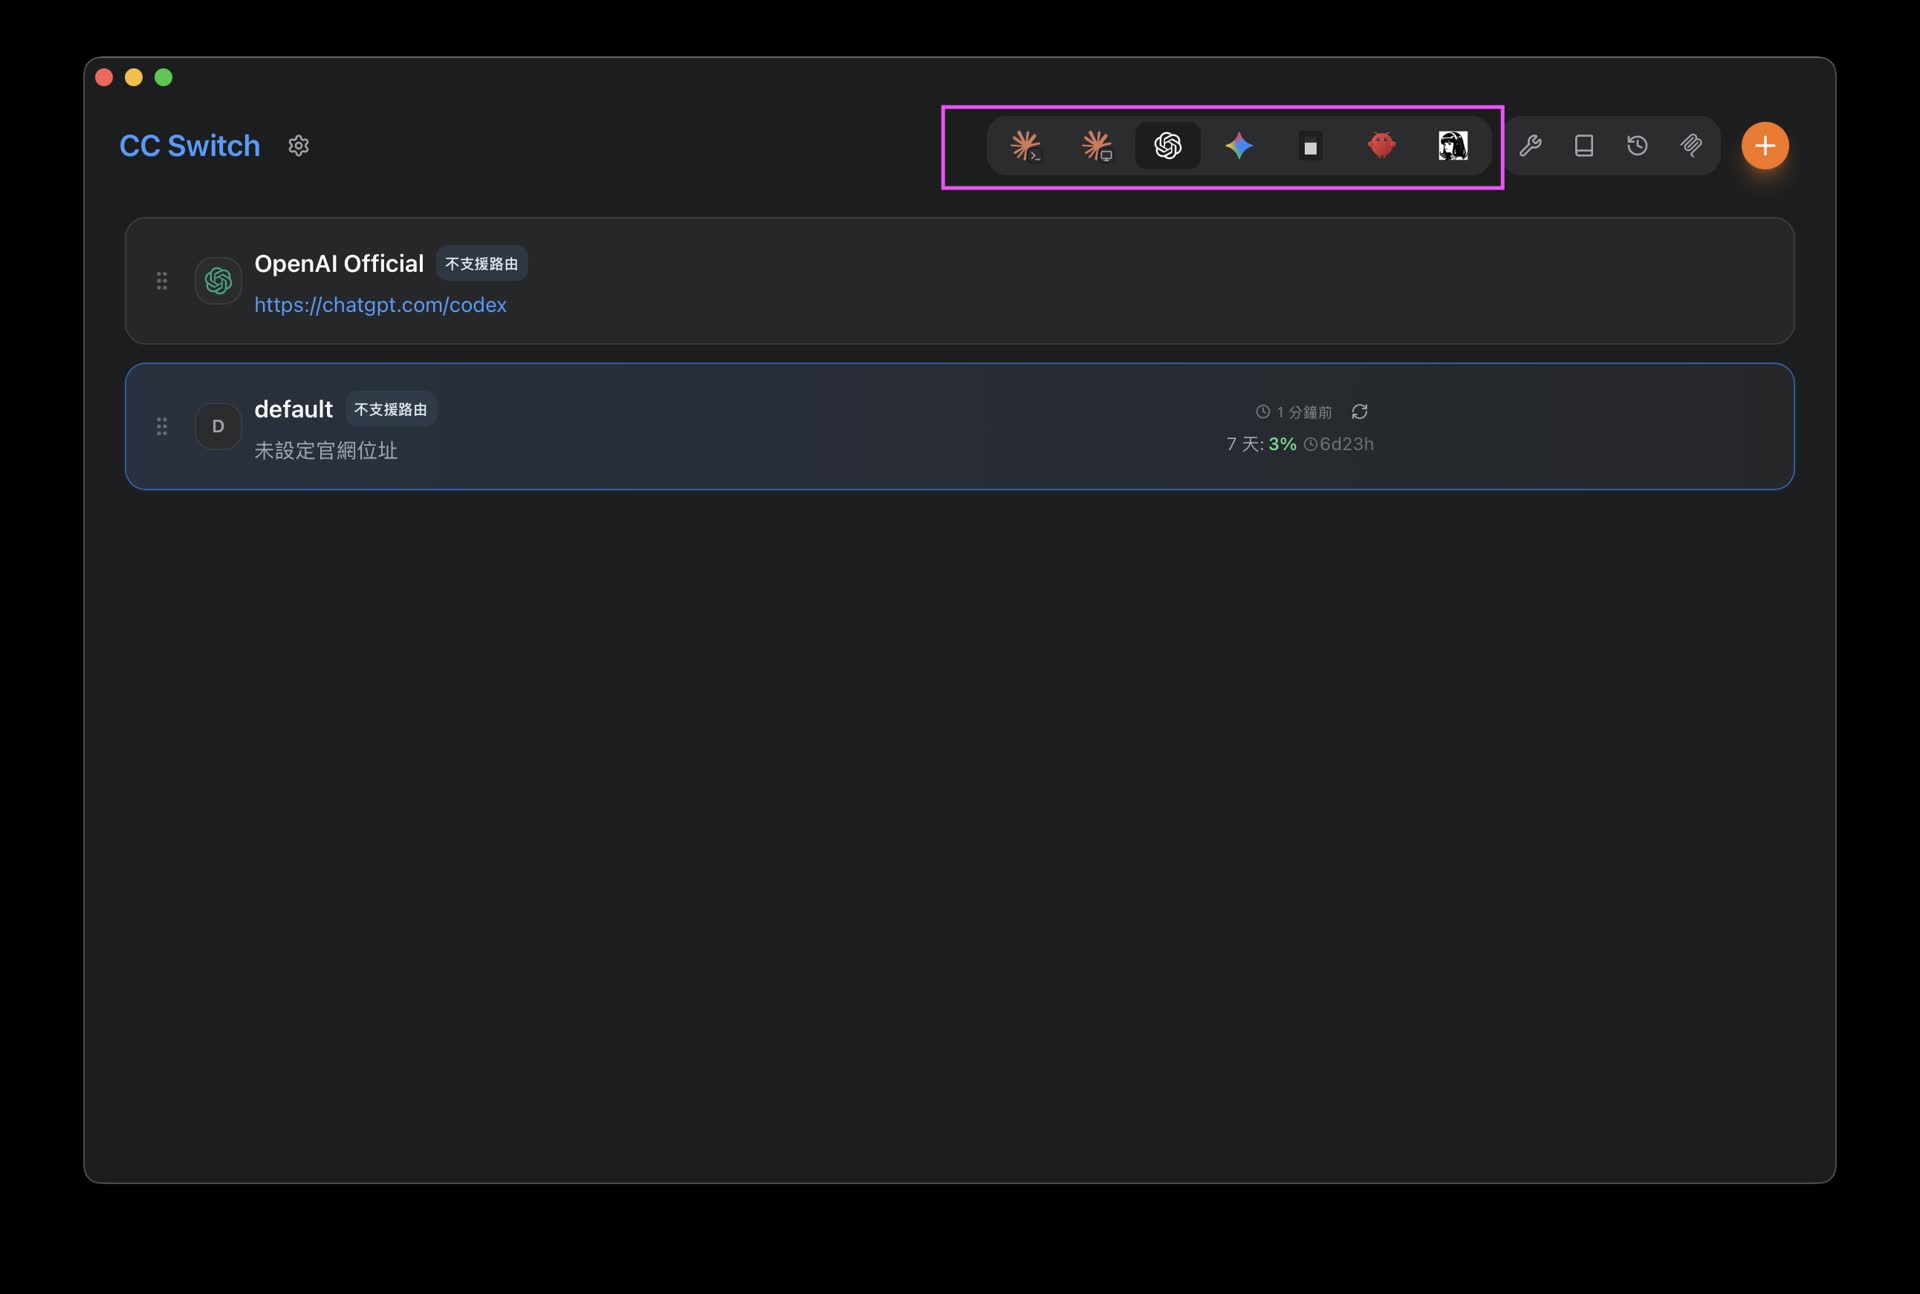
In the tool menu, choose the target CLI tool you want to take over and route
Step 3: Add a Provider Configuration
In the settings interface, click the add provider button to add your own AI service provider and API key.
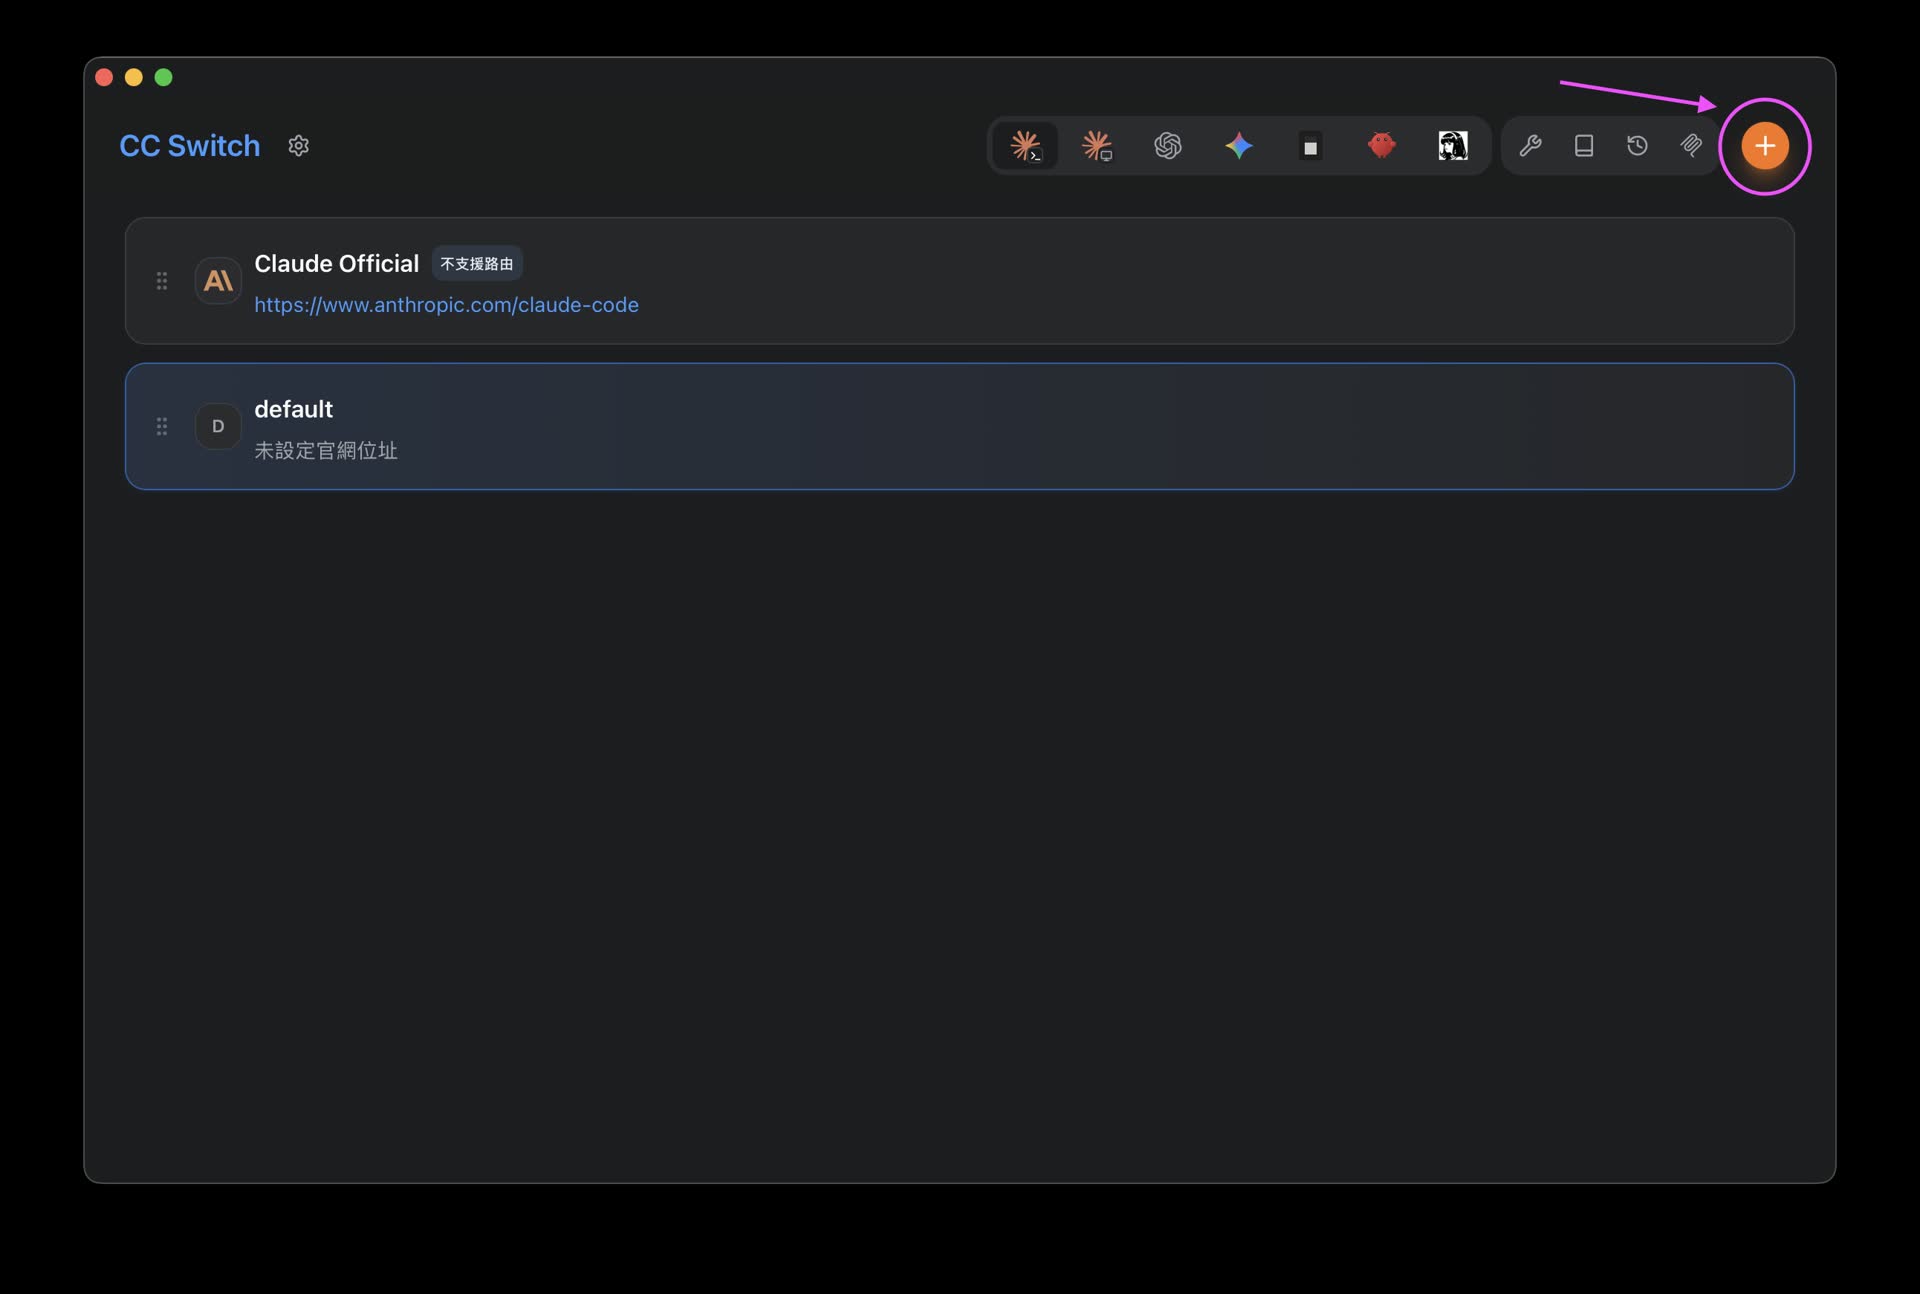
Click the add button to configure a custom API provider
Step 4: Fill In the Provider and API Key
Choose the provider type you want to use. In this test, I use DeepSeek, and the other fields can stay at their defaults. Enter your API Key, then click the 「新增」 button in the lower-right corner to finish the setup.
 右下角新增按鈕來完成設定.jpg)
Choose a provider, enter your own key, then click the lower-right button to add it
Step 5: Configure Routing and Turn On the Switch
Next, click 「設定」 on the left:
- Switch to the 「路由」 tab.
- Turn on 「路由總開關」.
- Choose the routing rule you just created, meaning the provider and model you want to enable.
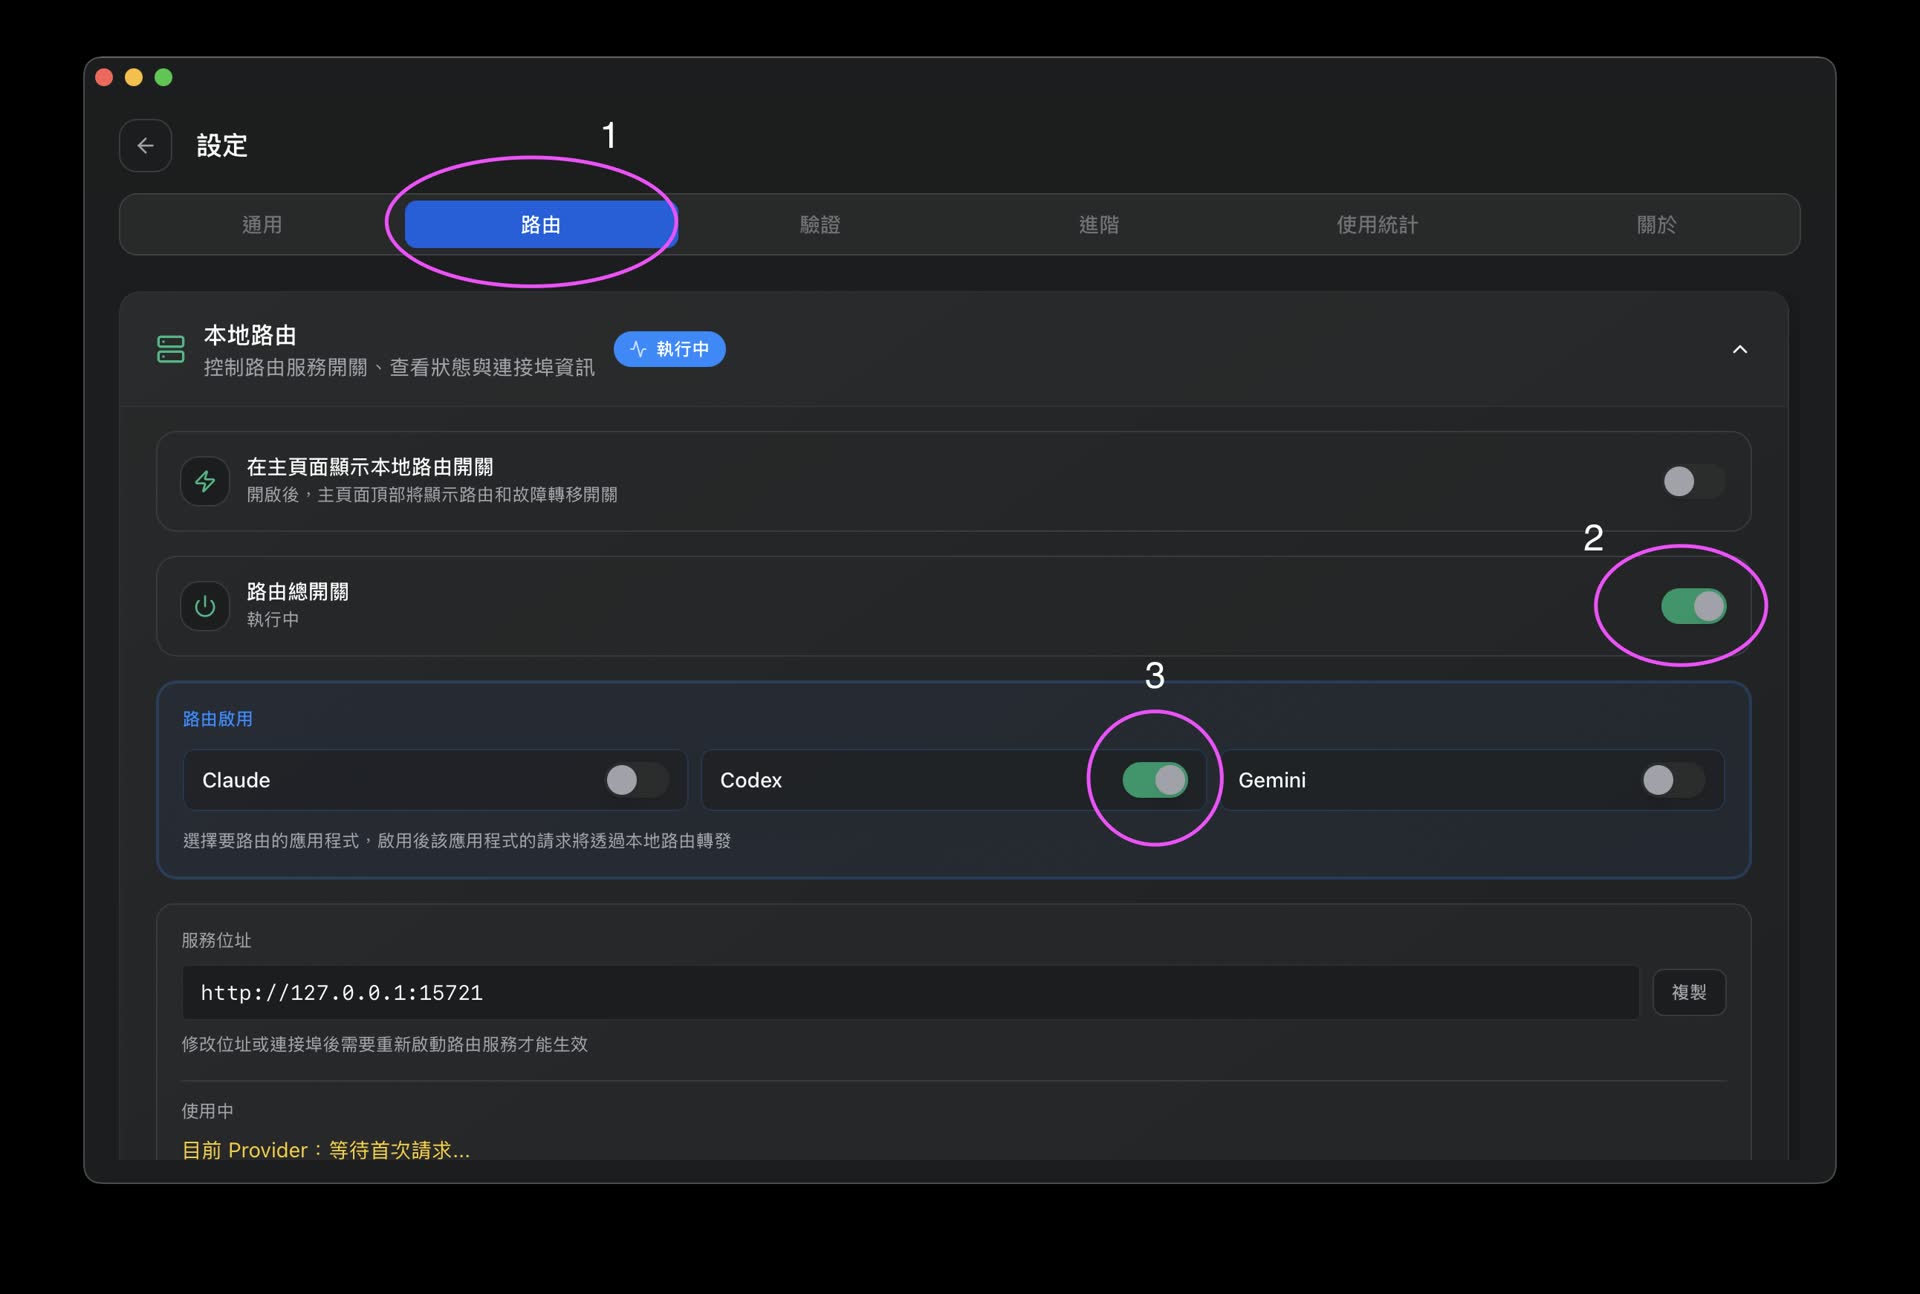
Turn on the routing switch and apply the provider rule you just configured
Step 6: Enable Routing and Test It in the CLI
Finally, return to the home page and click the 「使用」 button. CC Switch will now start the local takeover service. Pay special attention here: you must restart Codex for this routing configuration to be triggered and applied properly.
Also, if you later need to switch back to the official Codex service, just click the OpenAI option at the top of the interface to quickly restore the official default model connection.
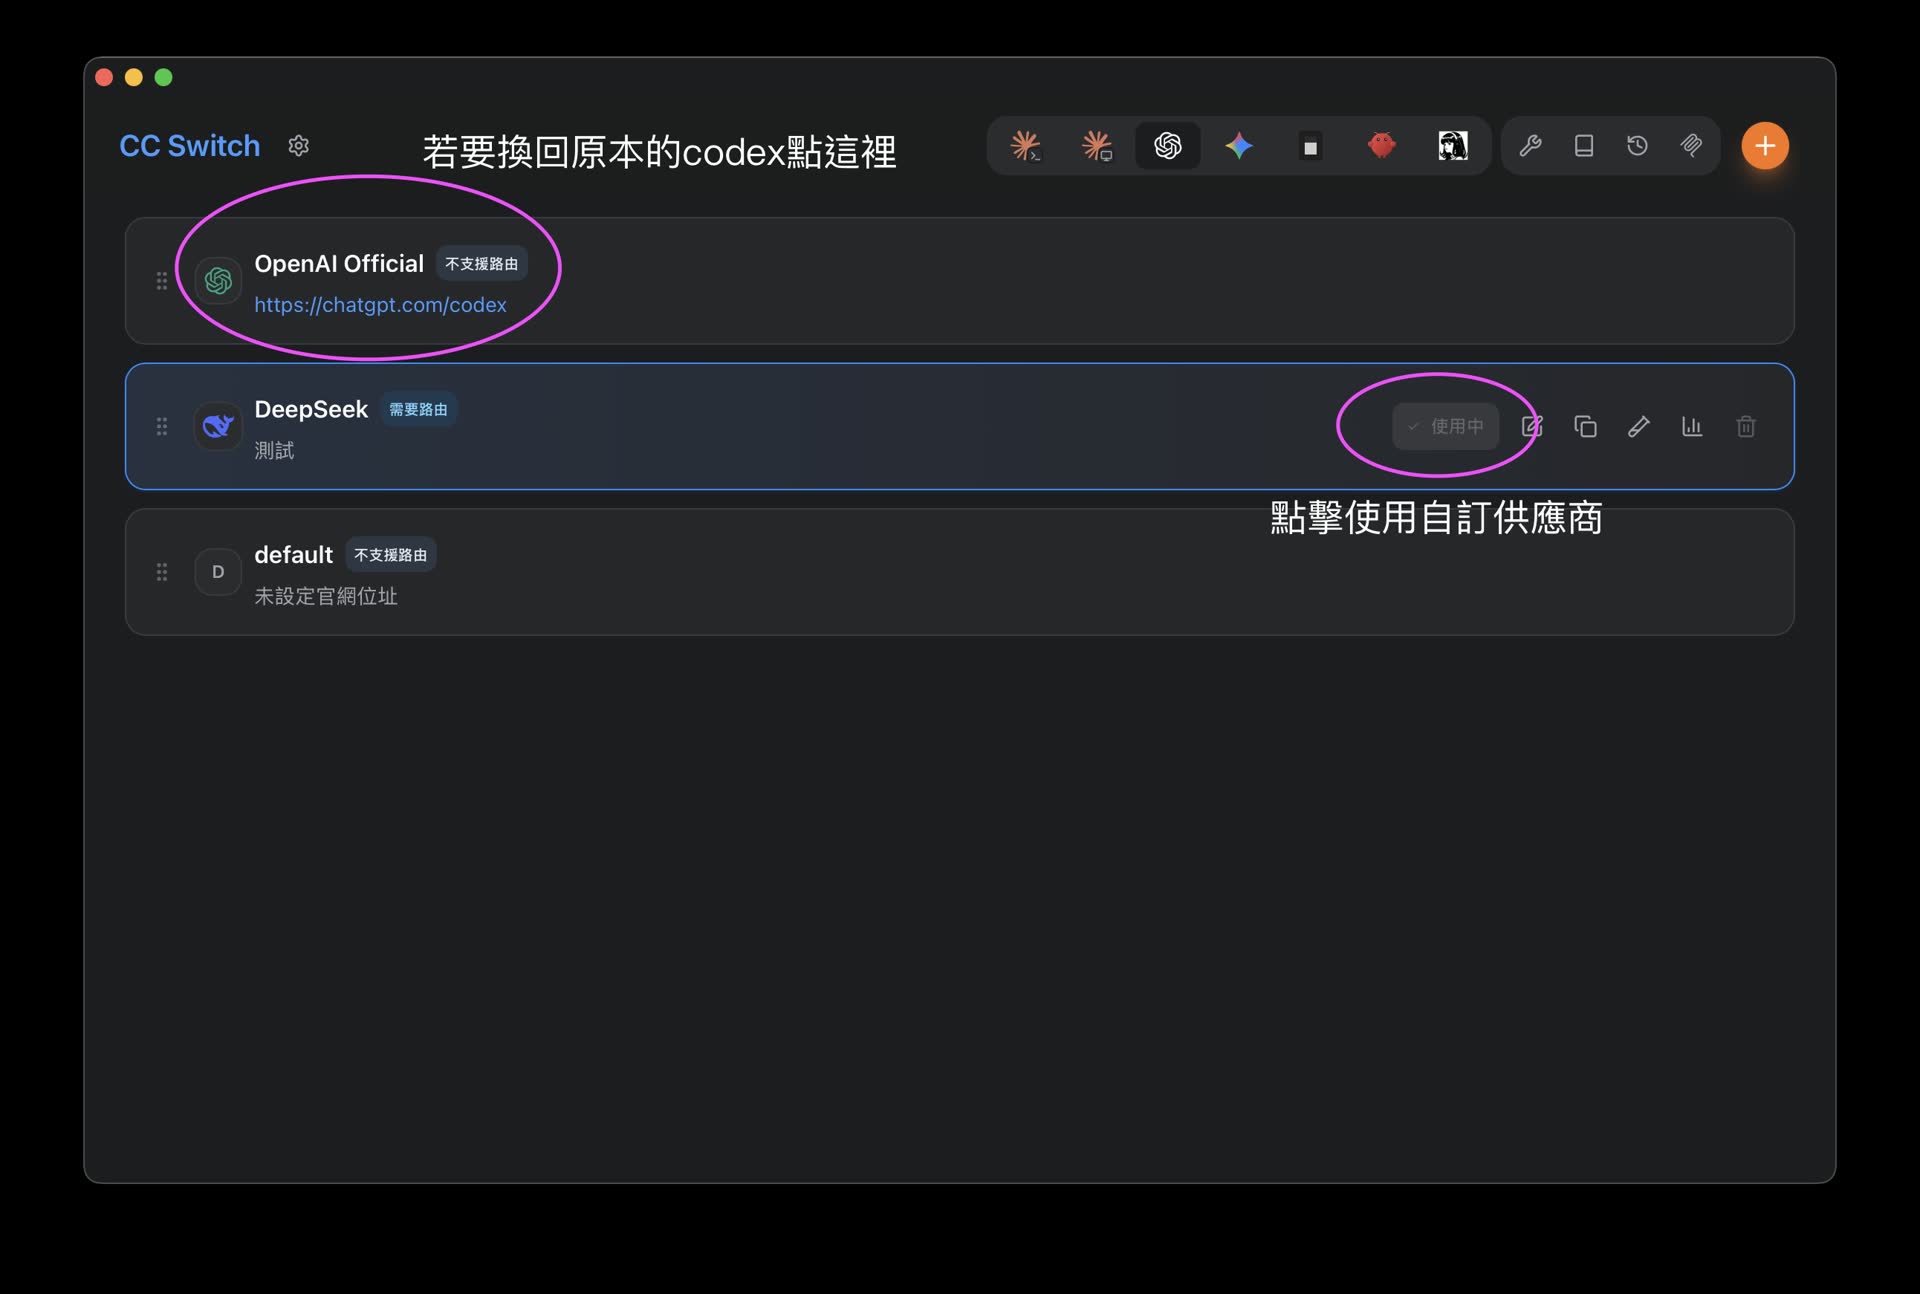
Return to the home page and click 「使用」. After restarting Codex, you can call your own model through the local route. Click OpenAI at the top anytime to switch back to official mode
Download and Installation Notes
CC Switch supports multiple platforms. Below are the recommended installation methods for each platform:
macOS
- Method 1: Install with Homebrew, recommended for easier updatesTo upgrade, run:bash
brew install --cask cc-switchbashbrew upgrade --cask cc-switch - Method 2: Manually download the DMG installer
Go to GitHub Releases and download
CC-Switch-v{version}-macOS.dmg. CC Switch has received official Apple signing and notarization, so you can install and open it directly.
Windows
Go to the Releases page and download either of the following:
- Installer:
CC-Switch-v{version}-Windows.msi - Portable version:
CC-Switch-v{version}-Windows-Portable.zip - System requirement: Windows 10 or later.
Linux
The Releases page provides several package formats:
- Debian / Ubuntu: Download
CC-Switch-v{version}-Linux.deb, then runsudo apt install ./CC-Switch-v{version}-Linux.deb - Fedora / RHEL / openSUSE: Download
CC-Switch-v{version}-Linux.rpm - Universal format: Download
CC-Switch-v{version}-Linux.AppImage - Arch Linux (AUR):
bash
paru -S cc-switch-bin
Frequently Asked Questions (FAQ)
Which AI terminal (CLI) tools does CC Switch support?
It currently has native support for 5 common command-line AI tools: Claude Code, Codex, Gemini CLI, OpenCode, and OpenClaw, and includes more than 50 provider presets by default.
After switching providers, do I need to restart the terminal?
No. Most CLI tools, including Claude Code, read proxy server changes in real time, so after switching, you do not need to reopen the terminal or CLI tool for the change to take effect.
After switching providers, will my plugin settings or history disappear?
No. CC Switch only takes over and routes API requests. It does not modify the CLI tool's own local cache, authentication credentials, or conversation history.
Why can't I delete a provider that is currently marked as "in use"?
To prevent system errors, CC Switch does not allow deleting the provider currently set as active. If you want to delete it, first switch active to another provider, then delete it.
How do I switch back to the official default login state?
Add an 「Official Login」 preset configuration in CC Switch, restart your CLI tool, and follow the original official OAuth login flow.
Where are my API keys and configuration data stored?
All configuration data, API keys, and history are stored entirely on your local machine and are not uploaded to any third-party server. You can also configure cloud sync yourself, such as Dropbox, iCloud, WebDAV, and so on, to back up local configuration files to your personal cloud storage.
Conclusion
For developers who rely heavily on AI terminal assistants, CC Switch solves the two main pain points: model flexibility and cost control.
With CC Switch, you are no longer limited to the official, higher-priced models bundled with each CLI. Instead, you can freely combine DeepSeek, OpenAI, or even large local models deployed inside your own LAN. This can save a meaningful amount in API fees while also giving you more choices in connection speed and model quality. If you are using Claude Code or Codex, CC Switch is worth trying if you want more control over your command-line AI setup.
The software project introduced in this article is open-sourced under the GPL-3.0 license. Feel free to visit GitHub and give the author a Star to support open-source work!