CC Switch Extended Use: Testing Phone Remote Control for Your Computer and Codex Enhanced Mode
How can you use the exclusive features in CC Switch v3.16.1+ to keep Codex's official mobile login state and remote-control capability, while routing the actual model requests to third-party APIs such as DeepSeek? This hands-on guide walks you through an AI Agent setup where your phone controls your computer.
Introduction
In the previous article, we covered how to use CC Switch to route AI CLI requests locally, letting developers bring their own API keys and use cost-effective models such as DeepSeek for software development. But many heavy users run into an awkward tradeoff when switching to third-party models: once you use your own key, you have to overwrite the original official login cache. That breaks the mobile remote-control features and official plugins provided by the official Codex app.
If you want to call an AI agent from your phone while you are away and have it operate your computer directly, similar to the open-source Hermes Agent experience, while avoiding expensive official subscription costs and routing the underlying reasoning model to something cheaper and capable like DeepSeek or openrouter, then the Codex app enhancement toggle introduced in CC Switch v3.16.1 is a very practical answer. Jason, the author of CC Switch, really did a solid job here.
Below is a real demo of us successfully calling Codex remotely from the phone and controlling the computer:
Core Principle: Separating auth.json and config.toml
To understand how this feature works, we first need to break down Codex's local configuration file structure. Codex mainly relies on two files to store the information it needs at runtime:
- auth.json: Stores the official login cache and Access Token. This is the login material required by the official Codex mobile app to verify the user's identity, establish a secure channel, and remotely transmit commands entered on the phone to the local computer.
- config.toml: Stores the current model provider, Base URL, model list, and related API keys. This part determines which API server the CLI should send requests to when it receives code-editing or command-execution requests.
In older versions of CC Switch, switching to a third-party provider would overwrite both files at the same time, causing the official login state to disappear. In v3.16.1+, after enabling the 「切換第三方時保留官方登入」 toggle, switching is limited to writing only config.toml, while preserving the official credentials in auth.json.
As a result, the mobile app and the remote relay server still see your computer as an “official account online.” But when the request reaches your computer, the actual model traffic is routed to the CC Switch proxy and converted into requests to your own DeepSeek or other third-party model API for inference.
Step-by-Step Installation and Configuration Guide
Below, we will walk through how to configure CC Switch and Codex to achieve the full “phone controls computer + bring your own API model” workflow.
Step 1: Check Your CC Switch Version
First, click 「設定」 in the left menu of CC Switch, then switch to the 「關於」 tab and confirm that your current software version is v3.16.1 or above. If your version is too old, click the update button to upgrade to the latest version.
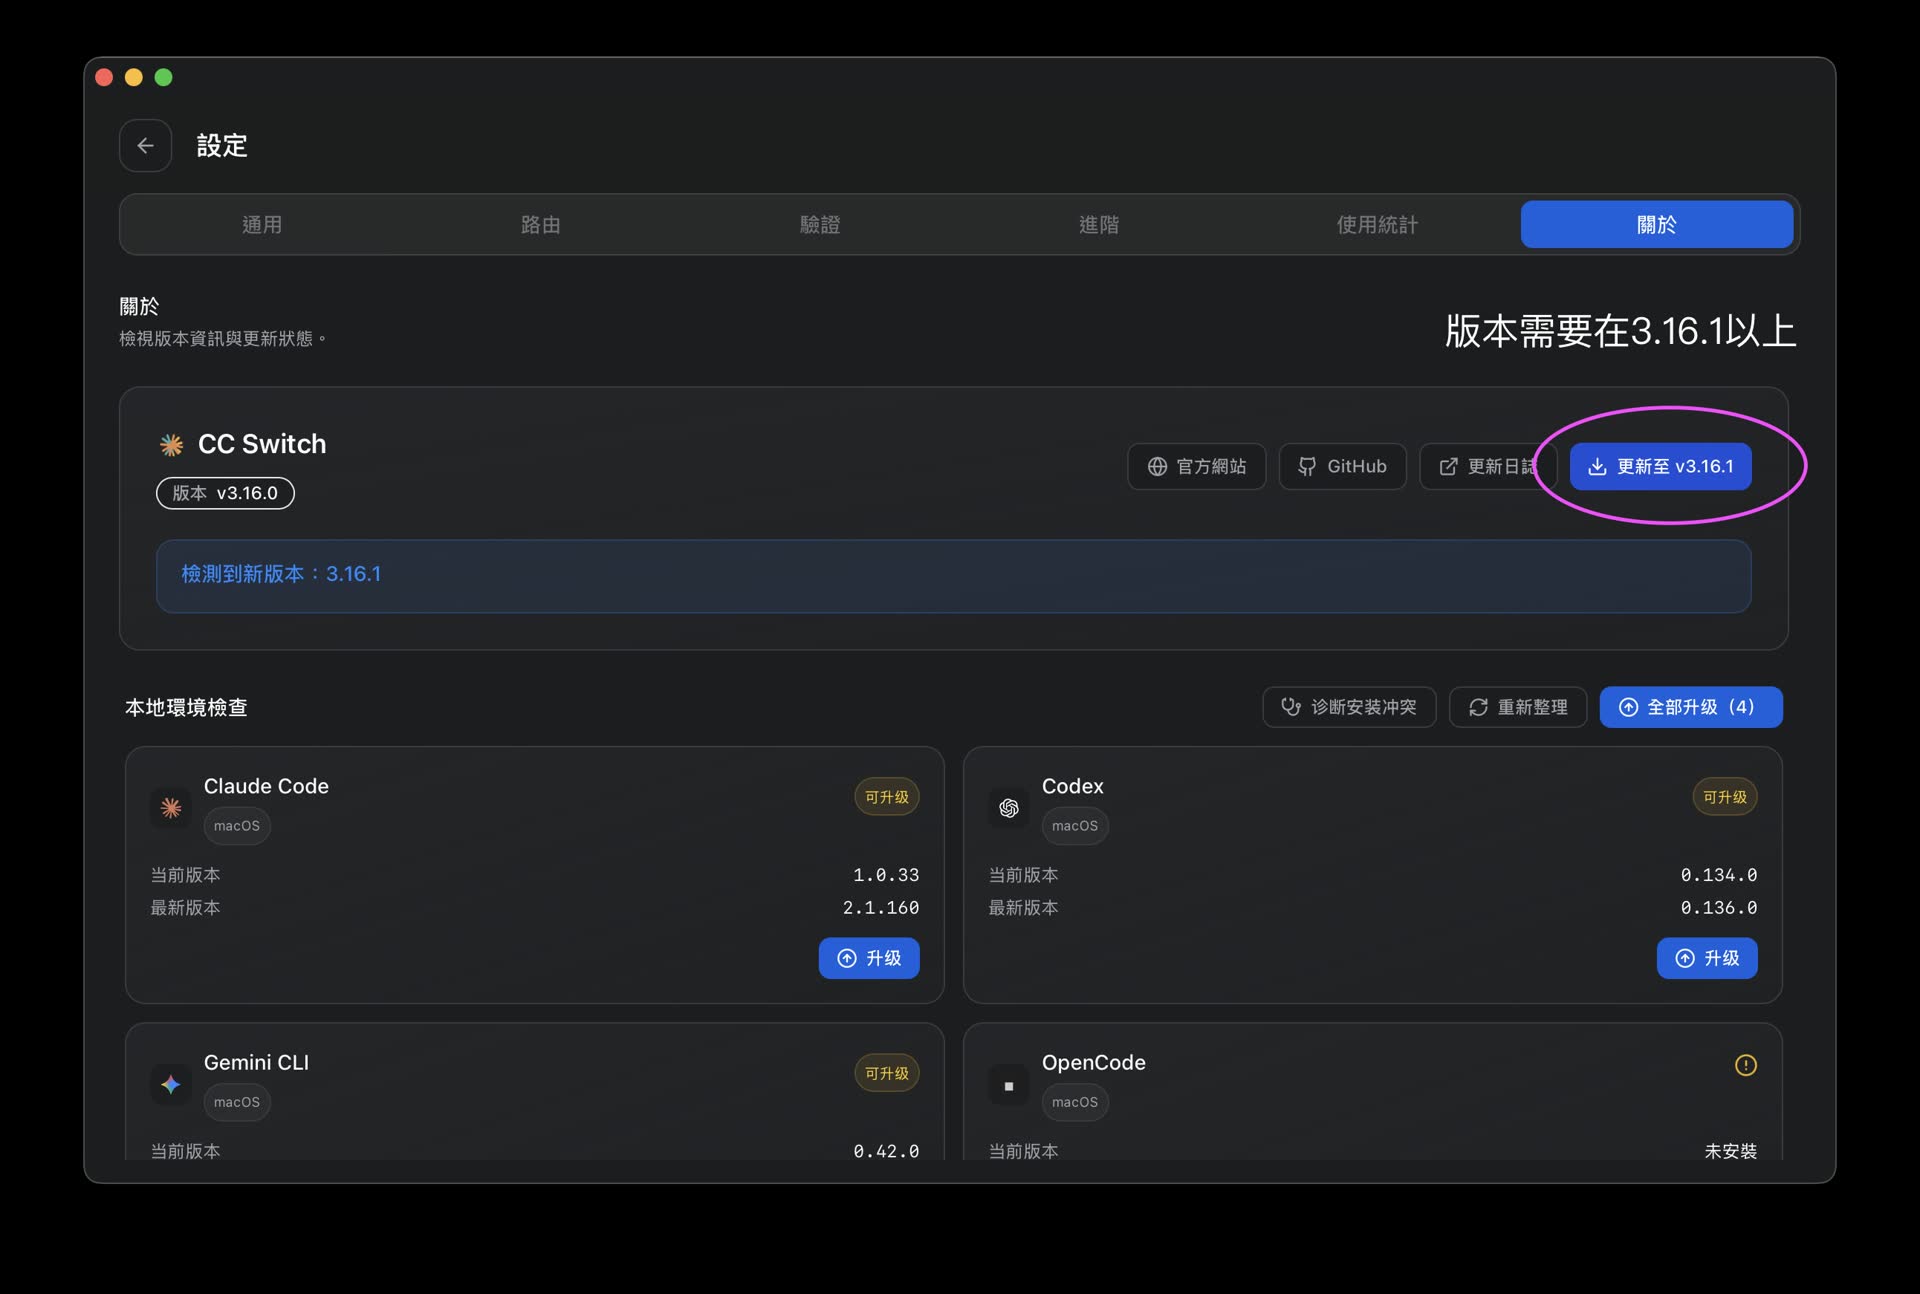
Confirm that the version is v3.16.1 or above to enable the app enhancement toggle
Step 2: Complete the Official OpenAI Account Login
Before routing requests, we first need Codex to obtain a valid official login state:
- In the Codex tab of CC Switch, switch to the OpenAI Official provider.
- Start your Codex CLI or app.
- Follow Codex's official guidance to log in to your official account. A free subscription account is enough. This step is only to write a valid Access Token into
auth.json; later model billing will use your own key.
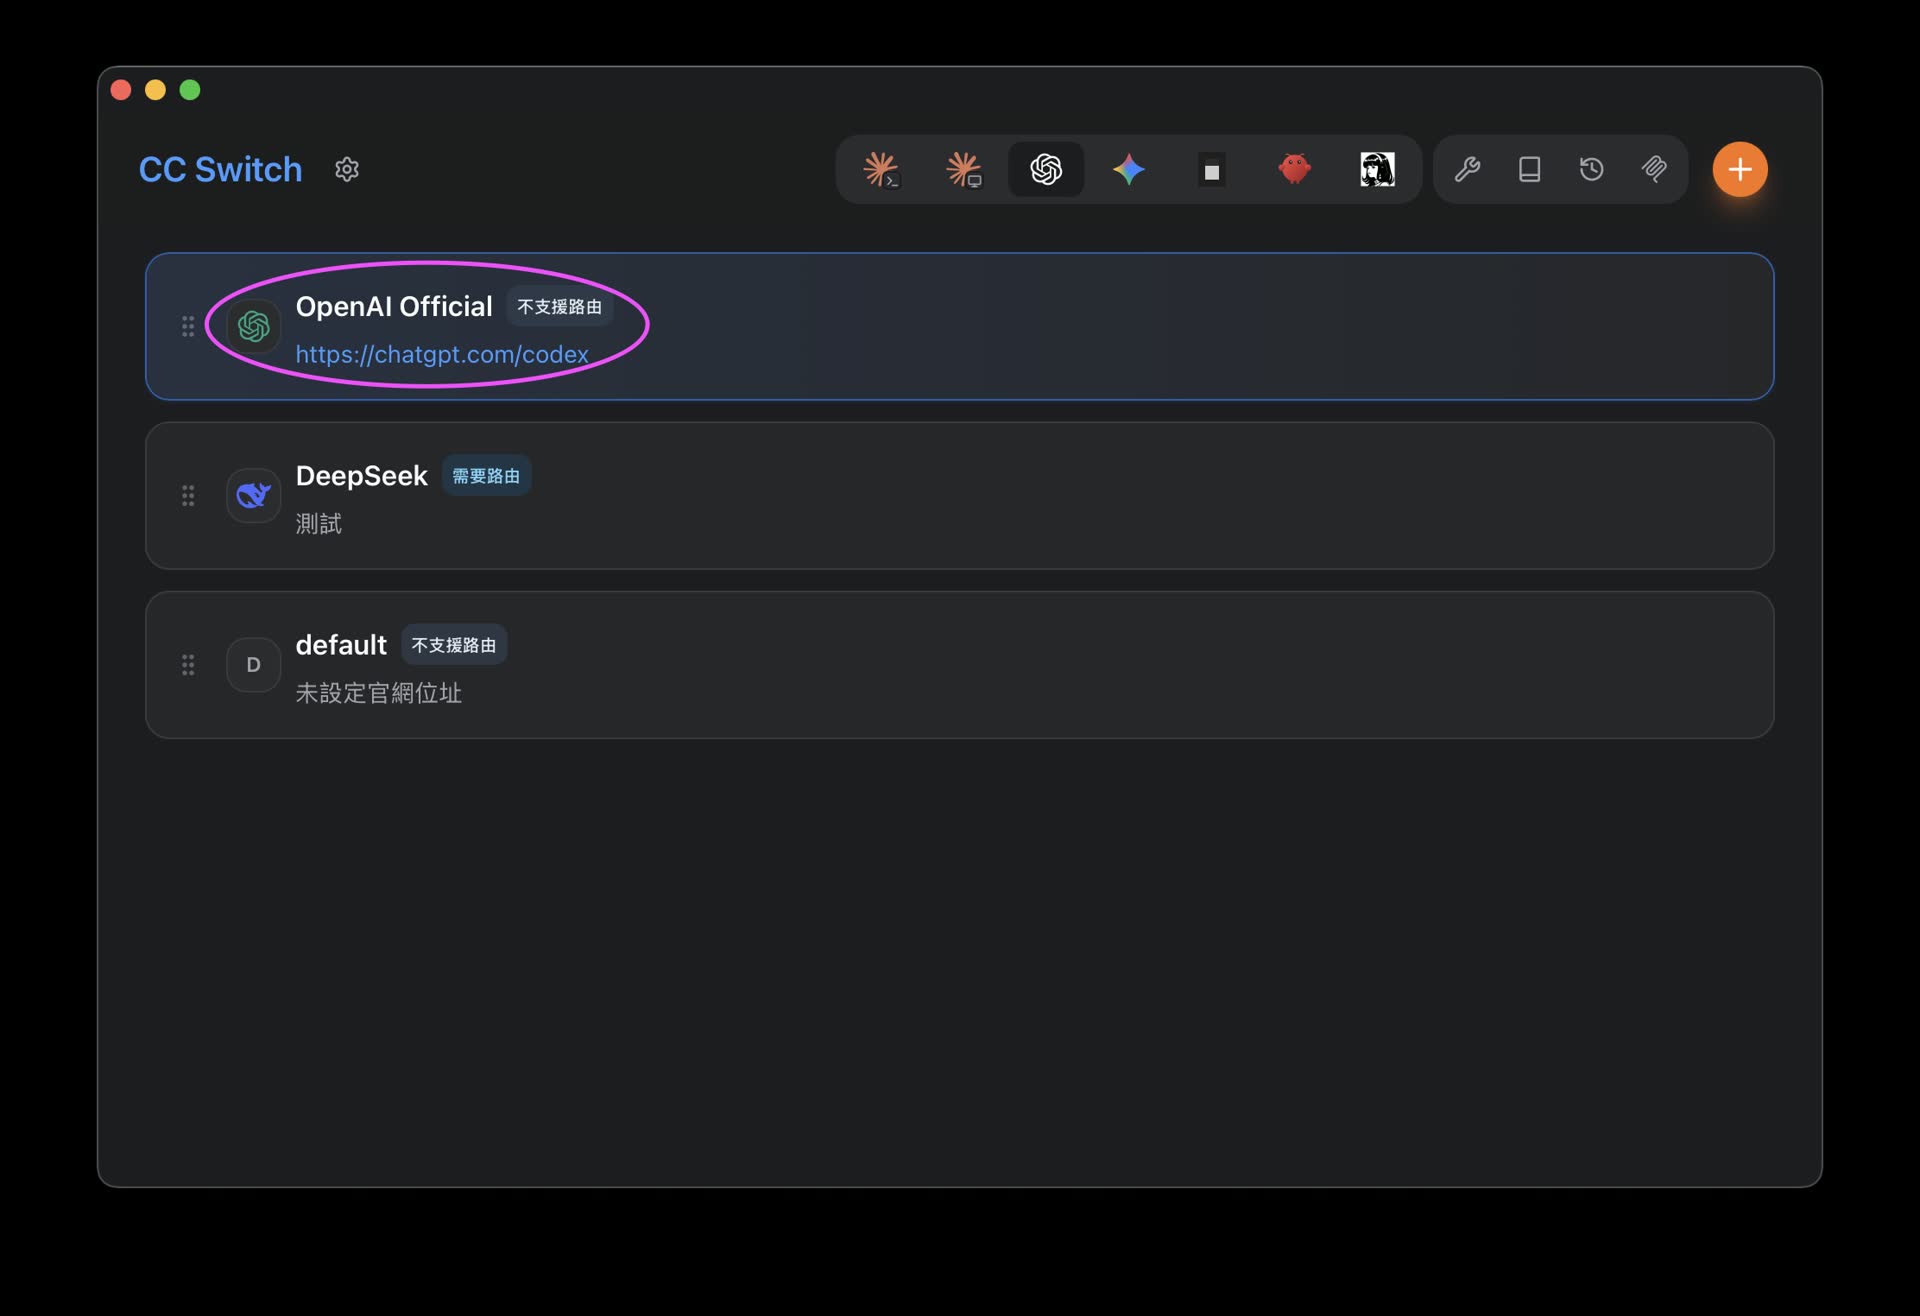
Switch back to official mode and log in to generate the auth.json credentials
Step 3: Enable Codex App Enhancement
After completing the official login, return to the main CC Switch window:
- Go to the 「設定」 menu and switch to the 「通用」 tab.
- Find the 「Codex 應用增強」 section.
- Turn on the 「切換第三方時保留官方登入」 toggle. From now on, switching to a third-party model will not overwrite the
auth.jsonfile.
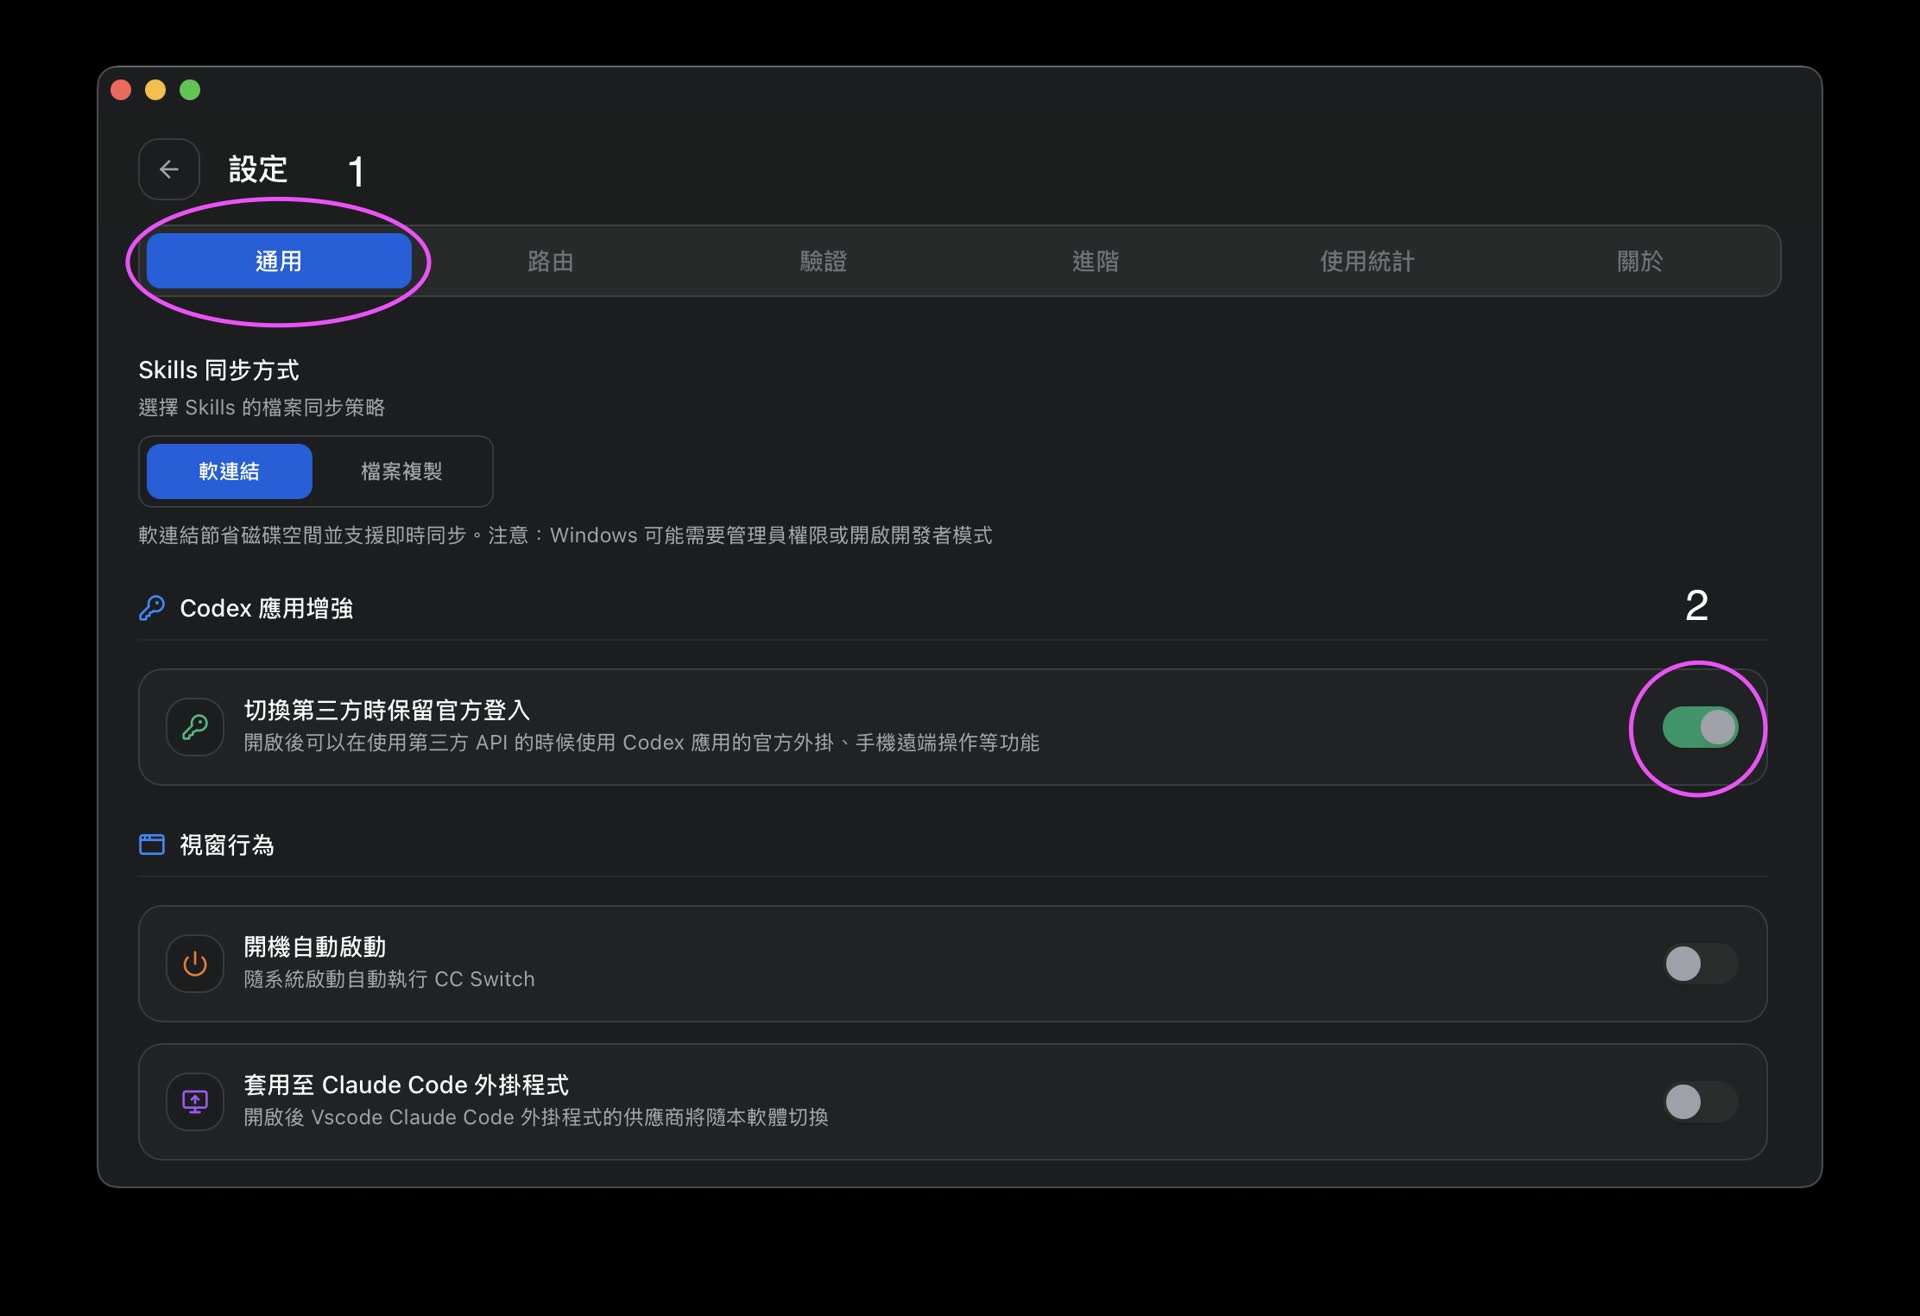
Enable the enhancement toggle to prevent third-party keys from overwriting the official login credentials
Step 4: Check Local Routing and Takeover Settings
Next, make sure the local proxy server is running correctly:
- Go to the 「設定」 menu and switch to the 「路由」 tab.
- Confirm that 「路由總開關」 is enabled. The default proxy address is
127.0.0.1:15721. - Confirm that 「Codex」 under 「路由啟用」 and the options related to 「本地路由映射」 are all checked.
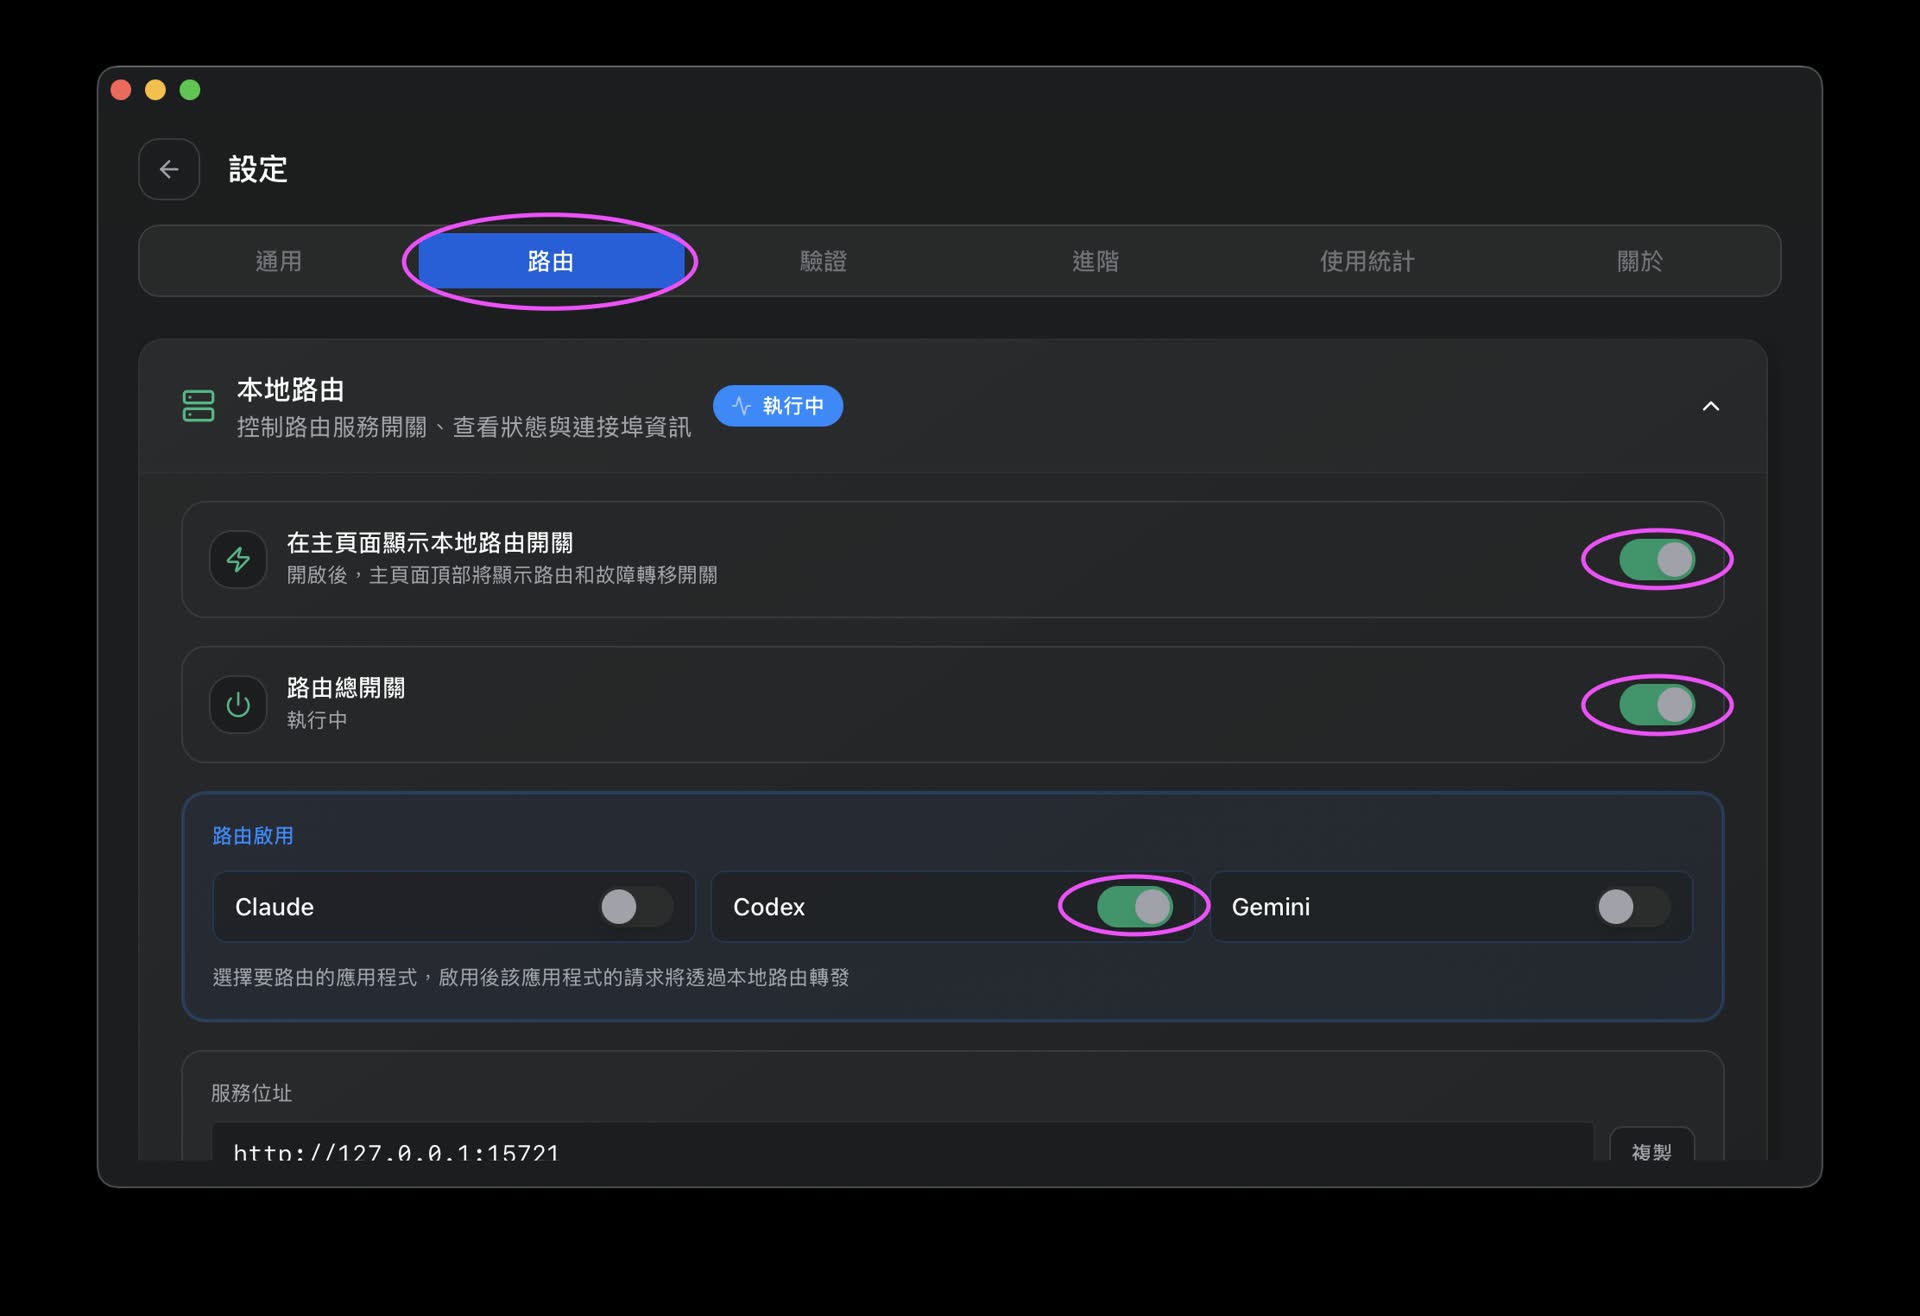
Make sure the main routing switch and Codex takeover options are checked so requests are routed into the local proxy
Step 5: Switch to Your Custom Third-Party Provider
Once the settings are ready, return to the main CC Switch screen:
- Click the Codex tab at the top.
- Switch the provider to the third-party provider you created earlier, such as DeepSeek, Kimi, or openrouter with your own key.
- Click the 「使用」 button.
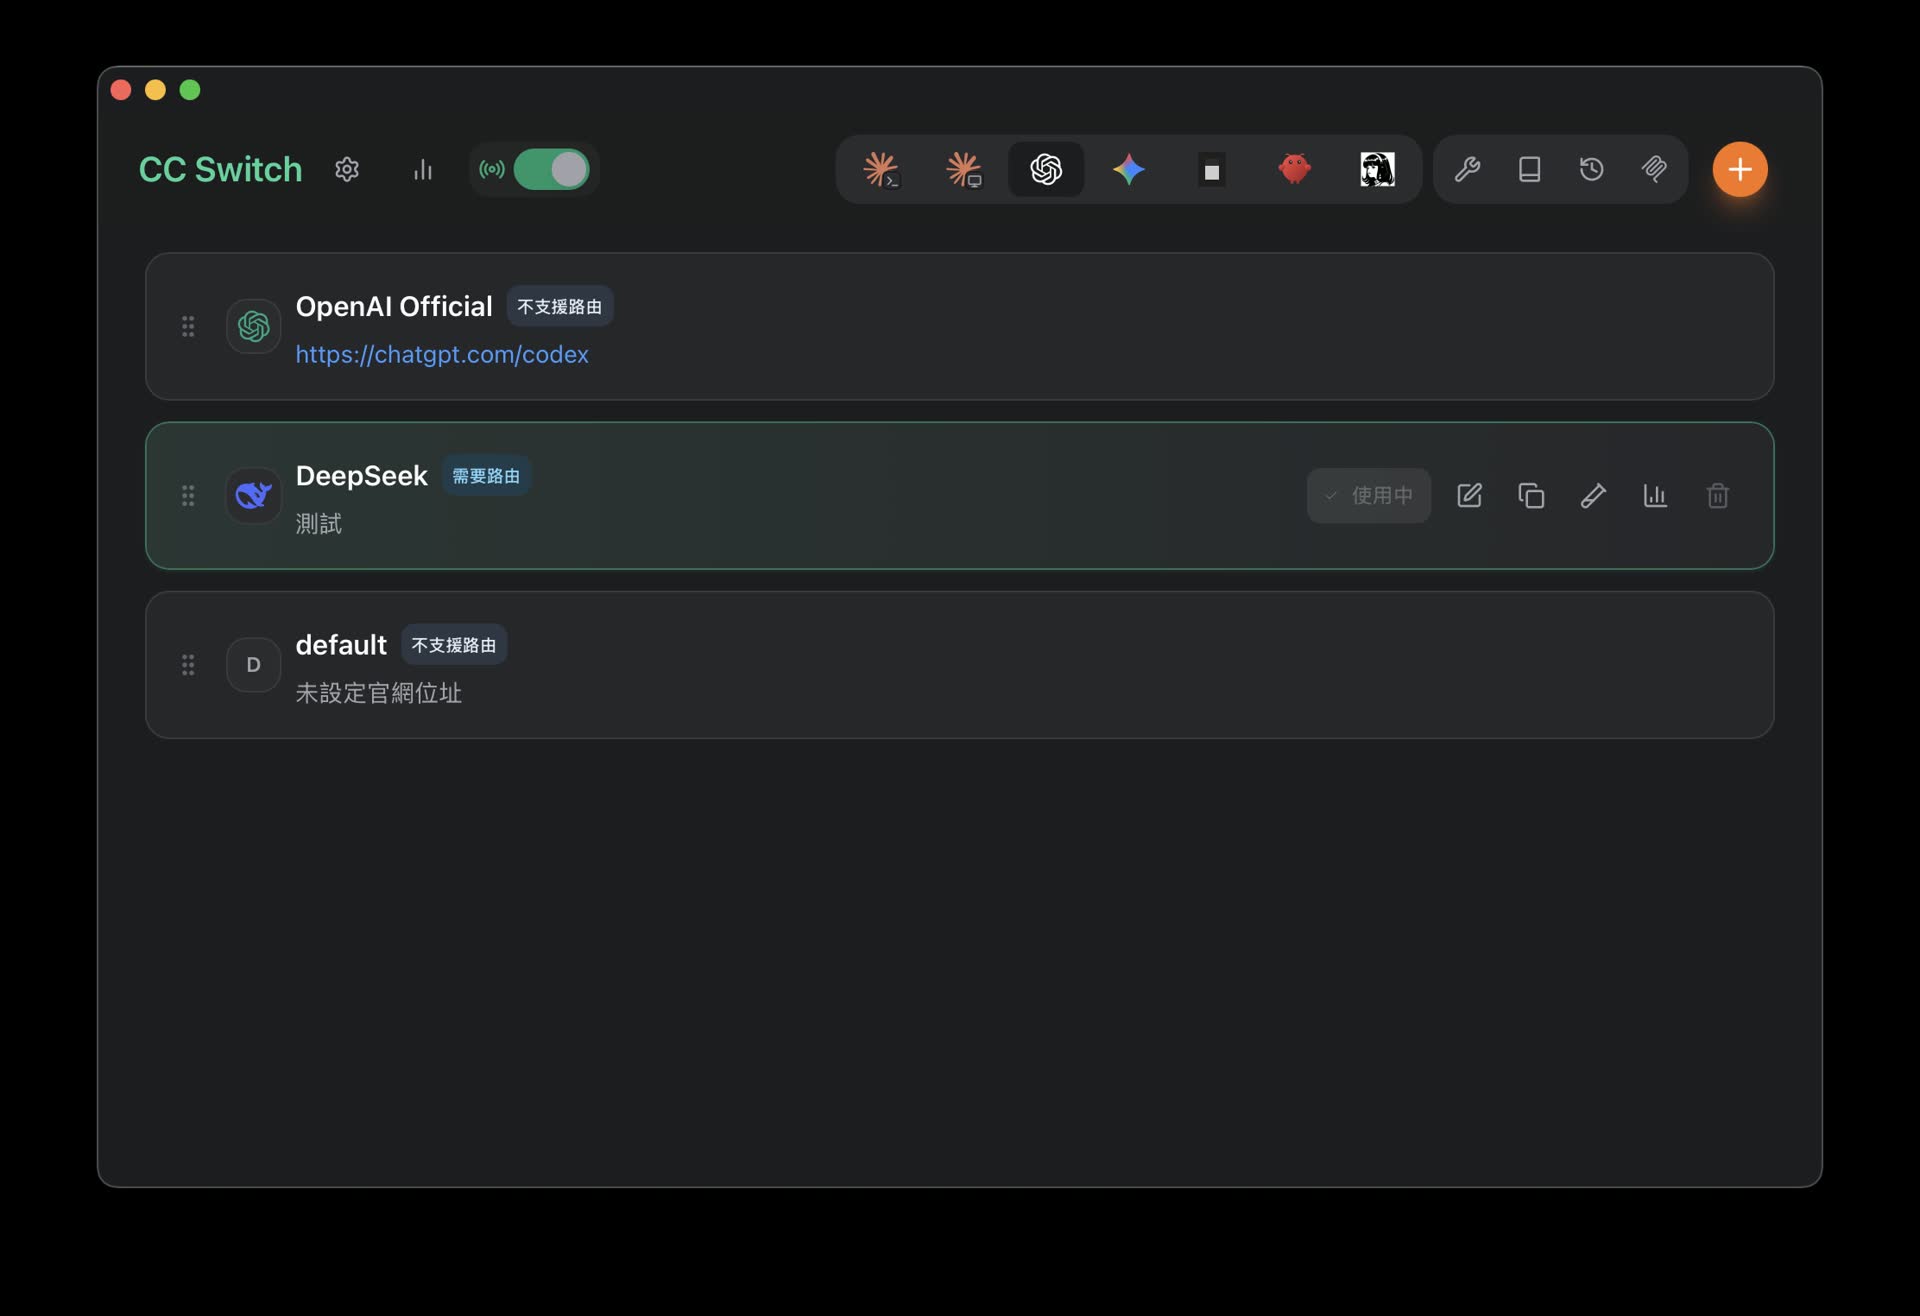
Switch to the custom third-party route, and CC Switch will automatically update config.toml
Step 6: Restart Codex to Load the Configuration
The final step is also the most important one: restart your Codex service.
Because Codex only reads config.toml and the model list at startup, the changes will officially take effect only after a restart.
At this point, you can take out your phone, open the Codex mobile app, and test remote computer operation. You should find that the phone can still connect to your computer and send control commands, while all model inference costs are now charged to your own third-party API account.
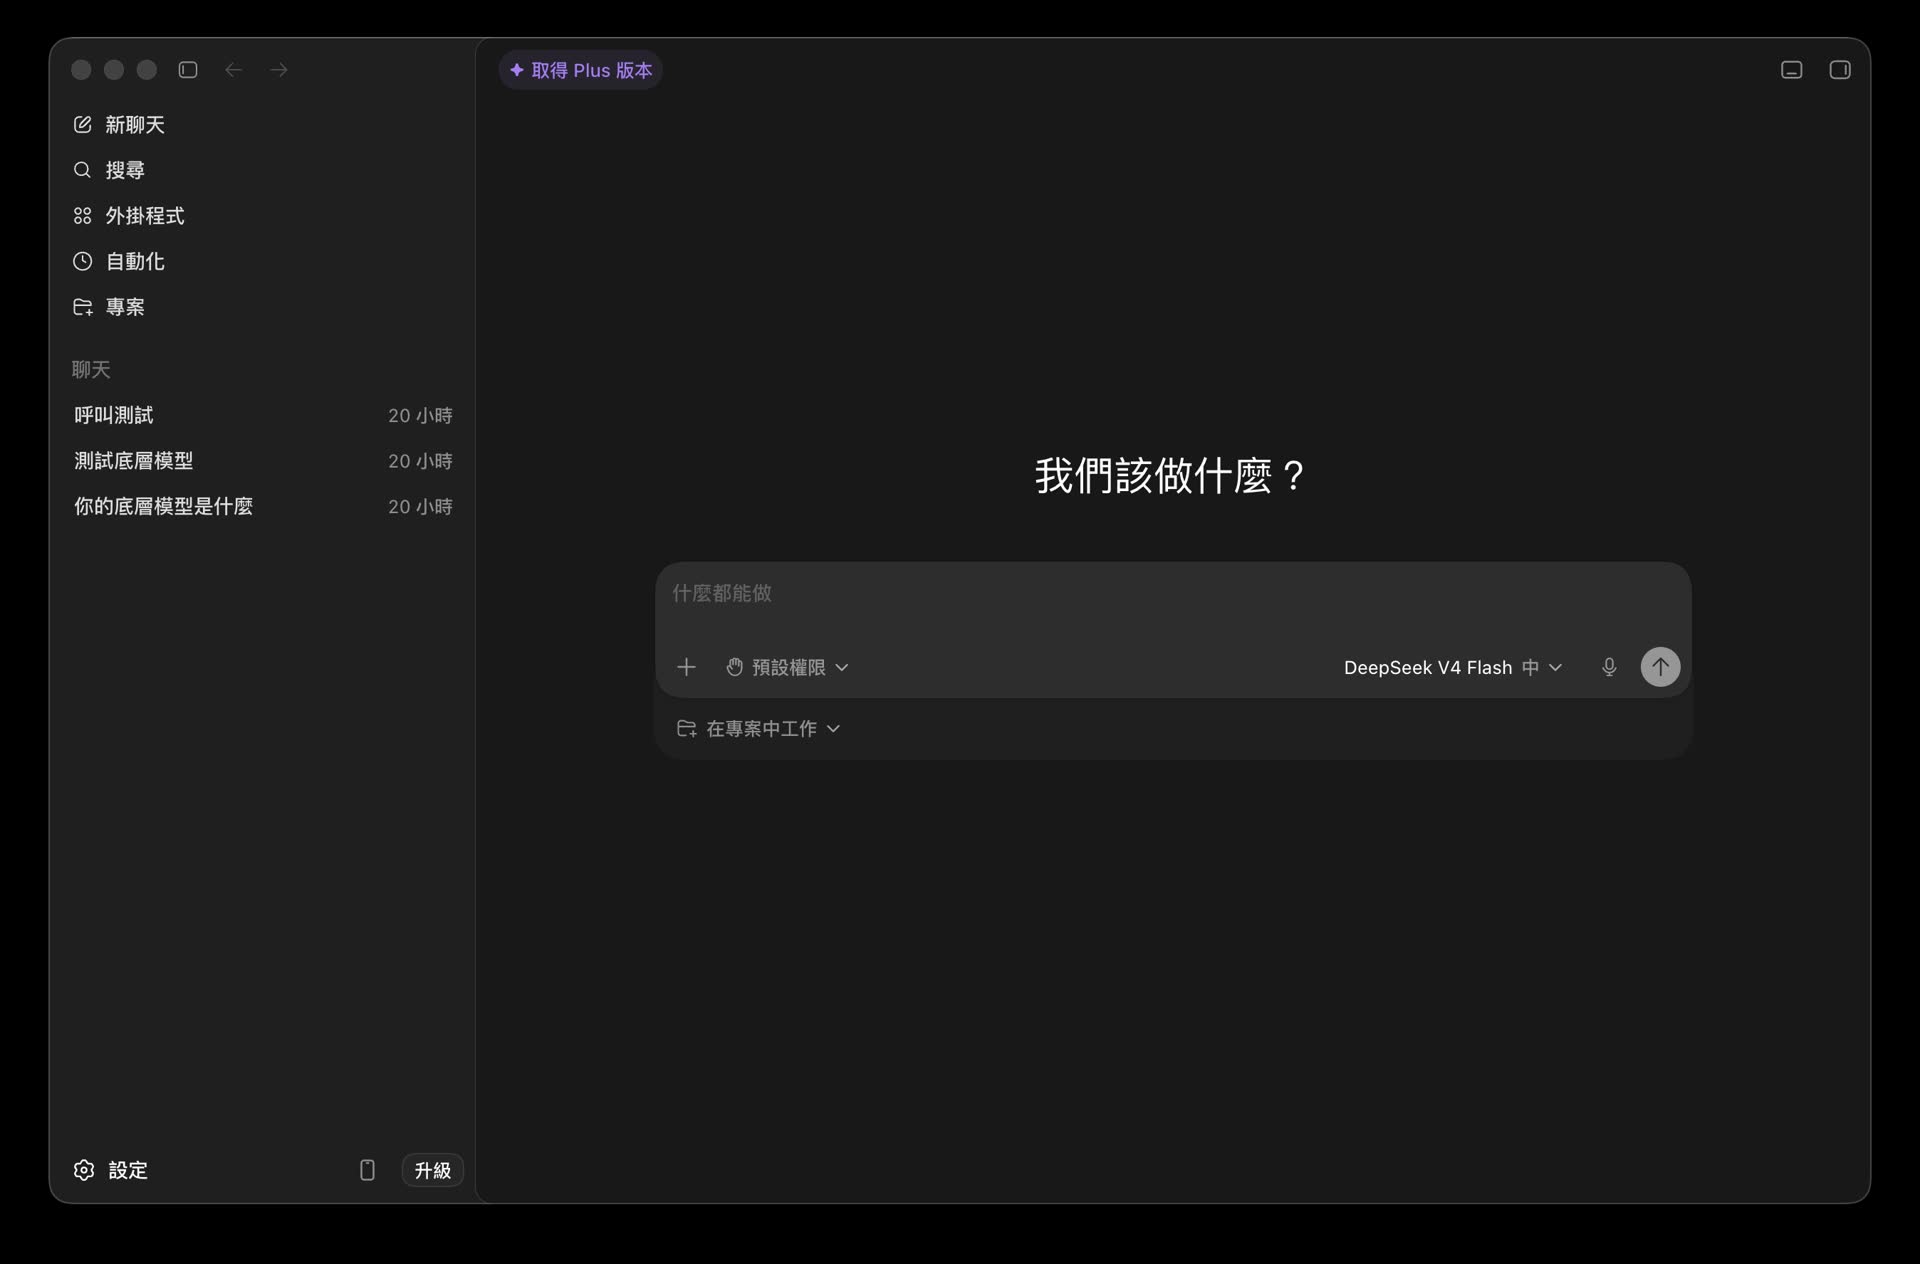
Restart Codex to load the new settings, then try remote computer control from the phone using your own API
Common Issues and Troubleshooting
The Phone Shows Connection Failed or No Response?
- Confirm that the official OpenAI / Codex account login state you used in Step 2 has not expired. If it has expired, switch back to OpenAI Official and log in again.
- Check whether the Codex background process on your local computer is running and whether the network connection is normal.
A Model Not Supported or 404 Error Appears After Sending a Request?
- Check the 「日誌」 panel in CC Switch and confirm whether the request successfully reached the local route.
- If the log shows that the model name does not match, check the model mapping table in the CC Switch provider settings. Make sure Codex's default model is correctly mapped to the model name provided by your provider, such as
deepseek-chat.
Are There Account Risks When Using This Feature?
CC Switch itself runs only locally and does not upload your keys or credentials to any cloud service. However, because this feature feeds results from unofficial model requests back to the Codex client, I recommend using this configuration only for personal testing and development environments. Avoid using it at high frequency in production environments with strict security requirements.
Conclusion
CC Switch's Codex app enhancement feature removes the old tradeoff between official login and third-party models. Now, with very low API costs, you can have an AI computer agent that stays with you and is ready whenever you need it. Whether you are handling an emergency code fix while away from your desk or showing an automated workflow where a phone controls a computer, this setup is very practical and flexible.