

Winhance Hands-on: Install Once, Then Manage and Remove Built-in Windows Apps
A hands-on look at Winhance's one-line PowerShell install, Traditional Chinese interface, and batch removal flow for built-in Windows apps. It brings debloating, system tweaks, and external app installs into one GUI.
Introduction
After using Windows for a while, it is easy to end up with built-in apps I never use. Removing them one by one through Settings, looking up scripts, or hunting down different tools is fragmented work. This time I tested Winhance, which puts Windows app management, system optimization, interface customization, and some external software installs into one graphical interface.
It is easy to see why the project has been getting attention on GitHub: its code is public, it works on Windows 10 and 11, and common tasks do not require learning a long list of commands. It is not a Microsoft tool, though. Before removing apps or applying system settings, I still read each option carefully and create a restore point.
The three things I tested
For this test, I focused on installation, switching the interface to Traditional Chinese, and batch-removing built-in Windows software. The flow is straightforward and is easier to approach than managing the system through standalone scripts.
1. One-line PowerShell download, or download the installer manually
The most direct starting point is the official download page. If I want to keep the installer myself, I can also download Winhance.Installer.exe from the official site or GitHub Releases. Its setup wizard offers regular installation and a portable mode.
For this test, I used the PowerShell command published on the official site:
irm "https://get.winhance.net" | iex
After entering it, the installer asks whether to use Normal Installation or Portable. A normal installation creates Start menu entries and shortcuts. Portable mode runs from the folder or USB drive where I place it. Both offer the same features.
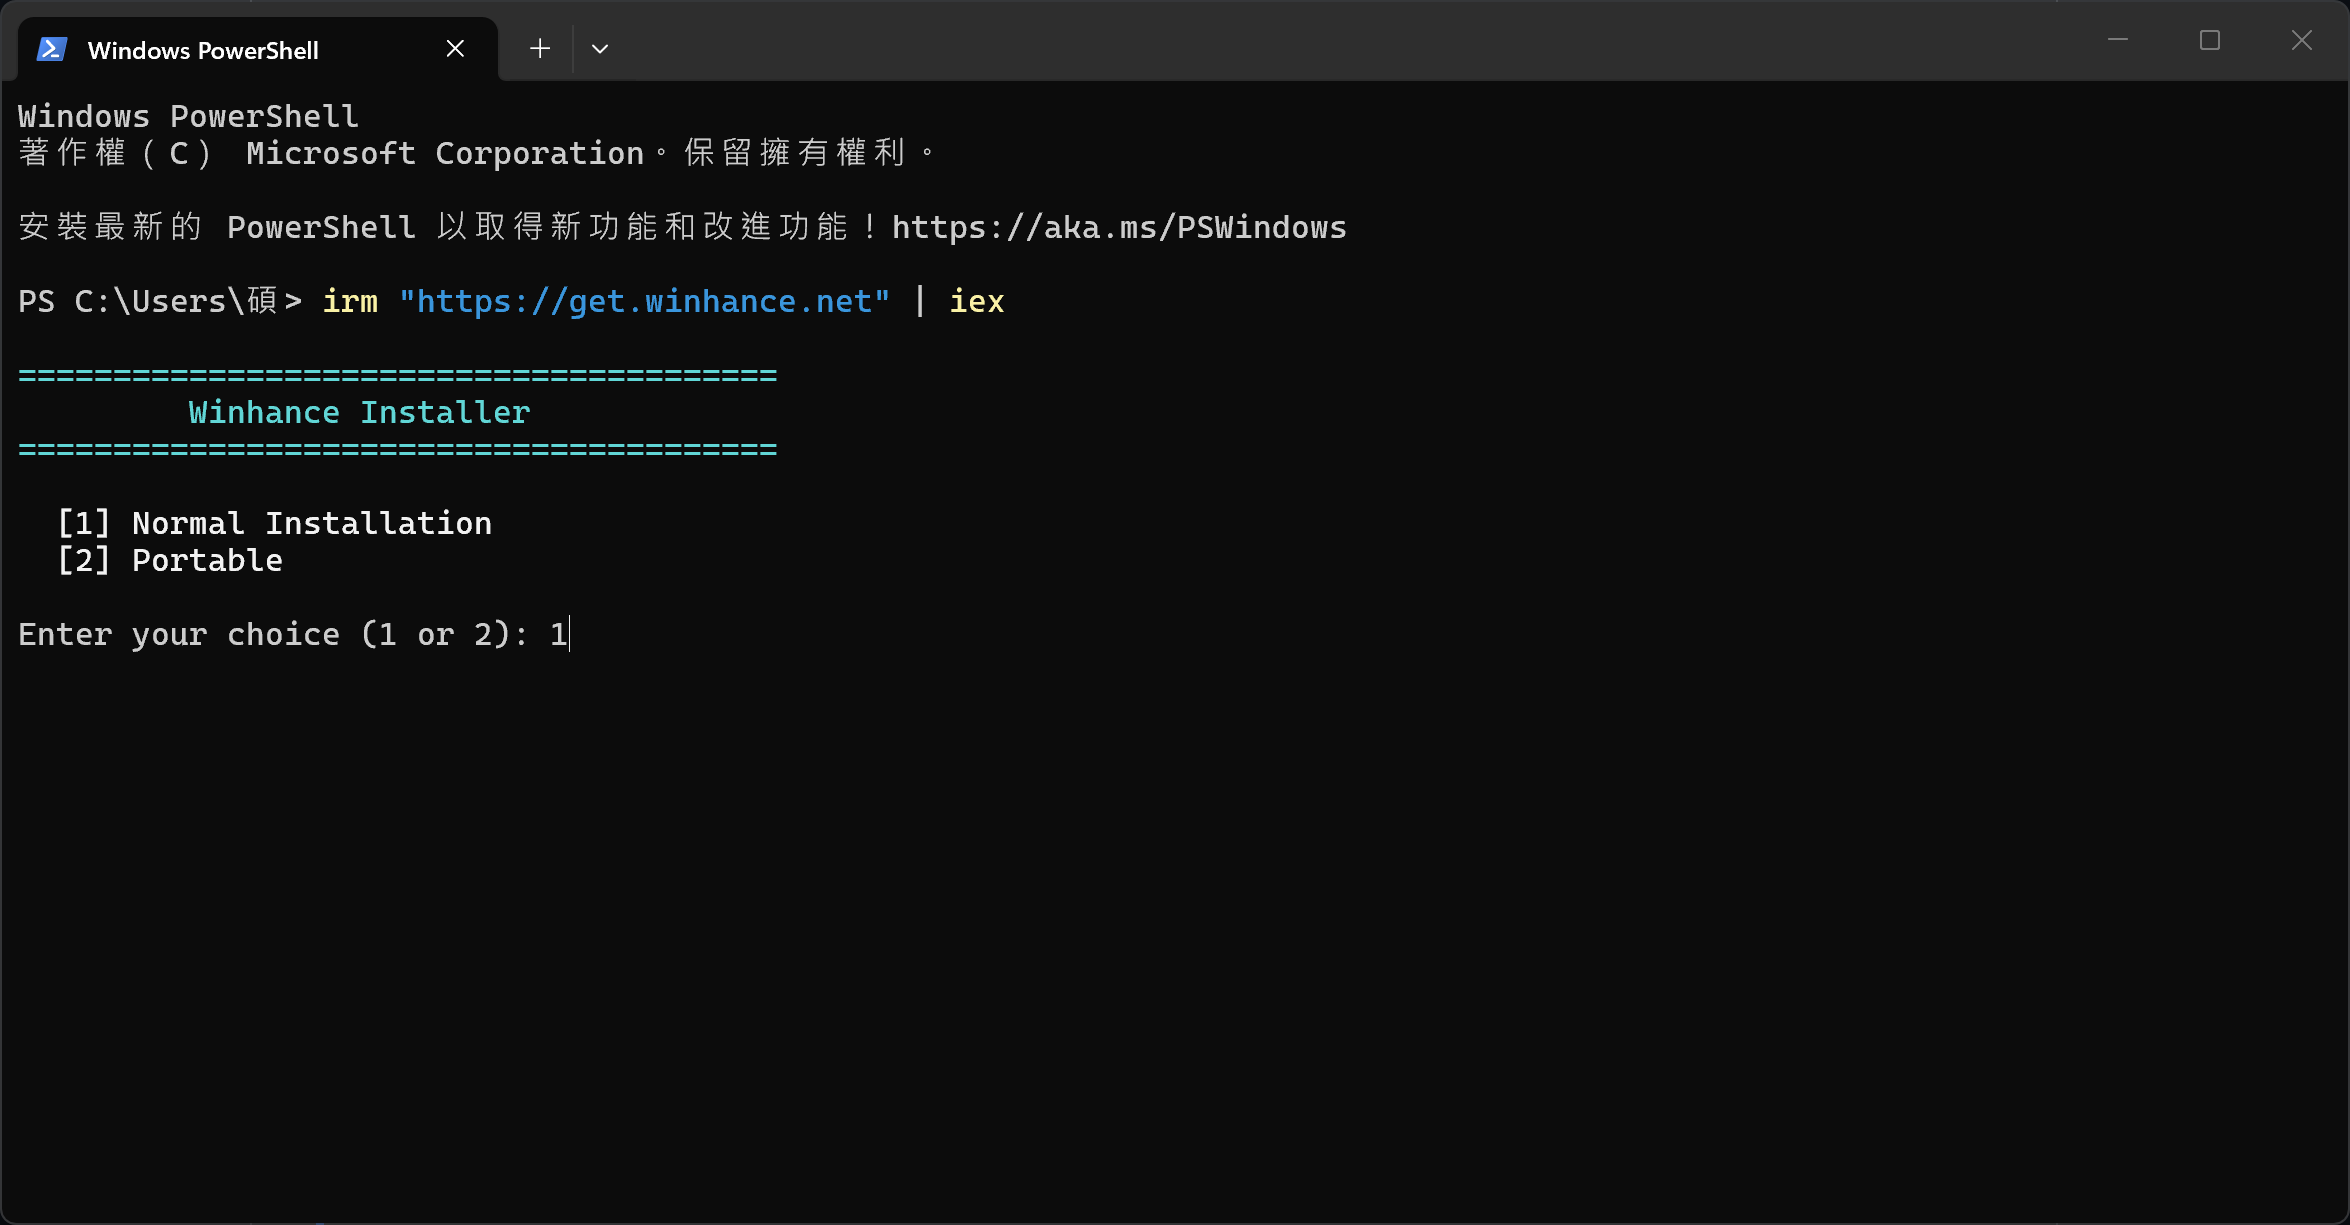
I chose normal installation for this test, but the portable option is available too.
Commands in the irm | iex form download and immediately run a remote script, so I would only copy it from the official URL above. If I prefer to inspect the installer myself, downloading the installer from GitHub Releases is the more cautious route.
2. Switch to Traditional Chinese from Settings
The first launch uses English, but I later found that Traditional Chinese is available from Settings in the lower-left corner. Open Language, then select 繁體中文(Chinese Traditional) at the bottom of the list. No reinstall is required.
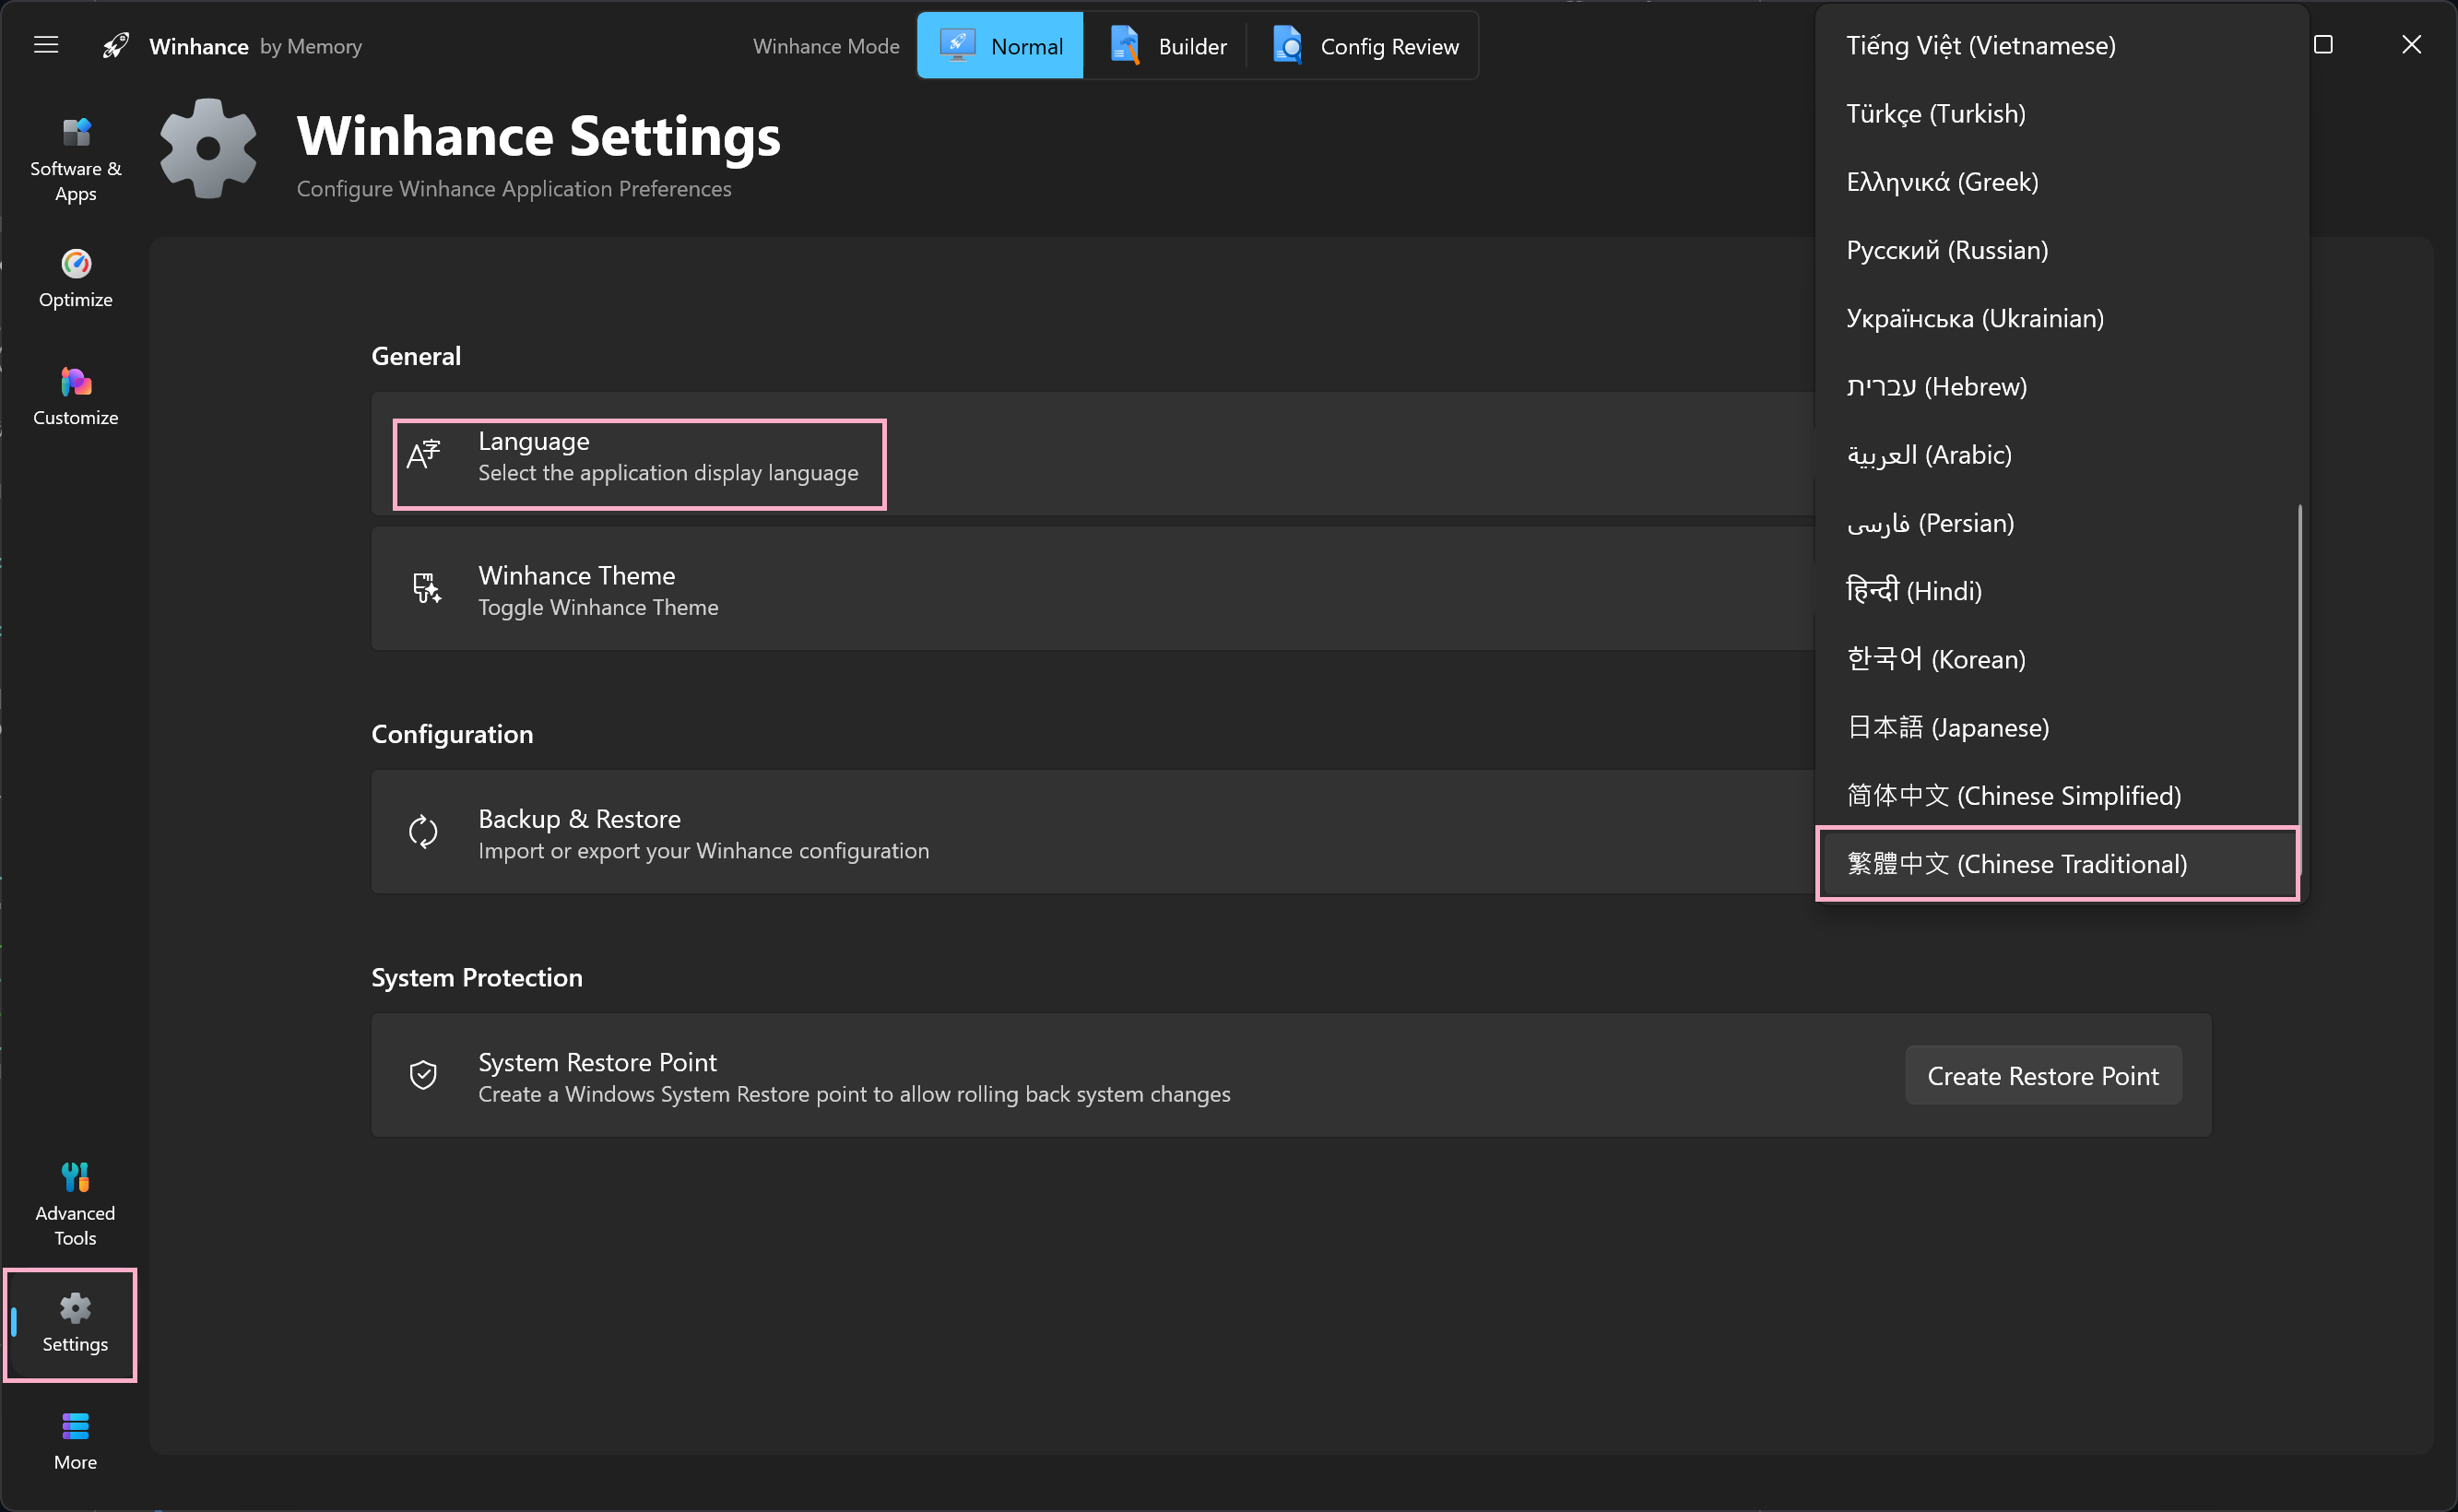
Settings → Language → Chinese Traditional.
After the switch, the main areas—Software & Apps, Optimize, Customize, and Advanced Tools—are displayed in Traditional Chinese. For anyone trying a Windows debloating utility for the first time, this makes it much easier to understand a setting before changing it.
3. Select and batch-remove built-in Windows apps
The feature I expect to use most is the Windows apps management screen under Software & Apps. It lists entries such as Bing Search, Camera, Clipchamp, Skype, Copilot, Xbox, and OneNote. Select the apps to remove, then use the remove button at the top to process them together.
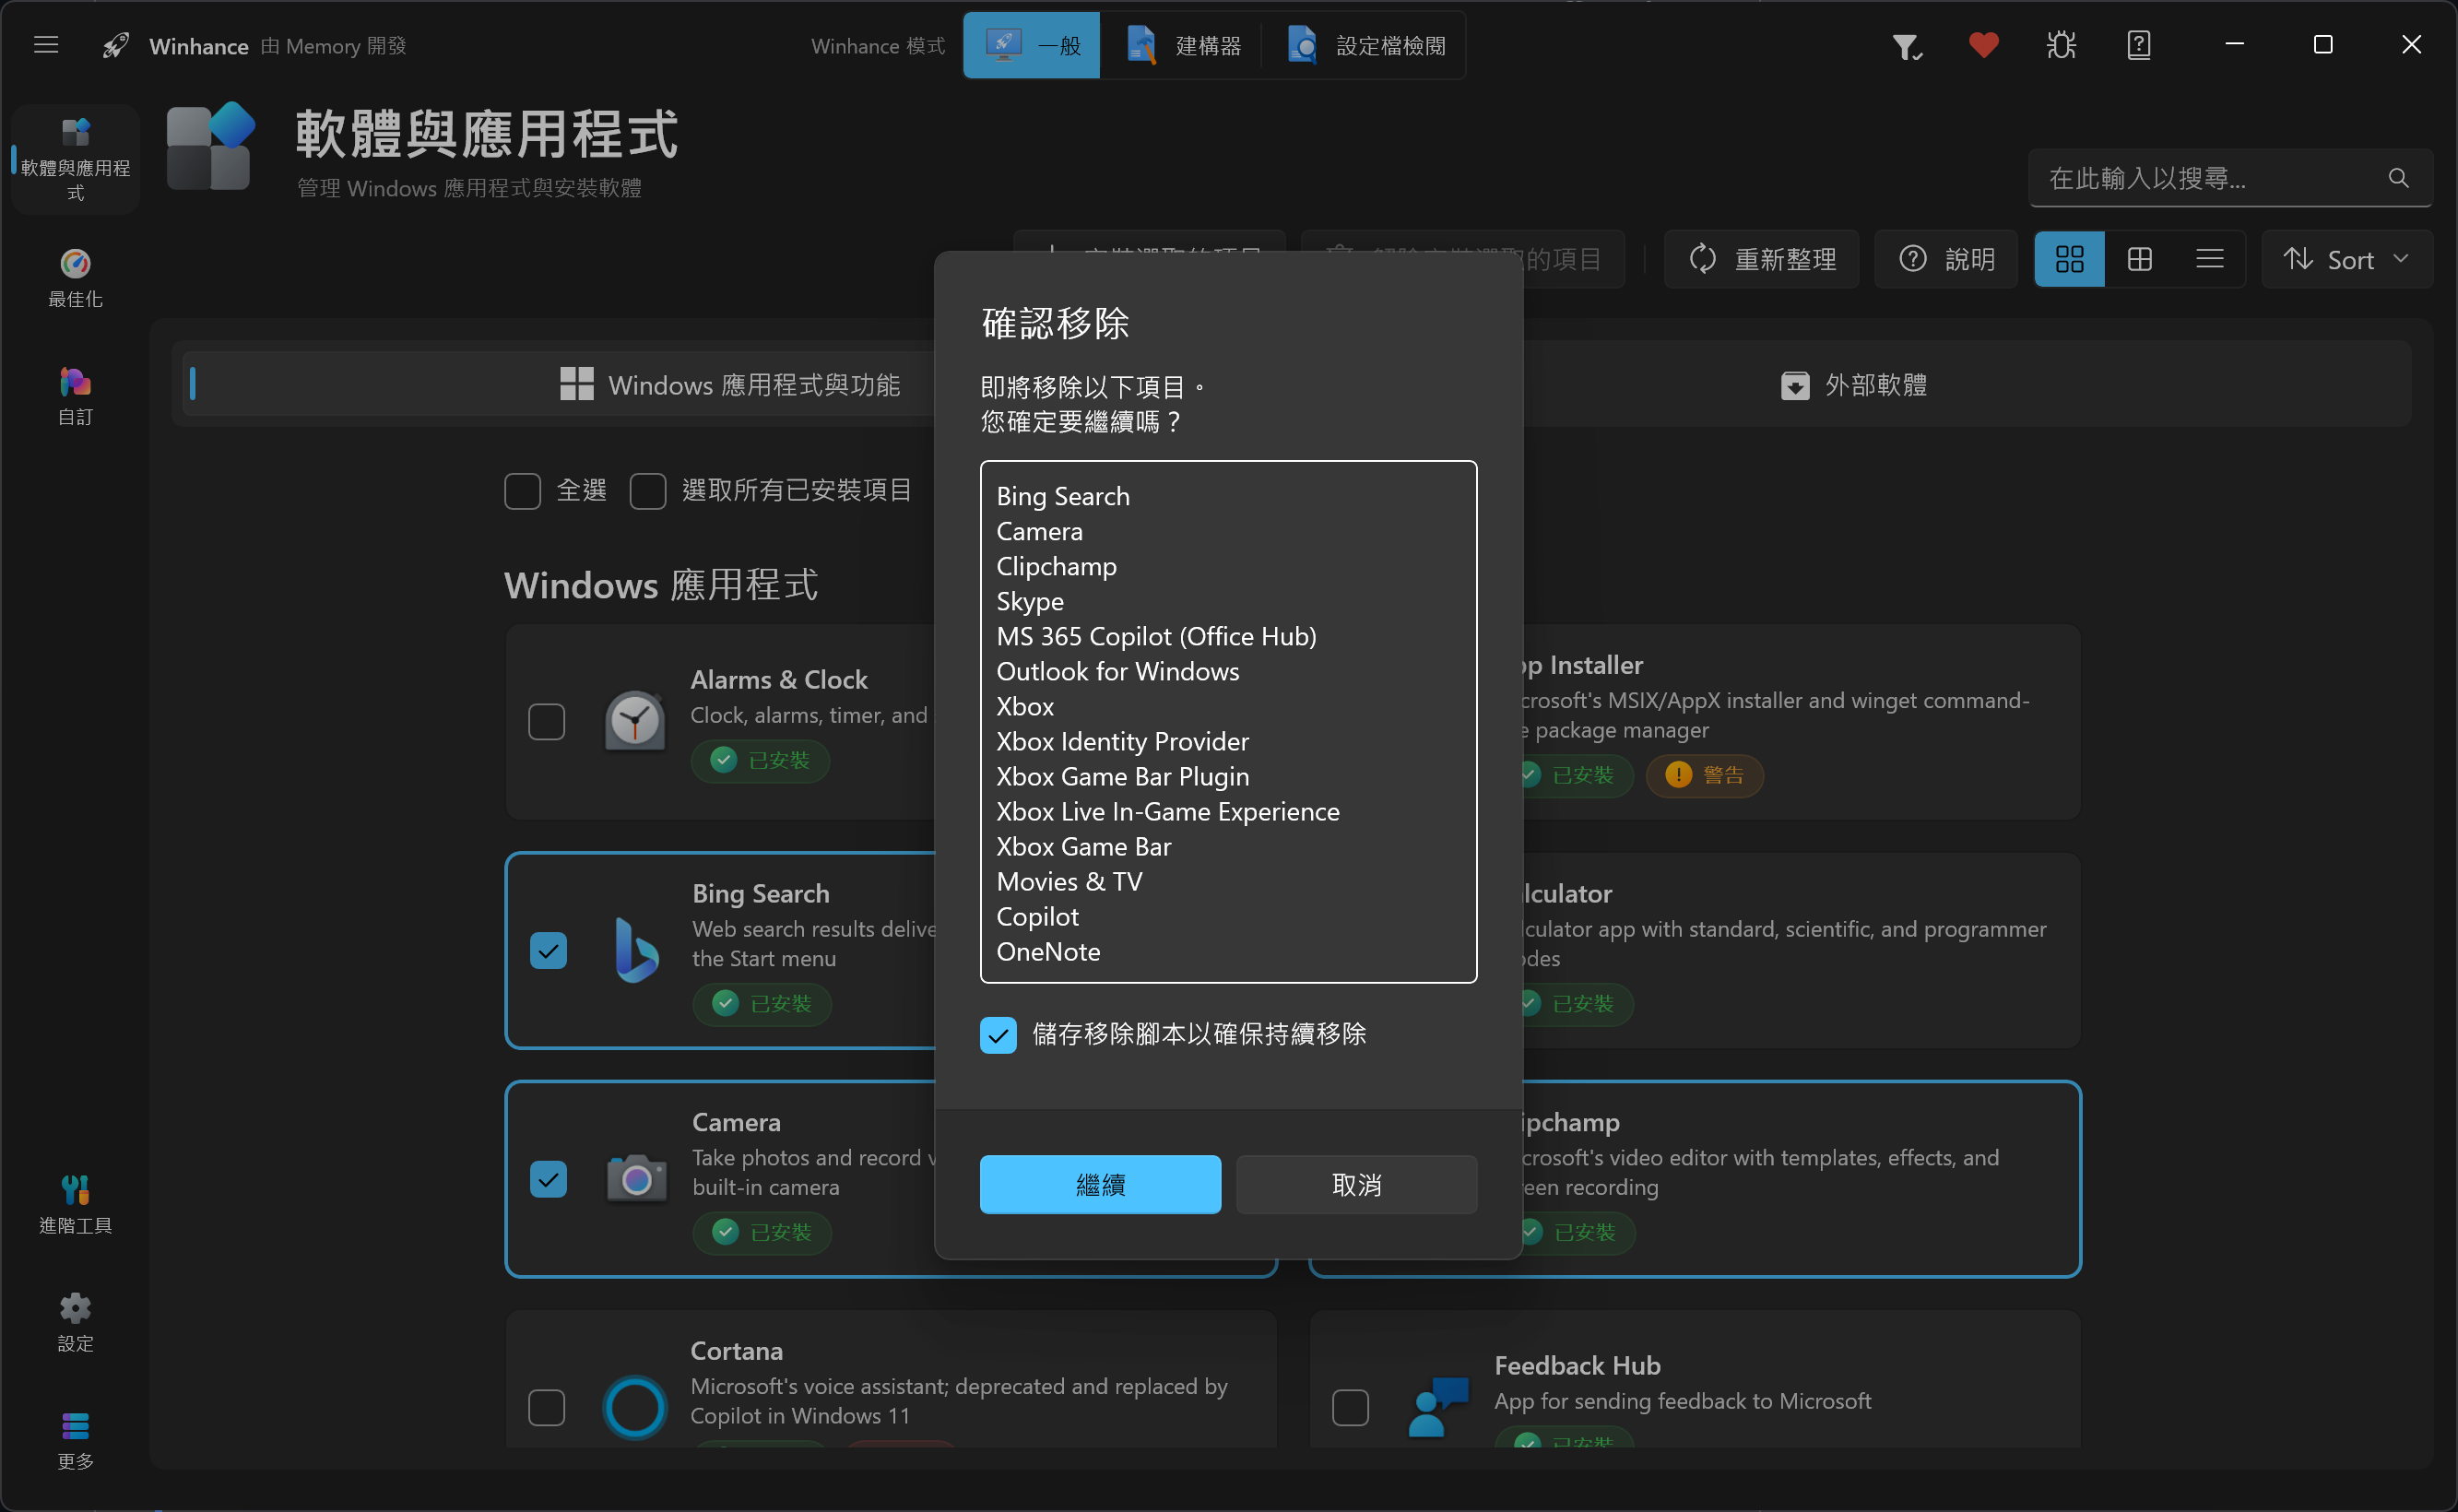
The confirmation window lists every item to be removed, so check it once more before continuing.
I recommend starting with apps I am certain I do not need, such as game-related components or unused built-in tools. I would not rush to remove browsers, system components, or anything I may need for work. Winhance also includes an option to create a system restore point; making one before a change gives you a practical way back if something goes wrong.
What else can it do?
Besides the app management I tested, Winhance groups common Windows adjustments into a few sections:
- Optimize: privacy, security, power, gaming and performance, Windows Update, notifications, and sound settings.
- Customize: light and dark modes, taskbar, Start menu, and File Explorer adjustments.
- External Apps: install common browsers, multimedia utilities, document viewers, and more through WinGet.
- Configuration and advanced tools: export or import Winhance settings; advanced users can also create a custom Windows ISO or
autounattend.xml.
I would not enable every optimization switch just because they are in one place. A more practical approach is to remove unneeded apps first, read each setting description, then use the computer for a few days to make sure it does not affect my software or workflow.
If the priority is performance tuning, privacy telemetry, or GPU power settings rather than removing apps, see my optimizerDuck hands-on as well. Both tools organize Windows settings, but optimizerDuck leans more toward those optimization options, while Winhance makes software and built-in feature management more central.
Takeaway
Winhance is most useful because it organizes tasks that would normally be scattered across Settings, PowerShell, WinGet, and many different tutorials into a readable, selectable, and confirmable workflow. When I removed a few built-in Windows apps in this test, I did not need to find another debloating script, and the confirmation dialog listed exactly what would be changed.
It is still a system-tuning tool, not a magic performance booster where more switches are always better. If I only want a cleaner Windows setup, I treat it as a transparent and controlled management interface: install from an official source, create a restore point, and make only the changes I actually need. That is the fastest approach—and the one least likely to create extra repair work later.
Useful links: