

File Converter Hands-on: Convert PNG/JPG to WebP from the Windows Right-click Menu
File Converter is an open-source file conversion tool integrated into the Windows Explorer context menu. I tested converting PNG and JPG images to WebP: no main app to open, just right-click the files. It also supports video, audio, and more image formats.
Introduction
This time I tested File Converter. It is not the kind of conversion app that opens to a row of buttons and asks you to drag files into it. Once installed, it is integrated into the Windows Explorer right-click menu. Select files, right-click, choose an output format, and the converted files appear next to the originals.
My video test focuses on images: converting PNG and JPG files to WebP. For everyday website-image cleanup, this is much quicker than opening another tool and choosing an output folder each time. It can handle video and audio too, but I did not extend this test into a video-conversion benchmark.
The Right-click Menu Is the Actual Interface
I only realized this after installation: when you open the app, it shows almost nothing beyond instructions, so at first it can feel as though something is missing. Nothing is missing. It is meant to be a Windows shell extension, so the File Explorer context menu is where the work happens.
Select one or more files, right-click, find File Converter, and you will see the formats and presets available for that file type. The official list includes PNG, JPG, ICO, WebP, and AVIF for image output; WebM, MKV, MP4, OGV, AVI, and GIF for video; and FLAC, AAC, OGG, MP3, and WAV for audio.
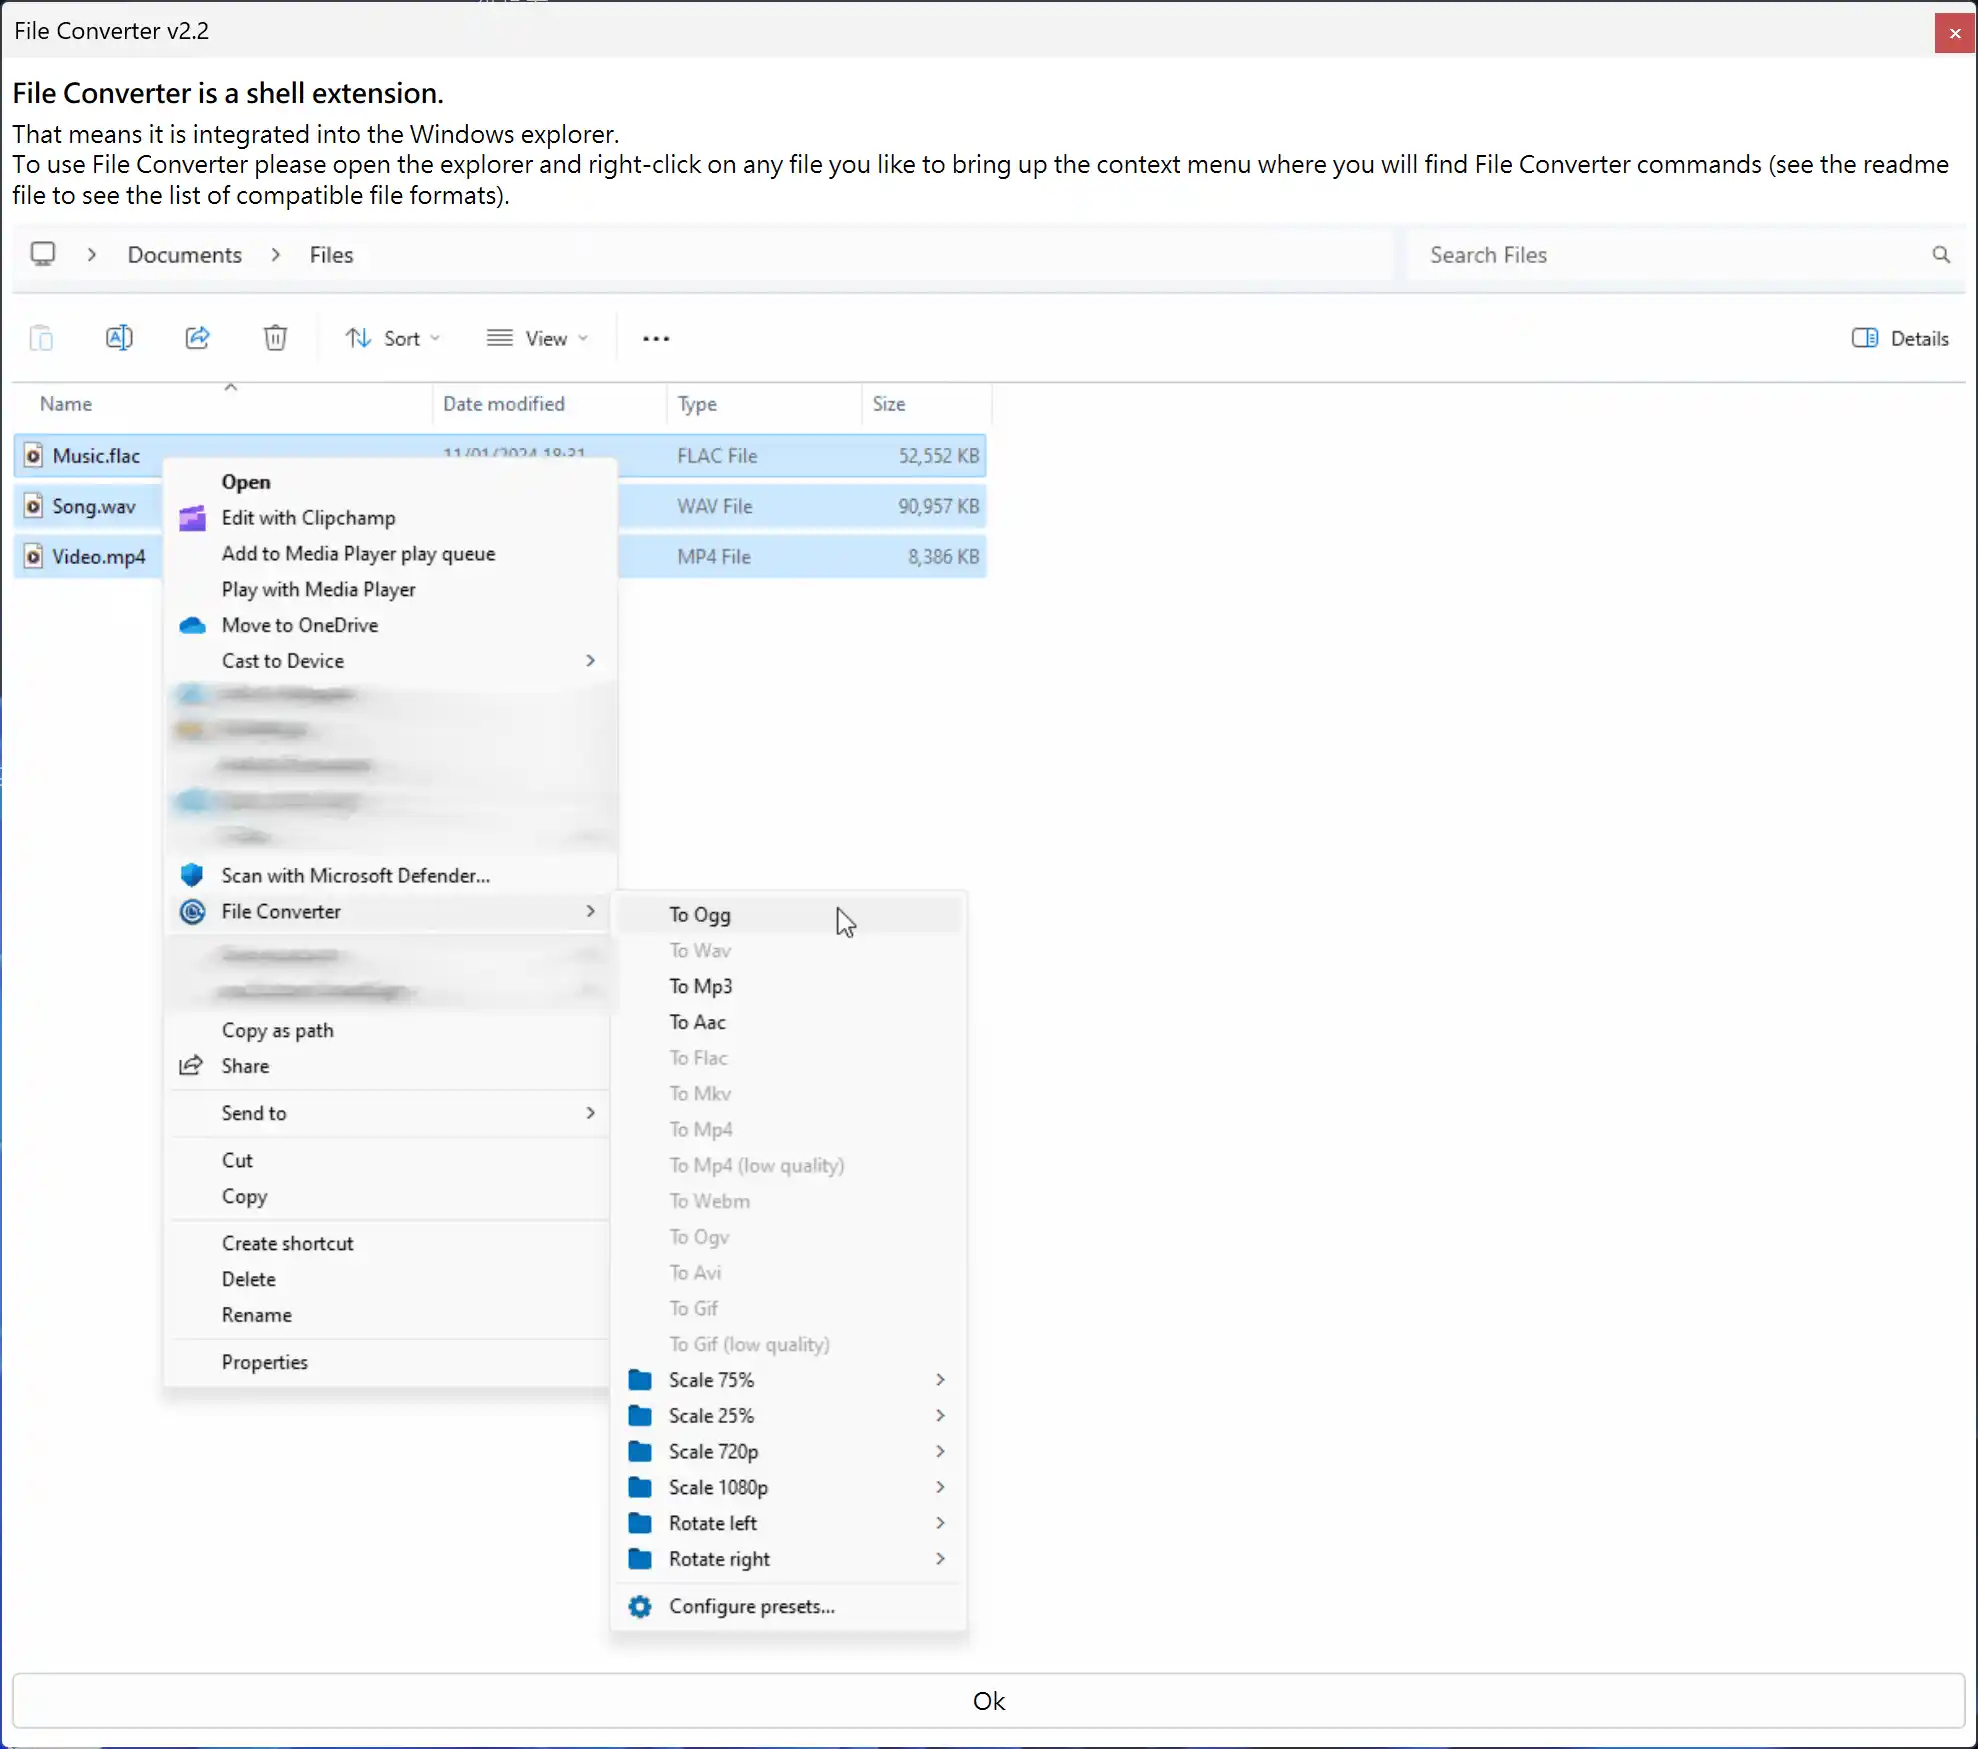
Instead of a new workspace, it puts common conversions in the right-click menu.
For me, that is both its greatest strength and its limit. Common conversions are fast, but if you need detailed editing, complex parameter tuning, or a full batch workflow, HandBrake, FFmpeg, or another specialized tool is the better choice.
Download and Installation
Start from the official File Converter download page and download the 64-bit Windows installer. The site currently offers File Converter 2.2 and lists support for Windows 7, 8, 10, and 11. It is an open-source project licensed under GPL v3, with its source code available on GitHub.
The installation is short and is mostly a matter of clicking Next. In my test, however, Windows Defender SmartScreen displayed a “Windows protected your PC” warning. That is a warning from Windows for software without enough established reputation; it does not mean the source can be ignored.
My rule is simple: only when the file came from the official download page and its name and version match do I click “More info,” check the publisher, and choose “Run anyway.” If the source is unclear or the file details do not match the official release, do not continue with installation.
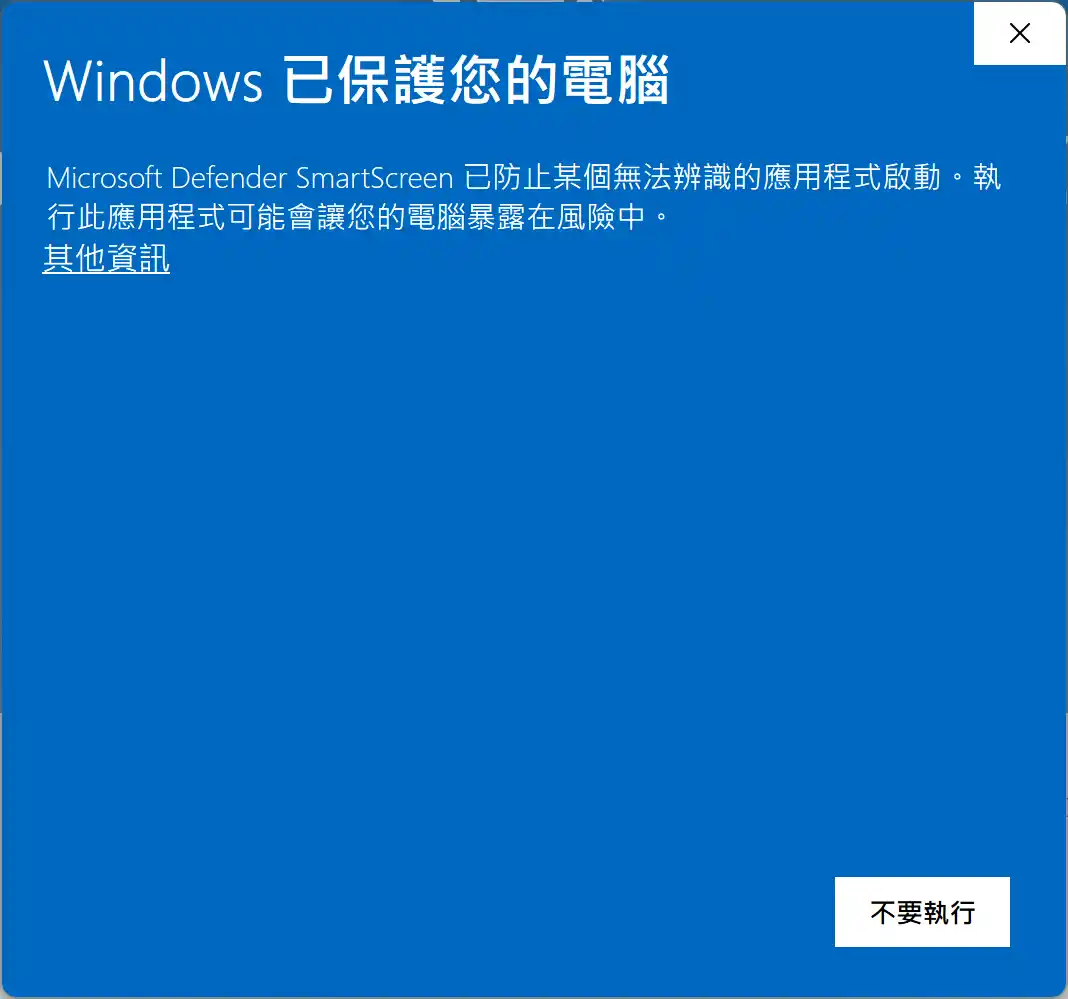
First confirm that the file came from the official download page, then check “More info.”
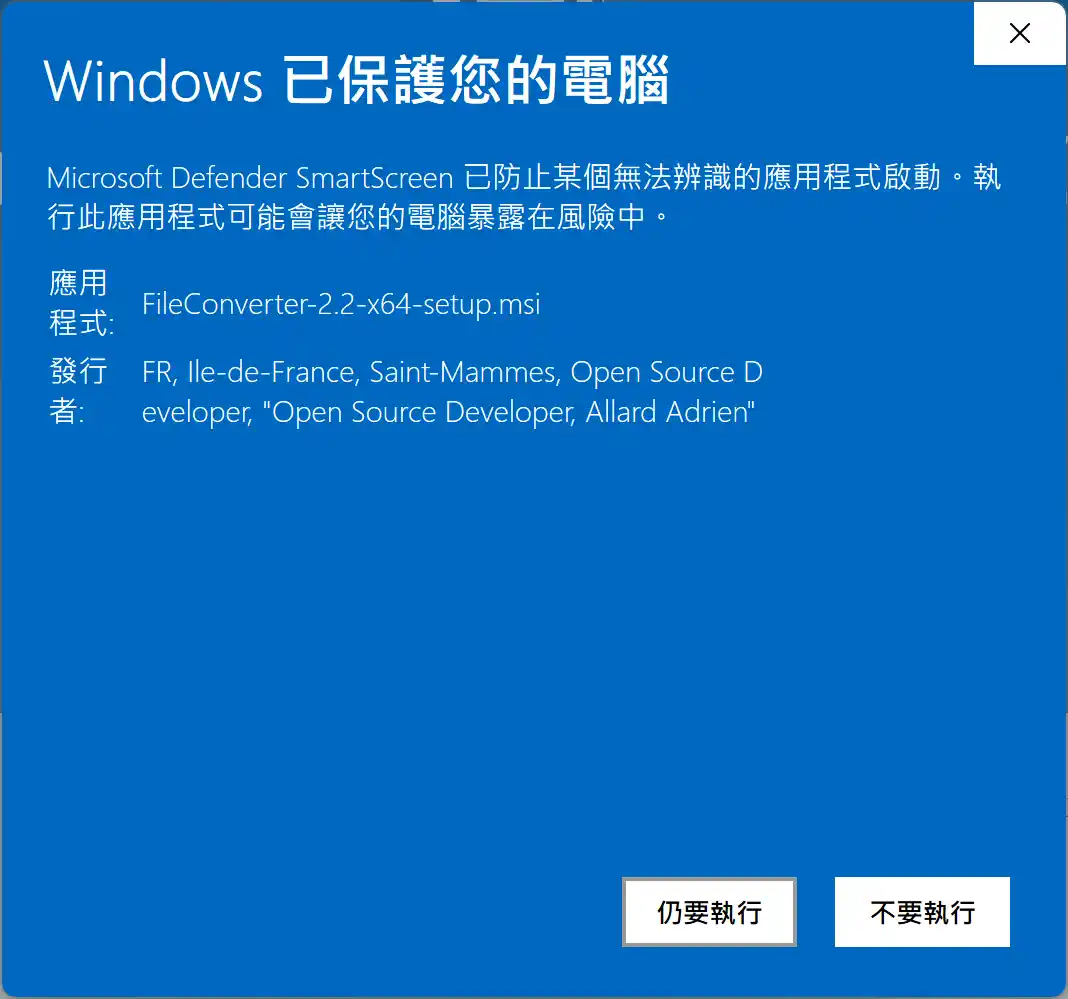
Only decide to continue after the file and publisher details check out.
Then accept the GPL v3 license and click Next to continue. There is no account, cloud login, or separate main application to configure.
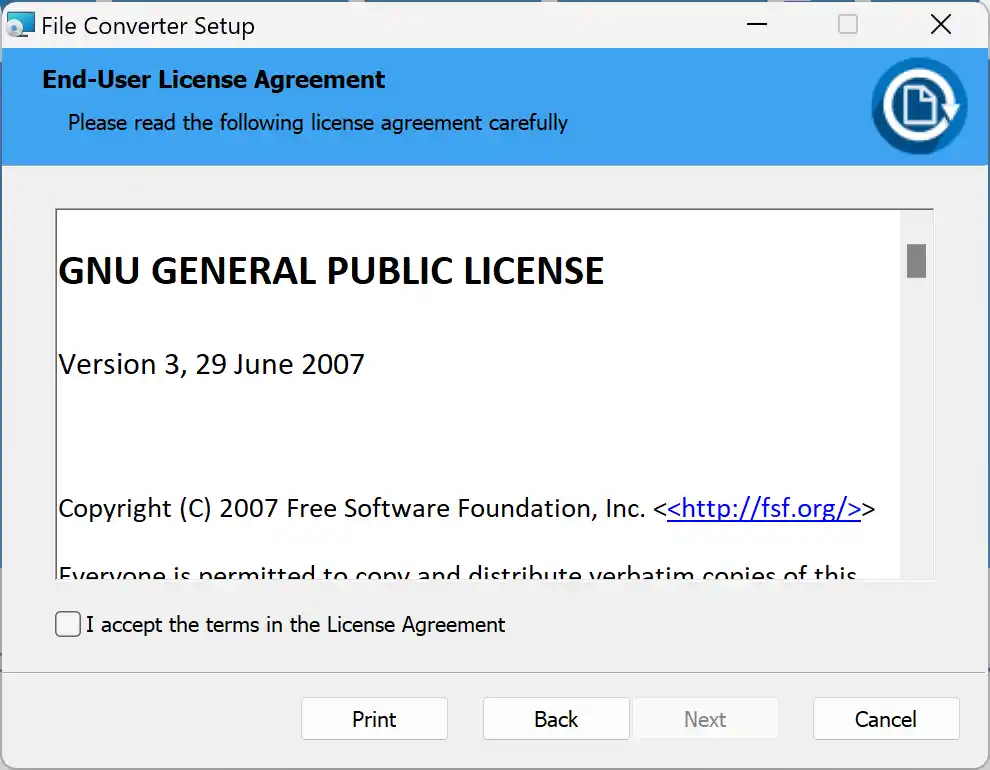
After accepting the license terms, the installer can continue.
How I Converted PNG/JPG Images to WebP
The process is exactly what the video shows:
- Select PNG or JPG images in File Explorer.
- Right-click and select
File Converter. - Choose the preset that converts to WebP.
- Wait for it to finish; the output file appears in the same folder.
I tested ordinary screenshots and image files. In this situation, what I value is removing one step: no website to open, no files to drag into an app, and no output folder to find afterwards. For occasional WebP conversion of a few images, that is quick enough.
WebP is not automatically the right choice in every situation, though. When I need to preserve transparency, I check the output first. When I am delivering files to an old system or a particular piece of software, I also confirm that it accepts WebP. Keeping the original PNG or JPG before converting is the safer move.
Things I Check Before Using It
- This is a Windows-only tool; it does not apply to macOS or Linux.
- Which formats appear in the right-click menu depends on the selected source file type and your preset settings.
- Converting Office documents requires Microsoft Office to be installed and activated locally; the official documentation specifically calls out this limitation.
- To change default formats, quality, or other options, select
Configure presets...from the right-click menu. For a first try, the built-in presets are enough.
Notes After Using It
File Converter is not an all-purpose media workstation. Its job is simple: put file conversion into the Windows right-click menu. Since it has no unnecessary main screen, I found it especially natural for converting PNG and JPG files to WebP.
If you often just need a quick format change—especially while organizing images or occasionally converting a video or audio file—it is worth installing and trying. On the other hand, for editing, comparing compression strategies, precise encoding parameters, or large-scale automation, a specialized tool is a better fit.
Related Links: