Upscayl Hands-On: A Free, Open-Source Local AI Image Upscaler
I tested Upscayl, a free and open-source AI image upscaling tool, from installing it through GitHub Releases and Homebrew, choosing the language on first launch, selecting a model, and using the Digital Art model to upscale a He-Man image by 4x.
Introduction
This time I tested Upscayl, an AI image upscaling tool that focuses on being free, open source, and able to run locally.
I wanted to try it because when I have been organizing old images, low-resolution screenshots, or compressed assets lately, I often run into the same situation: the image is still usable, but it turns blurry as soon as I enlarge it. Regular sharpening tools can easily make edges look harsh, and they do not necessarily bring real detail back. Tools like Upscayl use AI upscaling to infer details and enlarge images to a higher resolution.
I am not going to frame it as a magic image-fixing tool. My impression is closer to this: it works well for low-resolution images, images with obvious pixelation, or originals that already have clear outlines. But if a photo is badly out of focus, blurred by motion, or already missing too much information, Upscayl will not invent all the lost detail out of nowhere.
I also want to be honest up front: I do not think Upscayl is a good fit for restoring photos of real people, especially real human faces. It is not specially tuned for portrait or face restoration, so enlarged faces can look unnatural in the skin, facial features, or expression. If your goal is restoring old portraits or fixing face details, I will share a more specialized portrait photo restoration tool next time.
First, the key point: the local version is free and open source, but it needs a GPU
Upscayl Desktop is an open-source project licensed under AGPL-3.0, and it supports Linux, macOS, and Windows. This article is about the local version you download and run on your own computer.
One thing to note: the official README says it needs a Vulkan-compatible GPU to upscale images properly. If it does not run after installation, it may be a graphics card, driver, or Vulkan support issue, not necessarily an operation mistake.
Downloading from GitHub Releases
If you want the desktop version, the most direct entry point is the official download page, or you can go straight to GitHub Releases.
When I tested it, I started from the Releases page. After opening it, scroll down to the Assets section of the latest version, then download the installer for your system. On Windows you will usually look for .exe, on macOS you will look for .dmg, and on Linux you will see different formats such as AppImage, deb, and rpm.
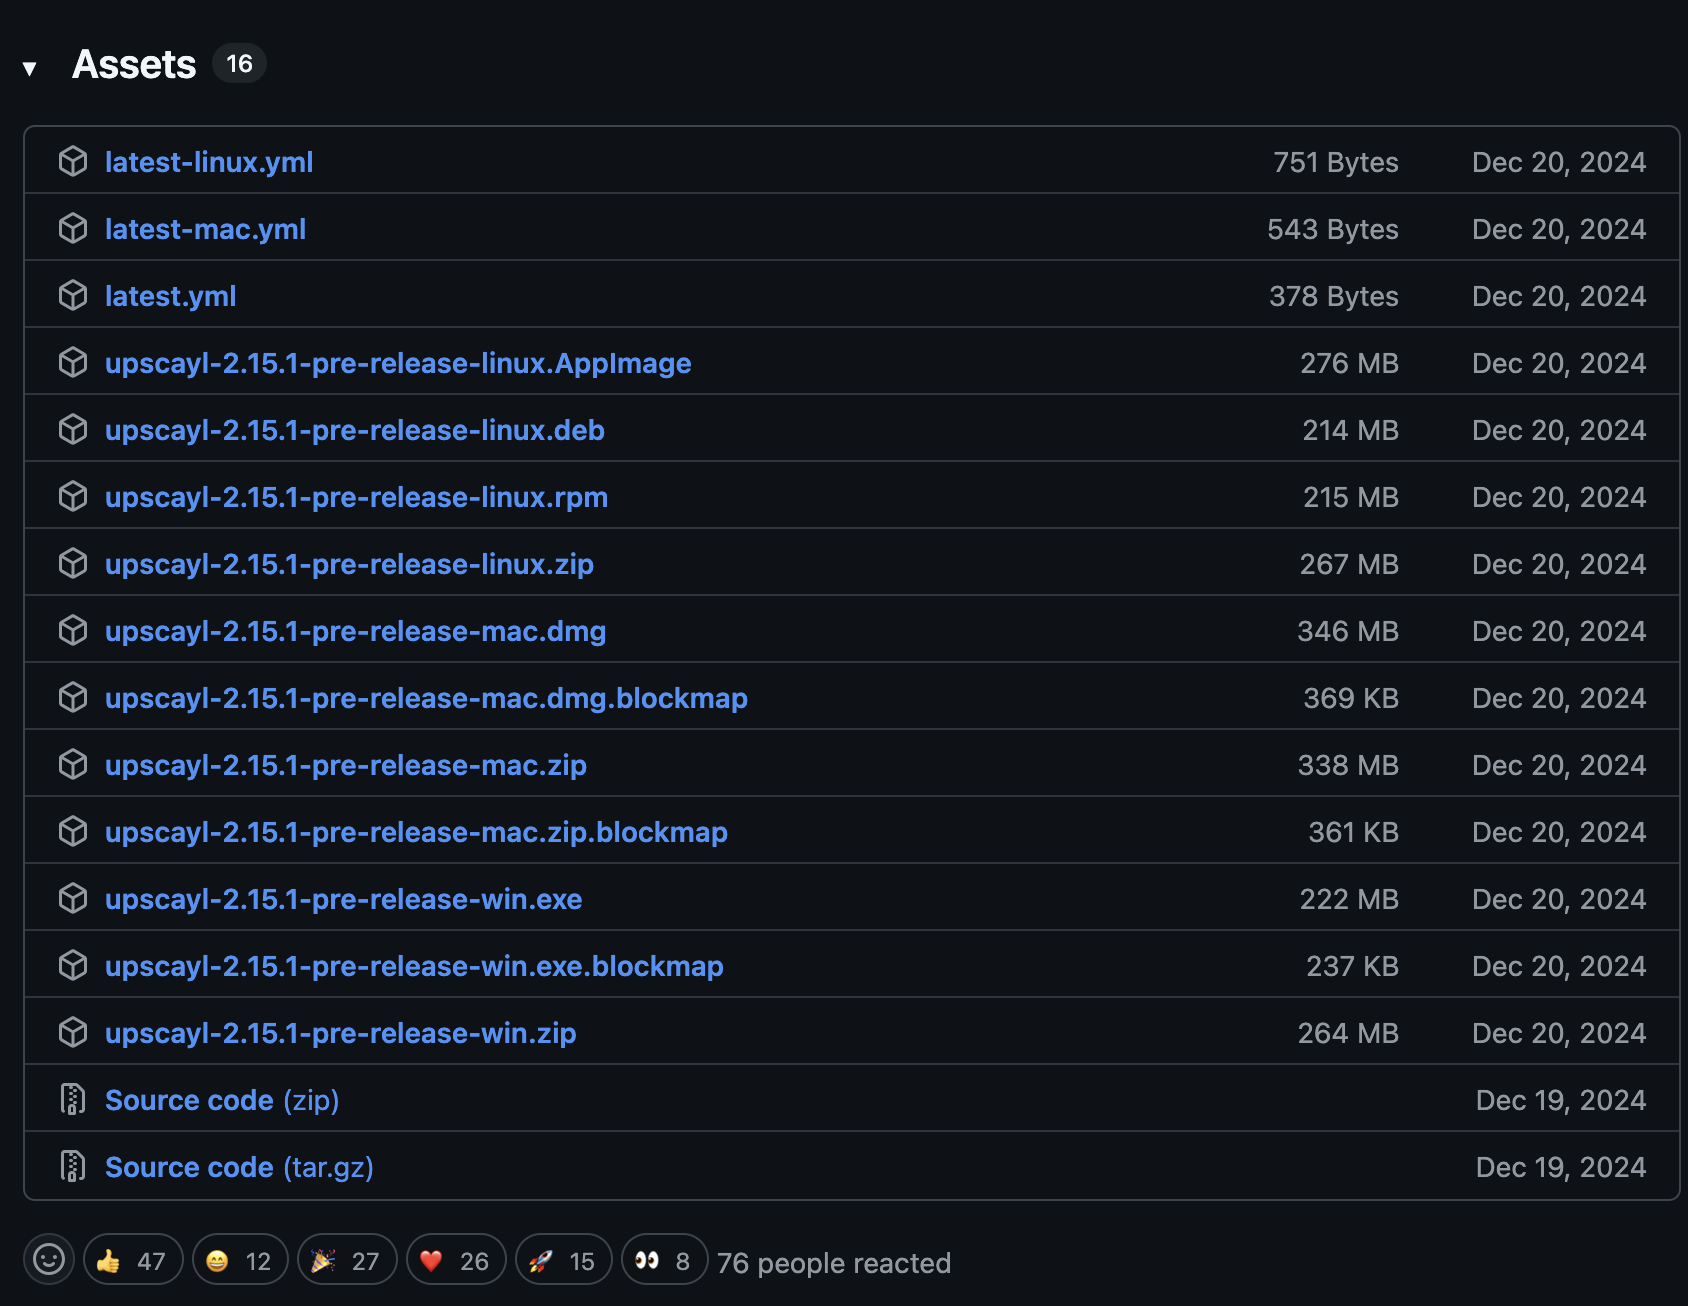
Go to Assets on GitHub Releases and download the installer for your system
I would recommend not downloading the installer from random third-party download sites. Upscayl has an official website and GitHub Releases. Downloading directly from official sources is cleaner and makes it easier to confirm the version.
When I checked the documentation, the official GitHub README marked v2.15 as released, and I could also see 2.15-related versions on GitHub Releases. The screenshots and workflow in this article may vary slightly with the interface version, but the general flow is the same: download, install, select an image, choose a model, and start upscaling.
Installing on macOS with Homebrew
If, like me, you are used to managing tools with Homebrew on macOS, Upscayl can also be installed directly with cask.
brew install --cask upscayl
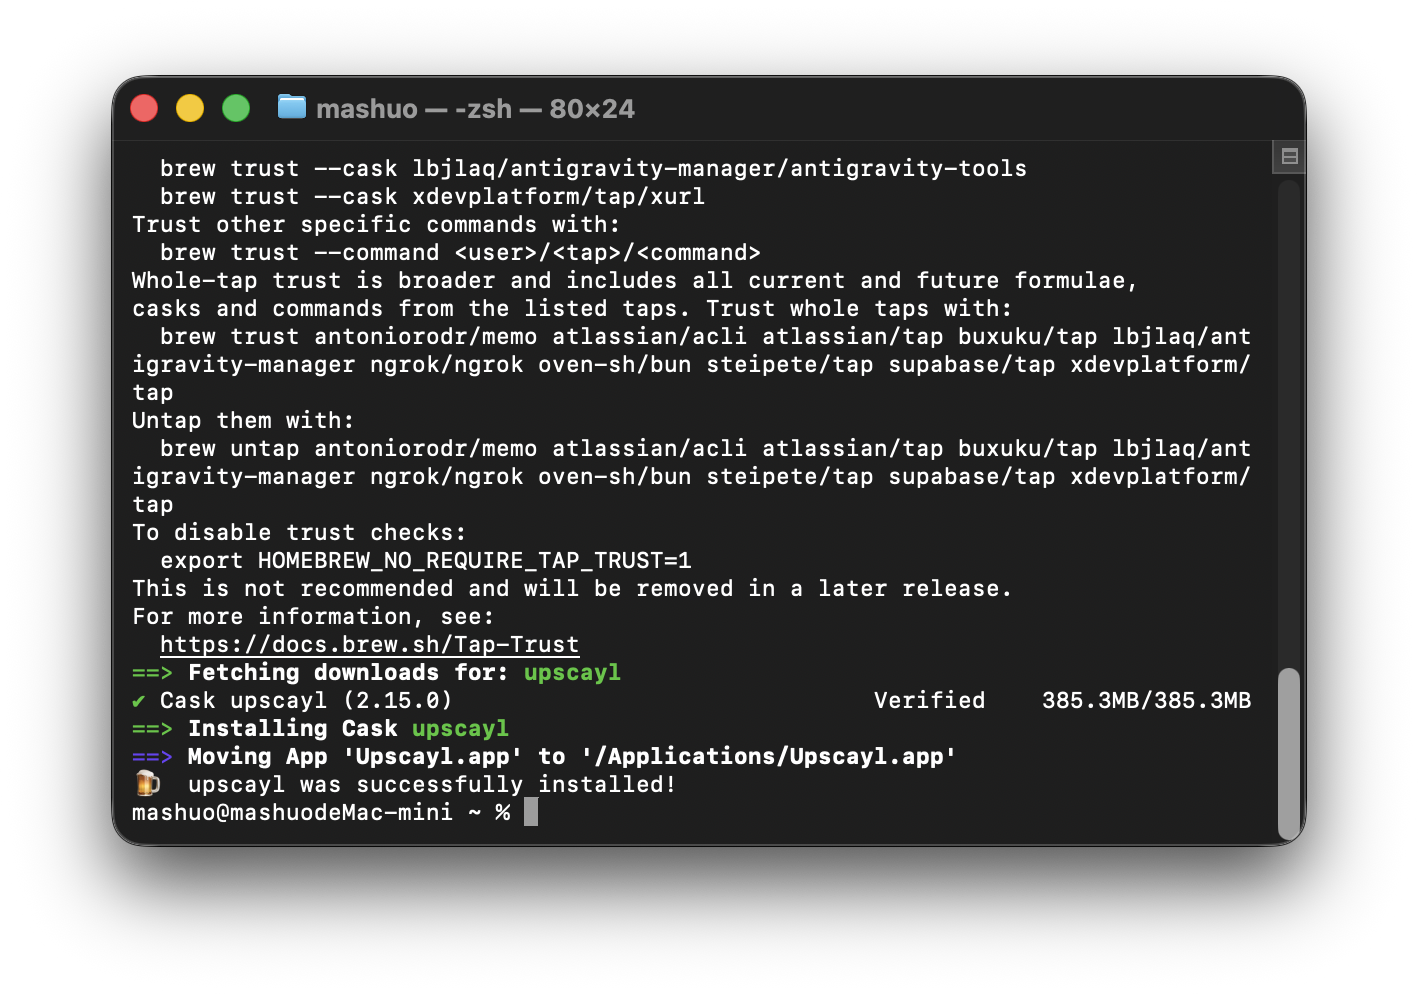
On macOS, you can download the dmg or install it with Homebrew cask
The nice thing about Homebrew is that installation, updates, and removal are all straightforward. That said, the first time you open the app, macOS may still show a security prompt. This is the usual Gatekeeper flow. Following the method in the official README, right-click the app in Applications and choose Open, and it should usually launch normally.
If you are a regular user and are not familiar with the terminal, just download the dmg from the official website. Homebrew is not required. It is simply more convenient if you often install tools this way.
Choose a language on first launch
When Upscayl launches for the first time, it first shows the language selection screen. This step is simple, but I think it is worth capturing because it affects how easy the rest of the workflow feels.
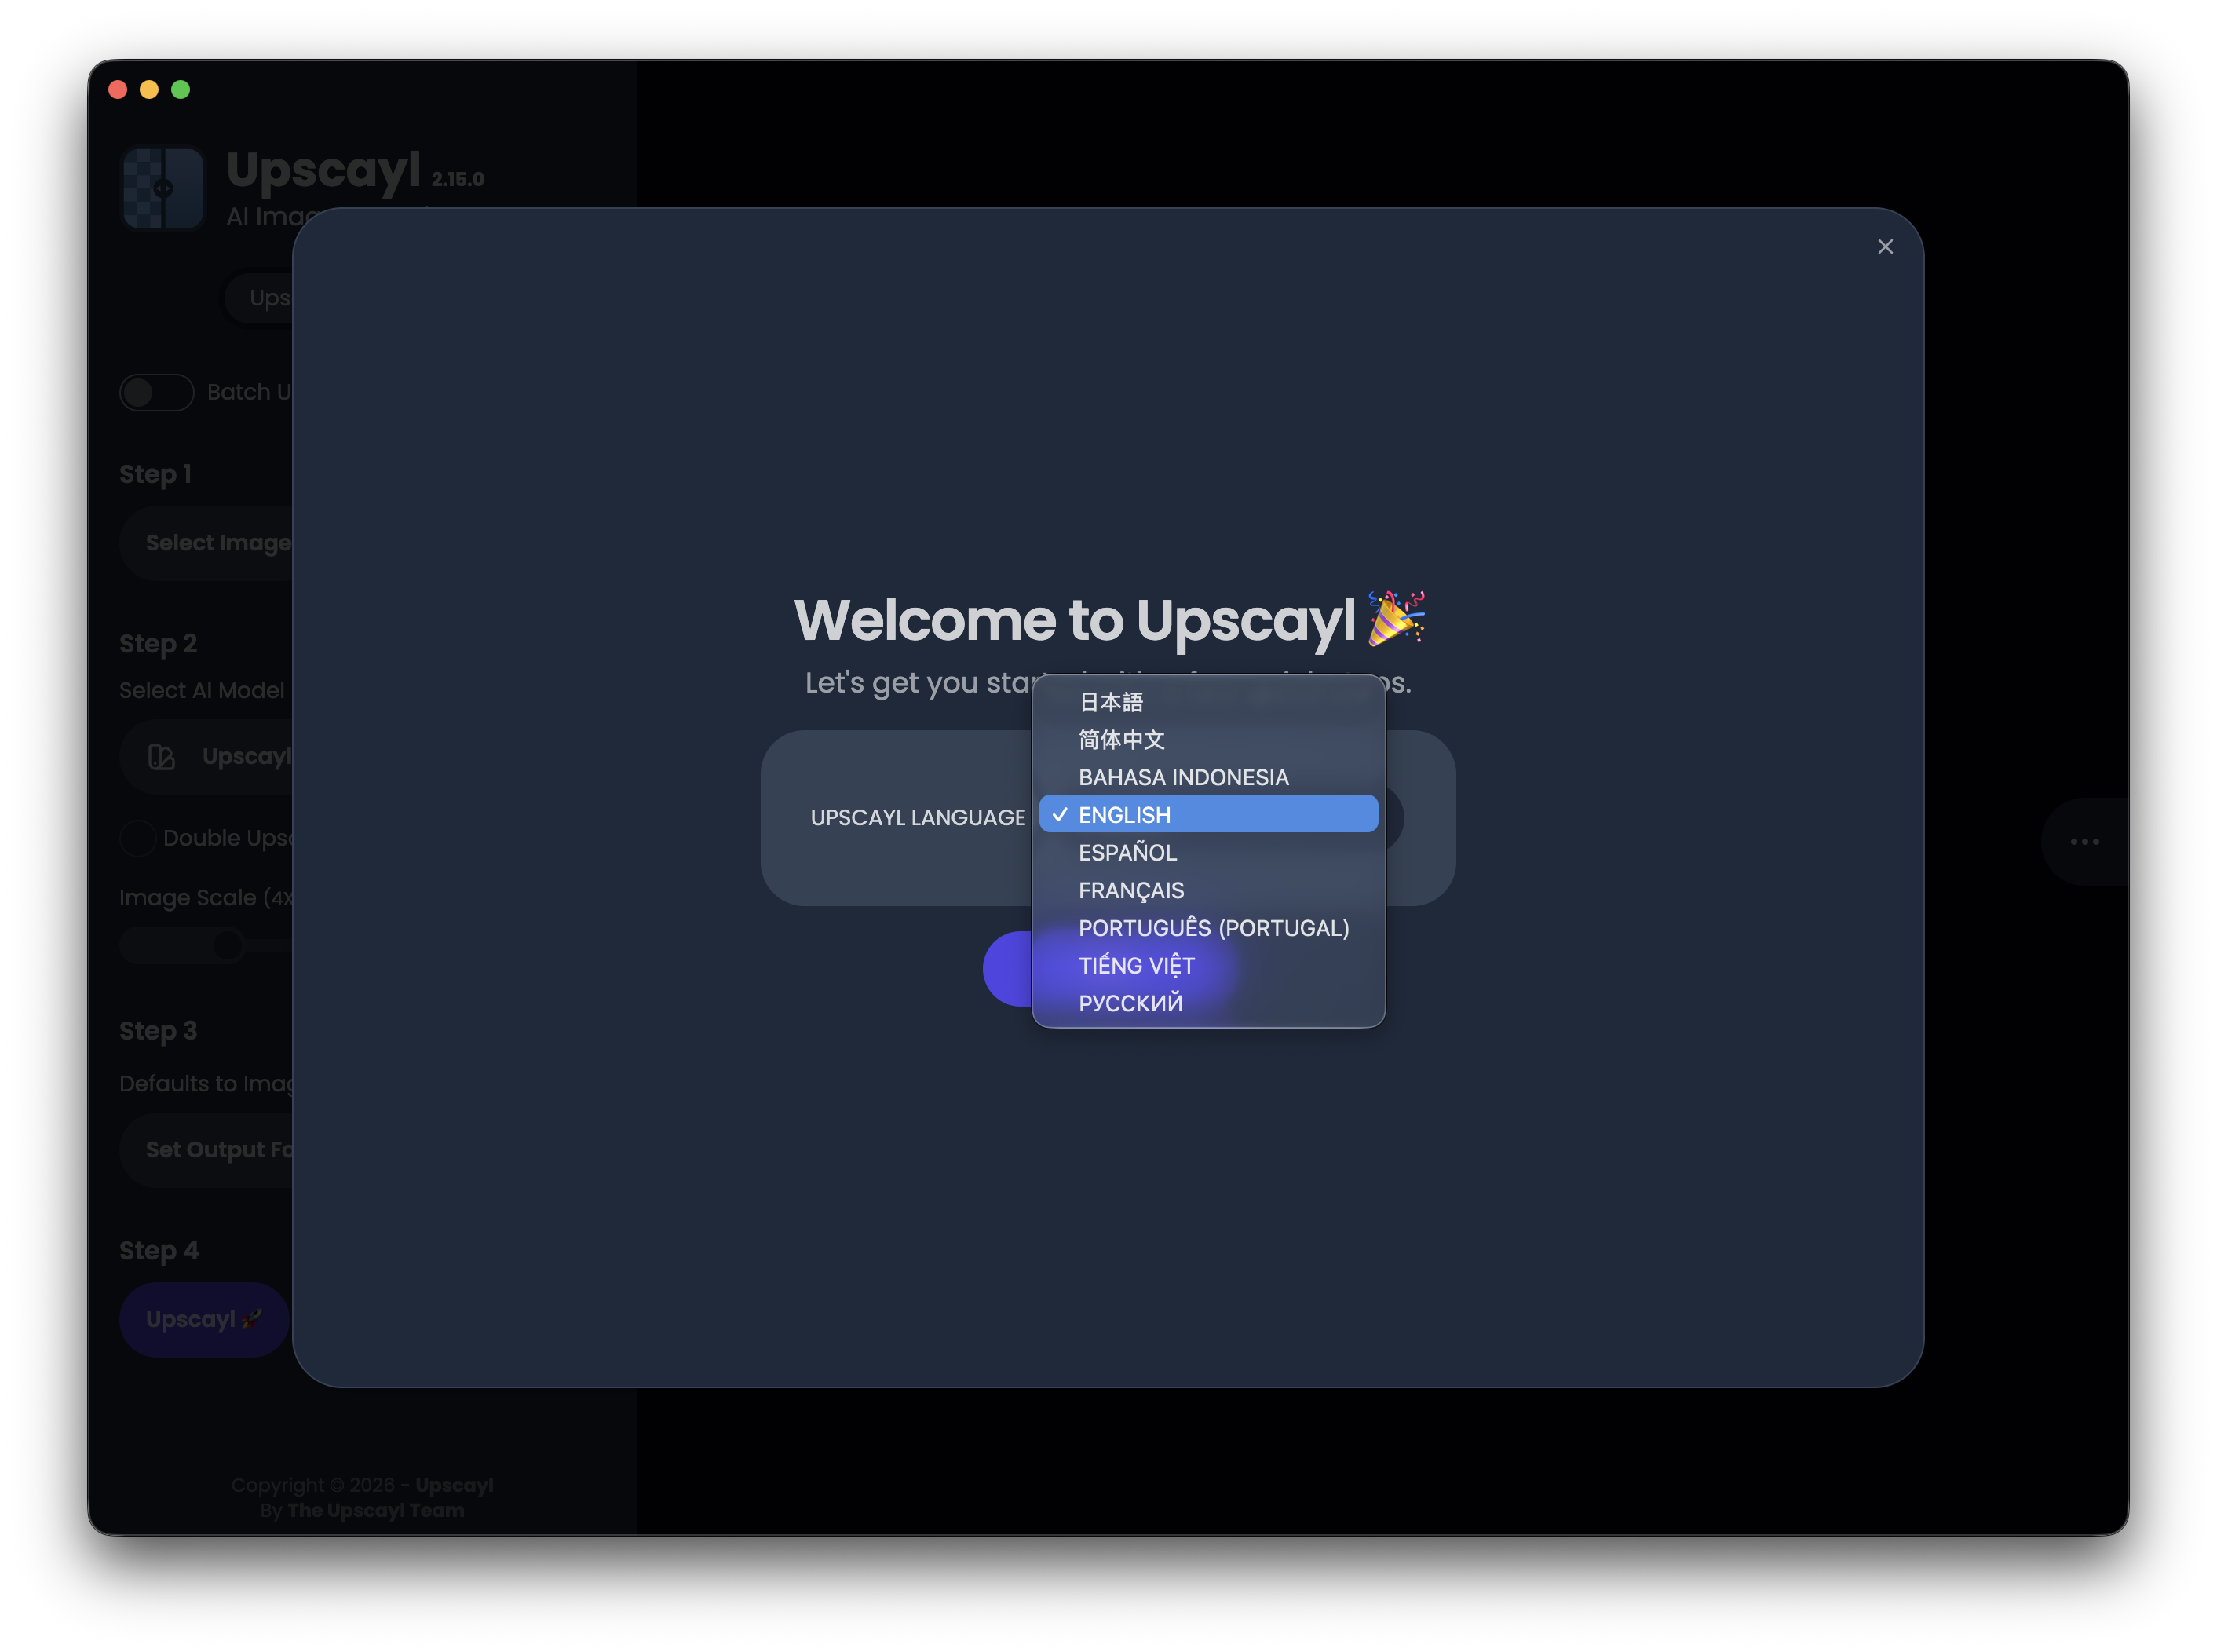
Choose a language on first launch, and the later steps become much easier
My own habit with tools that include options like models, output scale, output folder, and batch processing is to switch to a familiar language first. It reduces the chance of clicking the wrong thing. Upscayl has a simple interface, but if this is your first time using an AI upscaler, model names such as General Photo, Digital Art, and High Fidelity still require a little understanding.
Selecting an image and model
The main screen has a very direct flow: select an image, choose a model, set the scale or output options, then start Upscayl.
This time I used a He-Man image as the test image. The original resolution was 450 x 444. This kind of low-resolution image is good for checking the difference made by upscaling, because once you enlarge it, you can immediately see whether the edges, lines, and facial details are handled well.
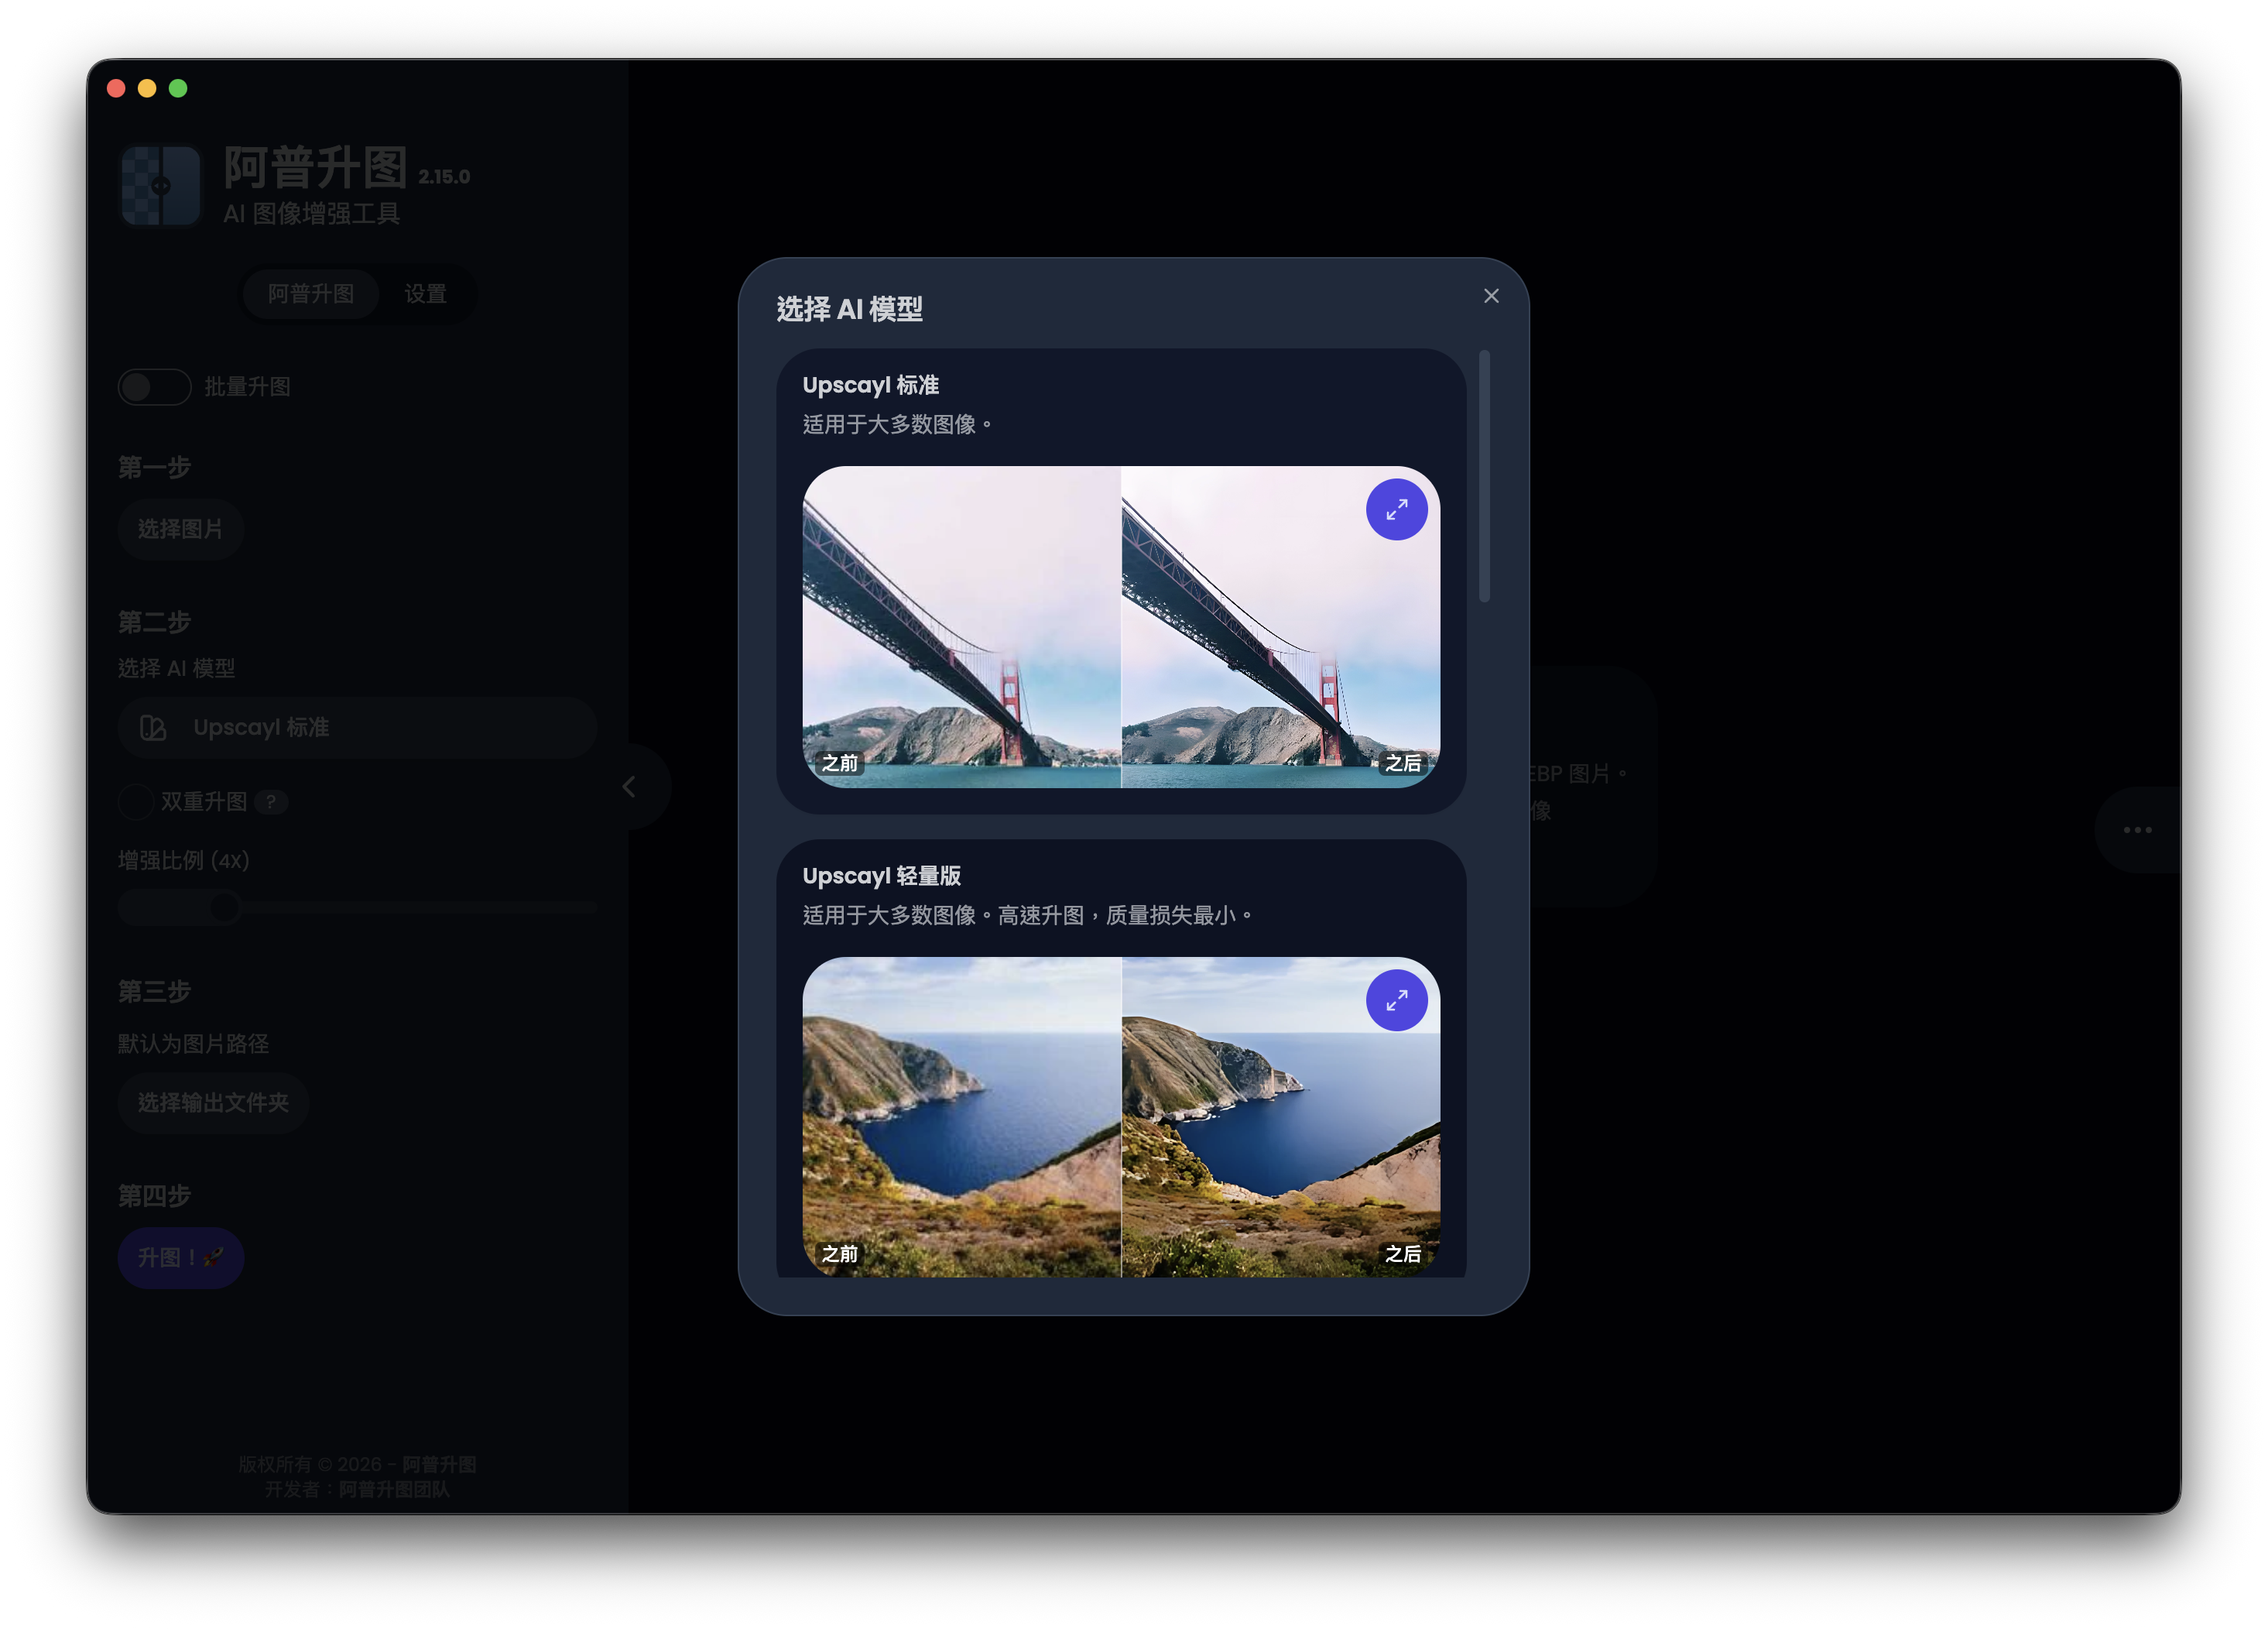
After selecting an image, you can switch models based on the type of source material
I chose the Digital Art model this time because the test image is closer to illustration than a regular photo. I think this point matters: the newest model is not always the best choice, and you do not have to stick to one model for everything. Photos, illustrations, anime-style images, and low-resolution icons may each fit different models.
If you are processing landscapes, objects, or screenshots, you can first try General Photo or a model with a similar name. If it is an illustration or AI-generated image, Digital Art often looks more natural. But for real human faces, I would not choose Upscayl first, because it is not a dedicated portrait restoration tool. My usual approach is to pick one representative image, test two or three models on a small sample, then decide whether to batch process the whole set of assets.
He-Man original image and 4x upscaled result
The image below is the original test image. The resolution is not high, and once it is displayed at article width, the lack of detail becomes obvious.
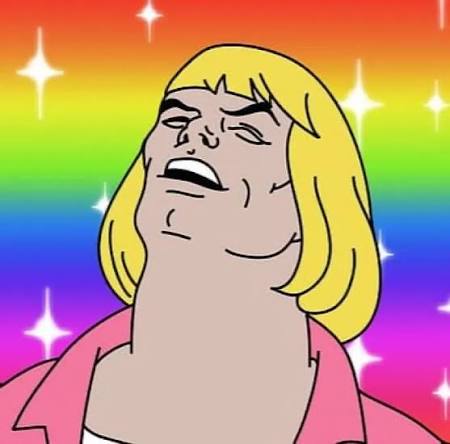
Original image: 450 x 444
After upscaling it 4x with the Digital Art model, the output image became 1800 x 1776. The most obvious difference is that the lines are cleaner, and the face, hair, and armor edges hold up better at a larger display size.
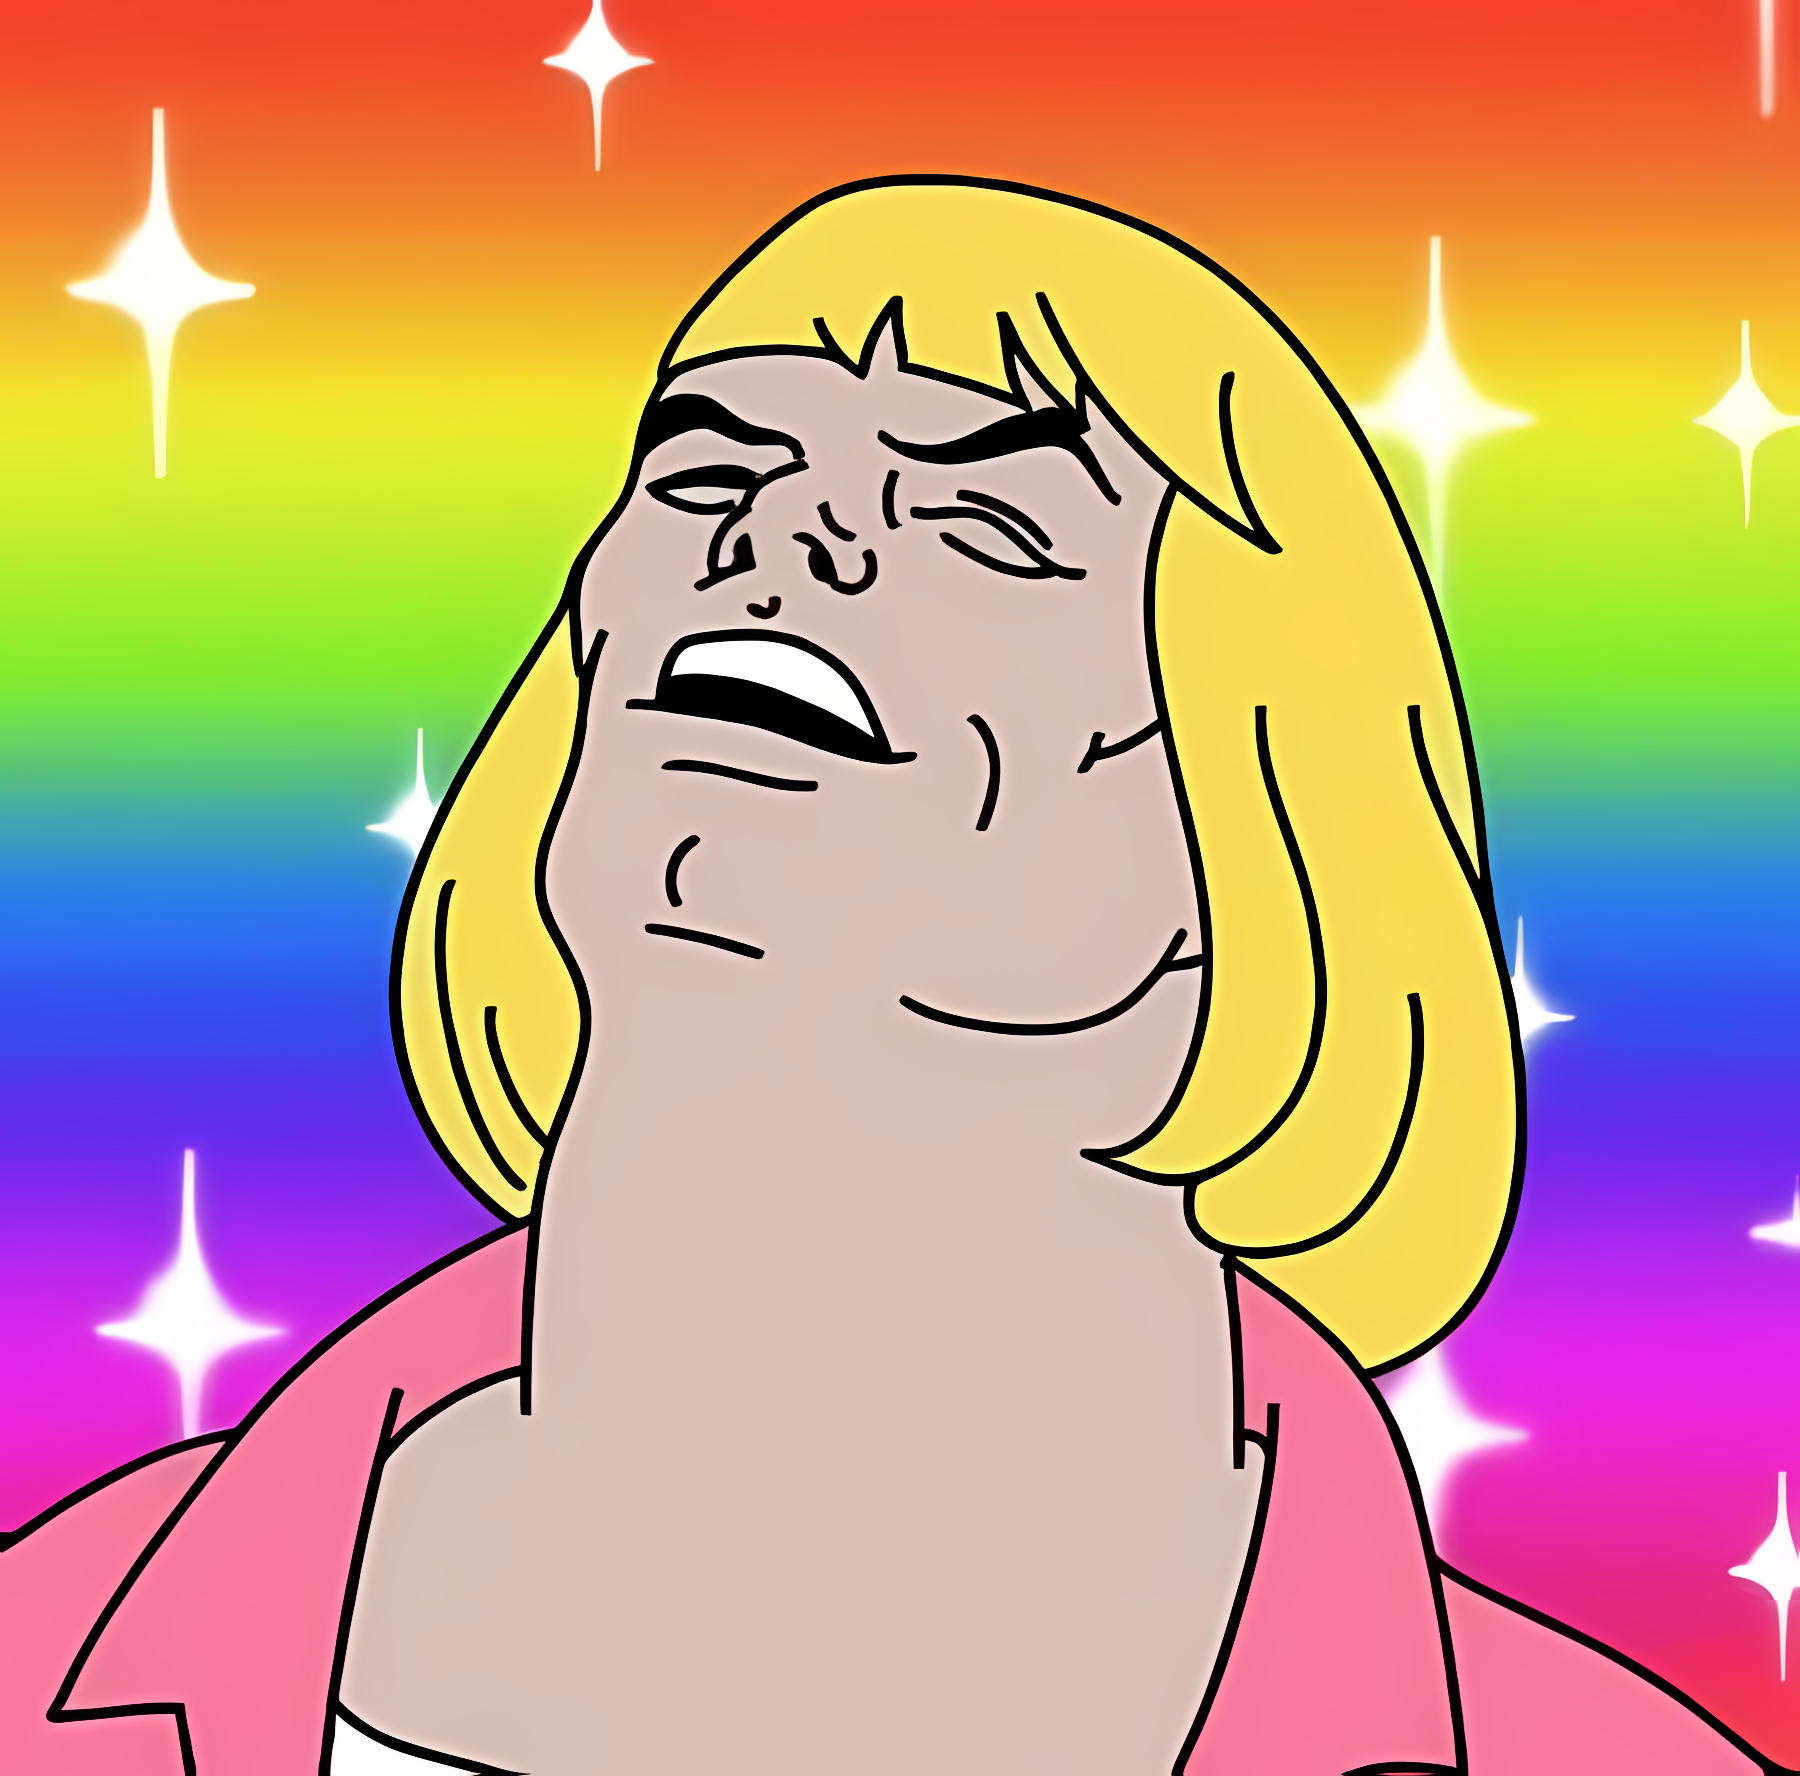
After 4x upscaling with the Digital Art model: 1800 x 1776
But I would also point out one thing: an AI-upscaled image is not the same as an original high-resolution image. It infers details, so some textures may become cleaner or look more like they were redrawn. It is very useful for article images, presentation materials, and repairing old images. But if you need strict fidelity to the original real-world details in a photo, you still need to judge whether the result is acceptable.
Actual conversion speed and usage feel
I recorded a short clip of the actual conversion process. Upscayl’s workflow is very linear. After starting it, you just wait for it to finish. There are not many extra settings to deal with.
My hands-on impression is that its advantage is being easy enough to understand. You do not need to know the underlying terms like Real-ESRGAN, NCNN, or Vulkan to complete an image upscale. Of course, if something goes wrong, those low-level terms become important again, because many problems eventually come back to the GPU, driver, model, or output format.
If you only need to enlarge a few images occasionally, Upscayl Desktop is already enough. If you need to process a large number of images, you will need to pay more attention to the output folder, disk space, GPU temperature, and whether your model choice stays consistent. After upscaling images 4x, file sizes can grow quickly, so it is better to test a few images before running a whole batch of assets.
How I would use Upscayl
I would put Upscayl into the “asset cleanup” stage of my workflow, rather than treating it as the final stop.
For example, when writing an article, if I only have a product screenshot with a low resolution but important content, I would first upscale it with Upscayl, then check whether it needs cropping, compression, or conversion to WebP. When making video thumbnails or social images, if I only have a small image on hand, I can also upscale it first and then lay it out.
But if the image itself is a blurry photo, especially a real human face, I would not expect it to restore the image as if I had retaken it with a camera. Upscayl is more like a way to make low-resolution images look more usable on modern screens, not a way to turn every bad image into high-resolution source material.
I think it is best suited for these situations:
- Old screenshots, old illustrations, or low-resolution assets need to be enlarged
- You prefer open-source tools and do not want to commit to a subscription right away
- You do not want to upload images to the cloud for processing
- You occasionally need to batch upscale a group of images
- You want to try the effects of different models on photos, illustrations, or AI-generated images
The less suitable cases are also worth saying clearly:
- Restoring real human faces
- Reconstructing facial details in old portrait photos
- Photos that are already badly out of focus, motion-blurred, or compressed until details are gone
- Any use case where you need real facial details preserved and do not want AI to redraw the face
Closing thoughts
Upscayl feels like a very practical tool to me: the interface is not complicated, and the workflow is not flashy, but it has the models, scaling, local processing, and cross-platform support you would expect.
What I like most is that it turns “local AI image upscaling” into a desktop app that regular users can actually use. You do not have to set up the environment yourself or understand the model inference workflow first. Just choose an image and a model, then start.
Its limitations are also clear: it needs a compatible GPU, it cannot rescue badly out-of-focus photos, and AI-generated details are not suitable for every scenario. For real human face photos in particular, I would not recommend using Upscayl as the main restoration tool, because it is not specially tuned for portrait face restoration and the result can easily look unnatural.
So my conclusion is this: if your goal is to upscale low-resolution screenshots, illustrations, or asset images into a more usable size, Upscayl is worth keeping in your toolkit. If you want to restore portrait photos, I will share a more specialized portrait photo restoration tool next time.