

PicSharp Hands-On: A Cross-Platform Open-Source Image Compression Tool for Batch Compressing by Drag and Drop
I tested PicSharp, a cross-platform image compression tool that supports macOS, Windows, and Linux. You can drag images or folders into it for batch compression, and switch between local compression and TinyPNG. It works well for organizing website images and article assets.
Introduction
While organizing image assets for the blog recently, I ran into a very common problem again: screenshots, cover images, and product UI images tend to get larger and larger over time. A single image may be fine, but if an article contains many images, the site eventually loads more slowly, and the deployed static files also become quite bulky.
In the past, I used online image compression sites for this. But every time, I had to open a web page, upload the images, download them back, and then manually clean up the filenames. That flow is okay for a small number of images, but it gets annoying once there are more of them. Also, if the images are unreleased product screenshots or client assets, I do not really want to upload all of them to a third-party website.
This time I tested PicSharp. It is a cross-platform image compression tool that supports macOS, Windows, and Linux. My impression is straightforward: it is the kind of tool where you drop images in, configure the settings, let it compress automatically, and get the output placed directly where you specified. For someone like me, who often needs to put images into articles, websites, or GitHub READMEs, this kind of direct workflow saves a lot of time.
What Is PicSharp?
PicSharp’s official positioning is a modern, high-performance, cross-platform image compression app. It is a desktop app, not just a web tool, so you can fit it into your daily workflow. The project is published on GitHub under the AGPL-3.0 license, and the source code is available to inspect or build yourself.
The currently supported systems include:
| Platform | Support Status | Notes |
|---|---|---|
| macOS | Supported | Officially marked as macOS 12+ |
| Windows | Supported | Officially marked as Windows 10+ x64 |
| Linux | Supported | Officially marked as Ubuntu 20.04+ or other distributions |
What I cared about most this time was not how many flashy features it had, but three things:
- Can it quickly reduce image sizes?
- Can it process images in batches instead of requiring clicks one by one?
- Can it handle things locally as much as possible, so sensitive images are not constantly uploaded?
After testing it, PicSharp feels more like an “image compression center for desktop workflows.” You can drag files or folders directly into it, and you can adjust the compression mode, compression quality, output format, and storage behavior in the settings.
Download and Installation
PicSharp mainly distributes installers through GitHub Releases. After opening the Releases page, scroll down to the Assets section of the latest version, then download the file that matches your operating system.
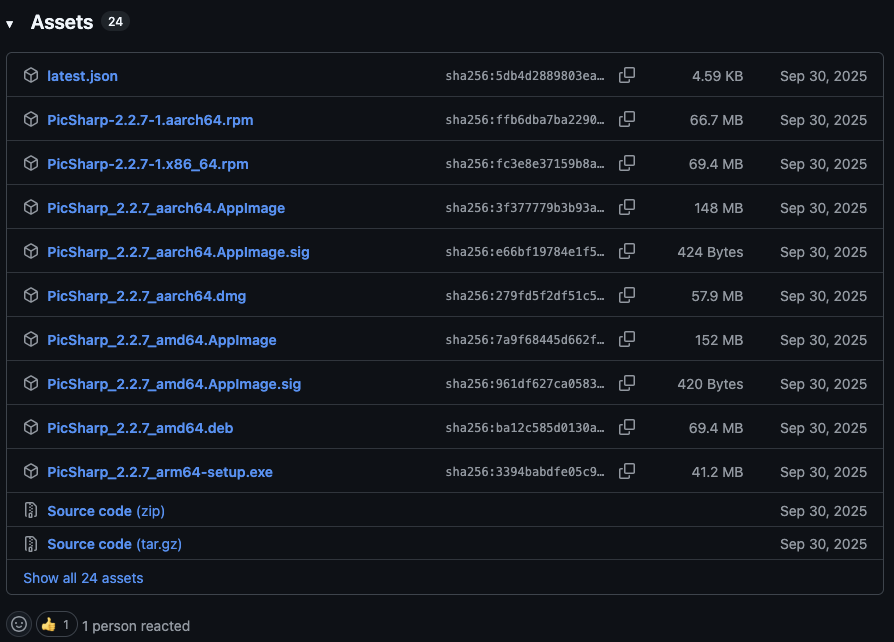
PicSharp can be downloaded from GitHub Releases for each supported platform
If you are a Windows user, note that the official README mentions a common issue: PicSharp needs Microsoft Edge WebView2 Runtime on Windows to display the interface. If you double-click picsharp.exe and nothing happens, it may not mean the app is broken. It may be that WebView2 Runtime is missing or has an abnormal version.
In that case, first check Windows “Apps & features” to see whether Microsoft Edge WebView2 Runtime is installed. If not, install or update WebView2 Runtime from Microsoft’s official page, then restart PicSharp.
If Linux users download the AppImage, they need to grant execute permission first:
chmod a+x PicSharp_x.x.x_xxx.AppImage
./PicSharp_x.x.x_xxx.AppImage
On macOS, the first time you download a third-party app from GitHub, you may also run into a system security prompt. This kind of tool reads the image files you select, so I recommend downloading only from the official GitHub Releases page and avoiding repackaged versions from unknown sources.
Interface and Basic Usage
PicSharp’s interface is very minimal. After opening it, the main drop area is right in the center. You can drag images directly into it, or click Files or Folders to choose the files or folders you want to compress.
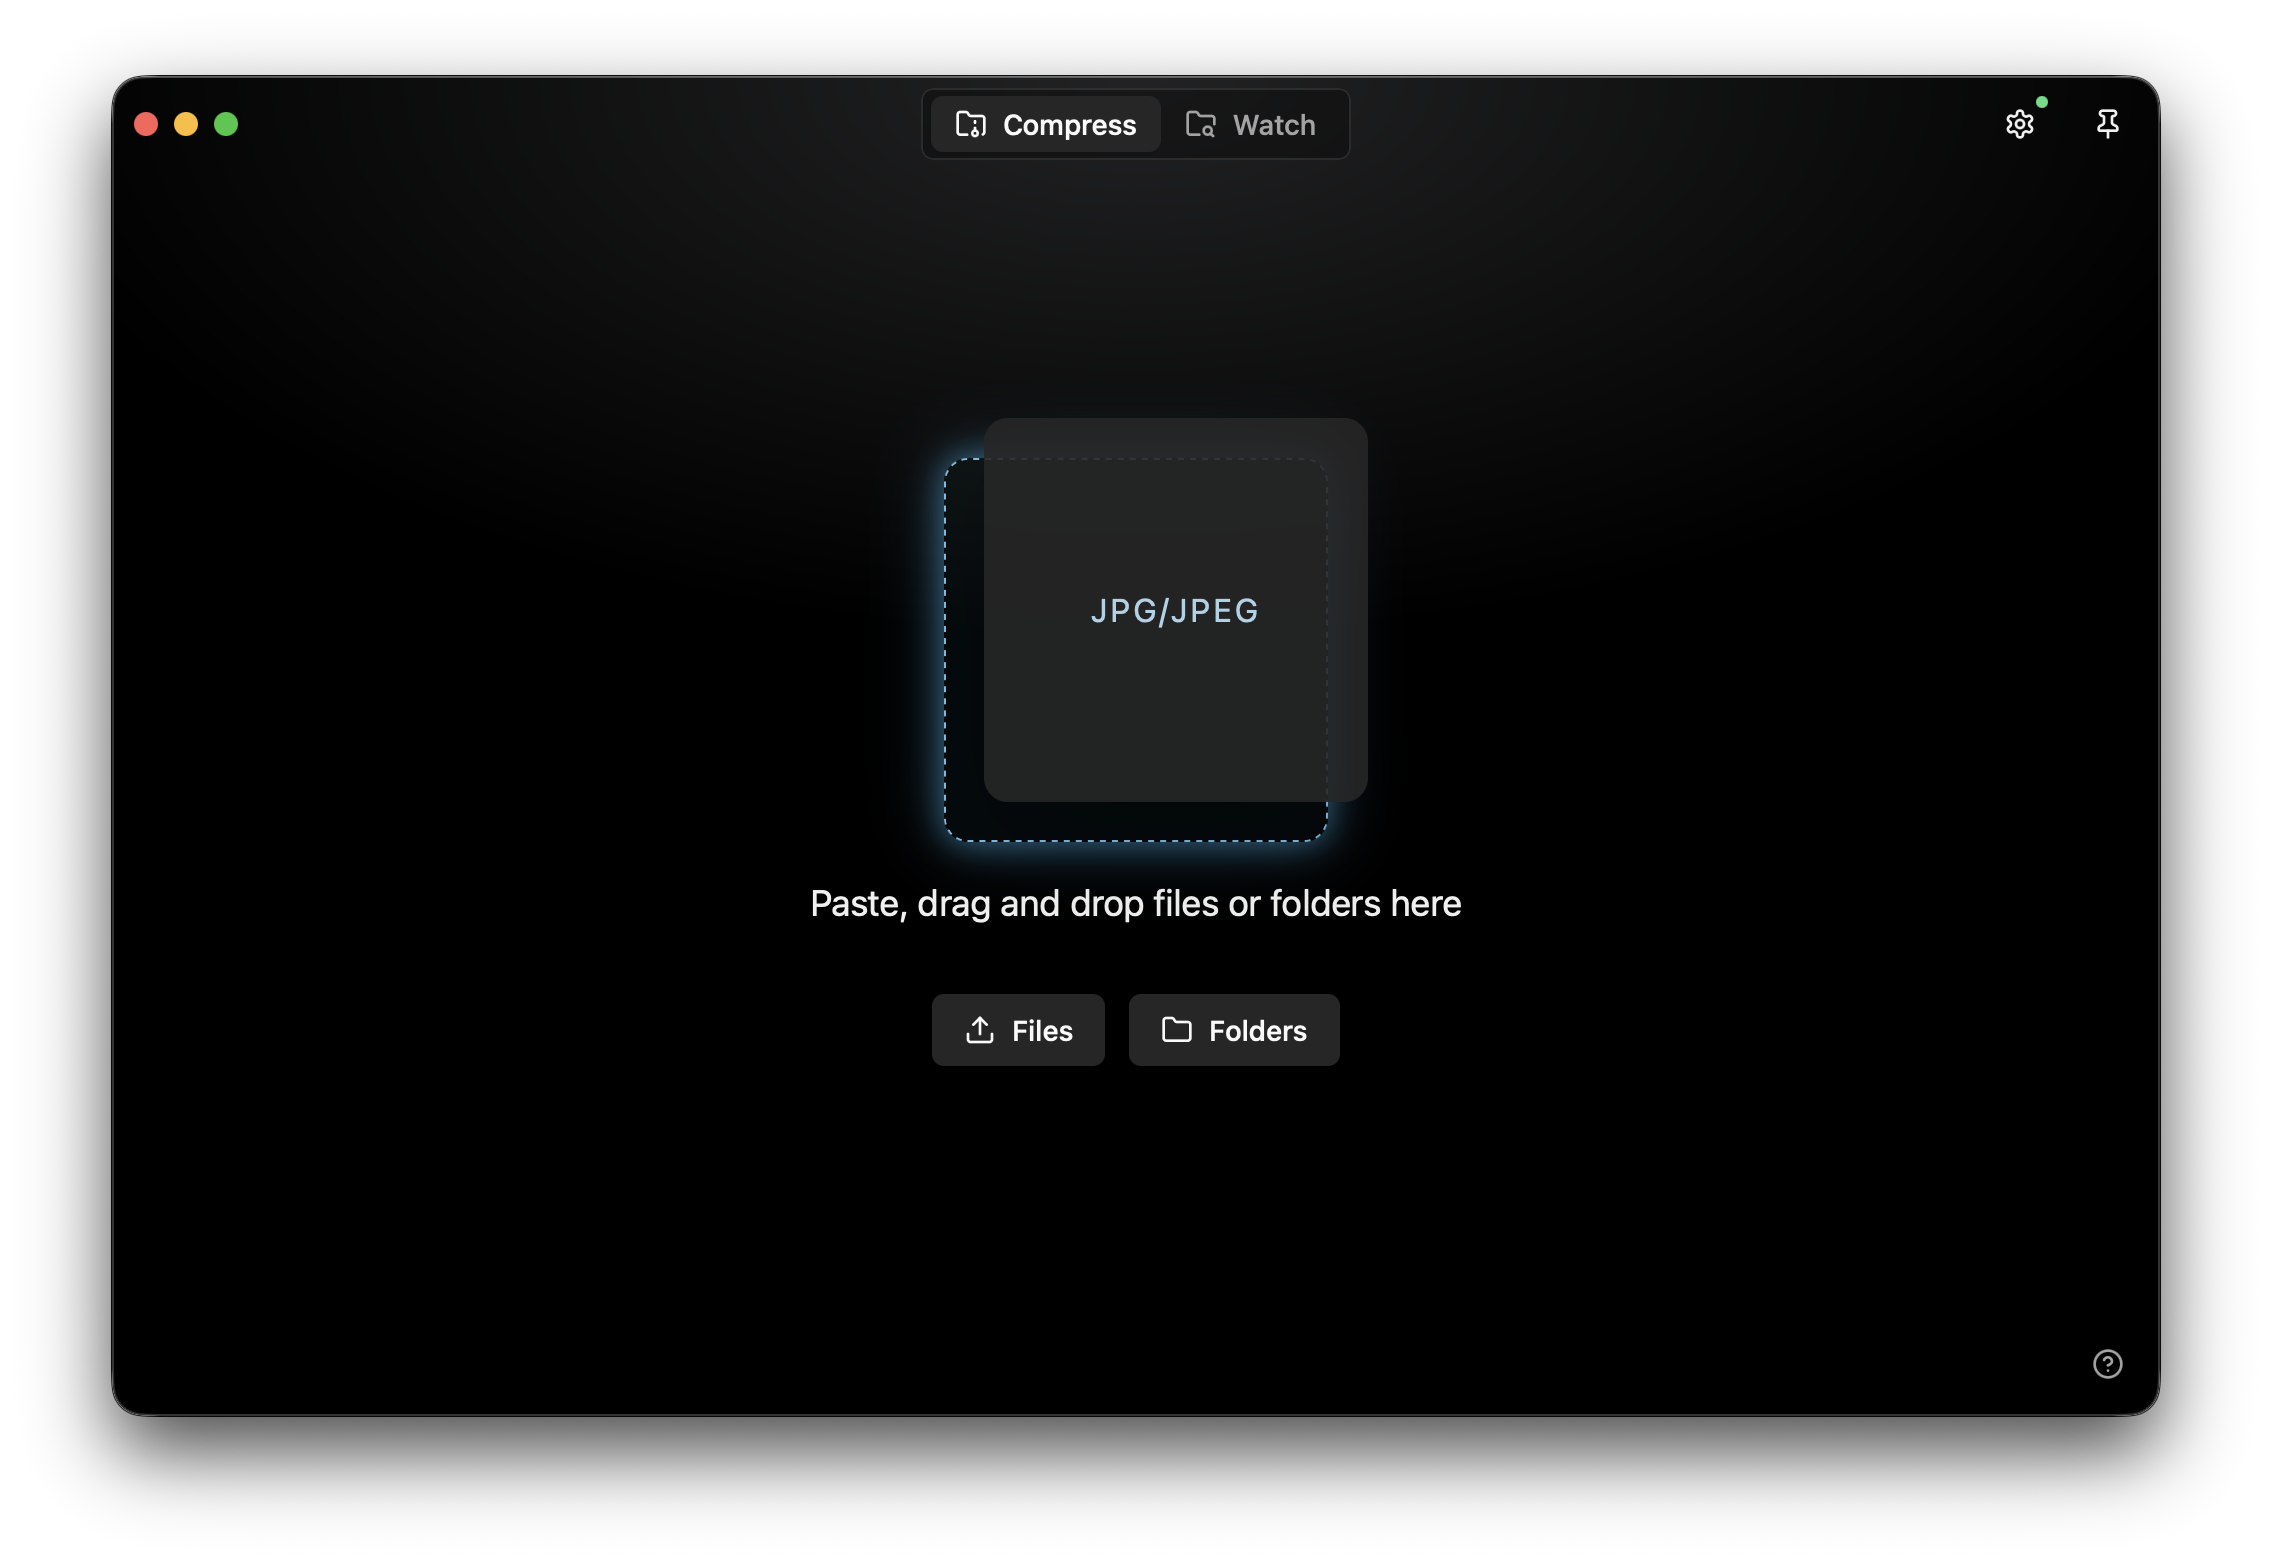
PicSharp’s main interface is straightforward: drag images or folders in and start processing
My own usage usually looks like this:
- Put all screenshots for the article into the same folder first.
- Open PicSharp and drag the whole folder in.
- Check the compression settings and output behavior.
- Start compression, then use the compressed images directly in the website.
This workflow is much more comfortable than sending images to an online compression site one by one. That is especially true when I am writing hands-on tool articles, where I often have UI screenshots, installation screenshots, settings screenshots, and result screenshots at the same time. If every image has to be uploaded and downloaded manually, the writing rhythm gets chopped up.
Local Compression and TinyPNG
PicSharp has two important compression paths: local compression and TinyPNG.
The advantage of local compression is that it is fast and the data does not leave your computer. It is suitable for unreleased screenshots, private assets, or large batches of images. The official README says local compression supports formats such as PNG, JPEG, WebP, Animated WebP, AVIF, TIFF, GIF, and SVG, and provides settings like compression level and lossy/lossless modes.
TinyPNG’s advantage is that the compression ratio is usually very good, which makes it suitable for website images where smaller files matter. However, it requires a network connection and sends the images to the TinyPNG service for processing. So if the image content is sensitive, I would prioritize local compression.
What I think PicSharp does well is that it does not force you into only one route. The official design includes automatic and combined strategies: by default, it can try TinyPNG first, then fall back to local compression and retry if it fails. This is convenient for normal website images, but if you care more about privacy, you should check the settings yourself and confirm whether it is using only local compression.
A simple summary:
| Mode | Advantages | Notes | Best For |
|---|---|---|---|
| Local compression | Fast, private, does not depend on network | Compression ratio may be slightly worse than TinyPNG | Private screenshots, client assets, large batches |
| TinyPNG | Usually produces better compression ratios | Requires network and API key, images are sent out | Public website images, public article assets |
| Automatic strategy | Easy to use, can fall back on failure | You should first understand how it handles images | General daily compression workflow |
Batch Processing and Watch Mode
PicSharp’s batch processing is the part I think fits article asset workflows best. The official README mentions that underneath, it has a scanning and processing flow implemented in Rust, which can handle many images and folders.
In actual use, you do not need to drag images in one by one. Select a folder directly, or drag the whole folder into the interface, and it will scan the image files inside. This is very practical for website projects, because assets usually do not exist as a single file. They are often spread across an assets or public folder.
Another thing worth noting is Watch Mode. You can choose a folder for PicSharp to watch. After that, whenever new images are added to that folder, they can be compressed automatically. This works well for fixed workflows, for example:
- A screenshot tool outputs to a fixed folder.
- PicSharp watches that folder.
- As soon as a screenshot is saved, it gets compressed automatically.
- The compressed image can then be placed into an article or website project.
If you often record demos, take screenshots, or organize article assets, this watch mode is smoother than manually opening the tool every time.
Format Conversion and Output Settings
Besides simple compression, PicSharp also supports format conversion. The official list includes conversion between formats such as PNG, JPG, WebP, and AVIF.
This is useful for website images. When I write articles, some screenshots start as PNG. If the image is mostly UI and text, keeping PNG may still be fine. But if the image is closer to a photo or contains large areas of color, converting it to WebP or AVIF may save more space.
However, transparent backgrounds need attention here. PicSharp provides an alpha background fill setting. When you convert a transparent image to a format that does not support transparency, such as JPG, you can specify what color the transparent area should be filled with. This small setting matters, otherwise a converted transparent image may unexpectedly end up with a black or white background.
For general usage, I suggest thinking about it this way:
| Image Type | Suggested Handling |
|---|---|
| UI screenshots, document screenshots | Test PNG or WebP first |
| Product showcase images, photo-like images | Try WebP or AVIF |
| Images that need transparent backgrounds | Do not casually convert them to JPG |
| Images that will be loaded in large quantities on a website | Compare quality and file size after compression |
My Impression After Testing
My first impression of PicSharp is that it feels “clean.” It is not the kind of tool packed with features where you do not know where to begin. Once you open it, you know you are supposed to drop images in.
What I like most is how short the workflow is. Drag images in, configure the settings, compress, and use the results. If the goal is simply to reduce image sizes for articles or websites, this flow is more stable than opening a bunch of online tools, and it is also less likely that I forget which downloaded version is the final one.
As for compression quality, based on the article assets I tested this time, it was acceptable. It is better suited for website screenshots, tool interface images, and general product images. If you care a lot about photo details, color gradation, or print usage, I still recommend keeping the original files and comparing before and after compression at a larger zoom level, instead of looking only at file size.
Who It Is and Is Not For
I would recommend PicSharp to these kinds of users:
- People who often write articles, build websites, or organize README images.
- People who need to batch-compress lots of screenshots.
- Dual-system users looking for a cross-platform image compression tool.
- People who do not want to upload every image to an online compression site.
- People who need TinyPNG but still want local compression as a fallback.
Situations where it may be less suitable:
- You only compress one image once in a while, and the system built-in tools or online tools are enough.
- You need professional photo editing, color management, or detailed manual adjustment.
- You do not want to think about output formats, compression levels, or storage strategies at all.
- You are handling extremely sensitive images but have not confirmed whether the current settings will use TinyPNG.
I think the last point is the most important. PicSharp supports local compression and TinyPNG. That is a strength, but it also means you should know which mode you are using before starting. TinyPNG is fine for public assets. For private or client assets, I would prioritize local processing.
Closing Thoughts
PicSharp is not a flashy-looking image tool, but the problem it solves is very practical: reduce image size, batch process images, convert formats, and keep as much of the workflow as possible inside a desktop app.
If, like me, you often need to put screenshots into articles, websites, or project documentation, it is a handy small tool. Since it supports macOS, Windows, and Linux at the same time, it is also more convenient for dual-system or multi-platform workflows than compression tools that only support one platform.
I would put PicSharp in the “website asset organization” category. It will not replace professional photo editing tools, but for image compression, it does make the workflow short, and it fits nicely into daily writing and development work.