Kando Hands-On: My Favorite Cross-Platform Open Source Pie Menu Lately
Kando is a free, open source Pie Menu tool for macOS/Windows/Linux. You can bring up a radial menu with Ctrl + Space, then use mouse gestures to quickly open apps, websites, files, hotkeys, and macros. This post shares my actual experience using it and how I set it up.
Preface
I really like Kando. I would even say it is one of the productivity tools that has surprised me the most recently.
It is not the kind of tool that looks packed with features but feels annoying once you actually use it. Kando’s idea is simple: press a shortcut, bring up a radial menu near your mouse cursor, then drag the mouse in a direction to open an app, website, file, folder, or even trigger a hotkey or macro.
Right now I use the default Control + Space to open the menu. Once it appears, I do not need to look for apps in the Dock or open my browser bookmarks bar. I just slide toward the corresponding direction and jump straight into the service or software I use often. This way of working feels a bit like turning “keyboard shortcuts” into visible, touchable gestures.
The clip below is a real demo after I configured it myself:
What Is Kando?
Kando is a free, open source, cross-platform desktop Pie Menu, meaning a radial shortcut menu. The official documentation mentions that it supports Windows, macOS, and Linux, and can be controlled with a mouse, stylus, touchscreen, controller, or even a keyboard.
It can do more than a typical “launcher.” Besides opening apps, it can also:
- Open specific files, folders, or websites
- Run shell commands
- Simulate keyboard shortcuts
- Execute a sequence of keyboard macros
- Paste specified text
- Create nested submenus
- Open different menus for different apps or windows
- Customize themes, icon sets, and sound effects
In other words, you can treat it as a visual shortcut hub. Put the apps, websites, and folders you use most often on the first level; put more specific workflows, such as opening a project folder, pasting a commonly used template, or triggering a certain hotkey, on the second or third level.
What I find most appealing is this: it is easy to start with, but the more you use it, the more you want to move your own workflows into it little by little.
Why Do I Like It So Much?
I like Kando not just because it looks good, although it really does. What made me keep using it is that it sits right between “intuitive” and “efficient.”
The problem with regular keyboard shortcuts is that you have to remember many key combinations. The ones you use often are fine, but the less common ones disappear from memory after a few days. The problem with regular launchers is that you still need to type to search, or look through a list. Kando’s radial menu is different: it turns position into memory. After using it for a while, you are not really looking at the menu anymore. Your hand already knows which direction Threads is in, which direction GitHub is in, and which direction YouTube is in.
Once that muscle memory forms, the operation feels very natural.
Kando’s official usage guide also mentions several navigation modes, including Point and Click, Marking, Turbo, and Hover. At the beginning, you can use the most intuitive click-based method. Once you are familiar with it, you can use drag gestures to select items directly. To me, this is what makes it more interesting than a regular launcher: it does not just list things out, it trains a gesture language of your own.
Custom Nodes: Names, URLs, and Apps Can All Be Changed
Kando’s settings interface is much nicer to use than I originally expected. You can add nodes directly in the graphical editor, drag their positions, adjust hierarchy, and then edit node content from the panel on the right.
For example, I changed one node to threads and set it to open the Threads website:
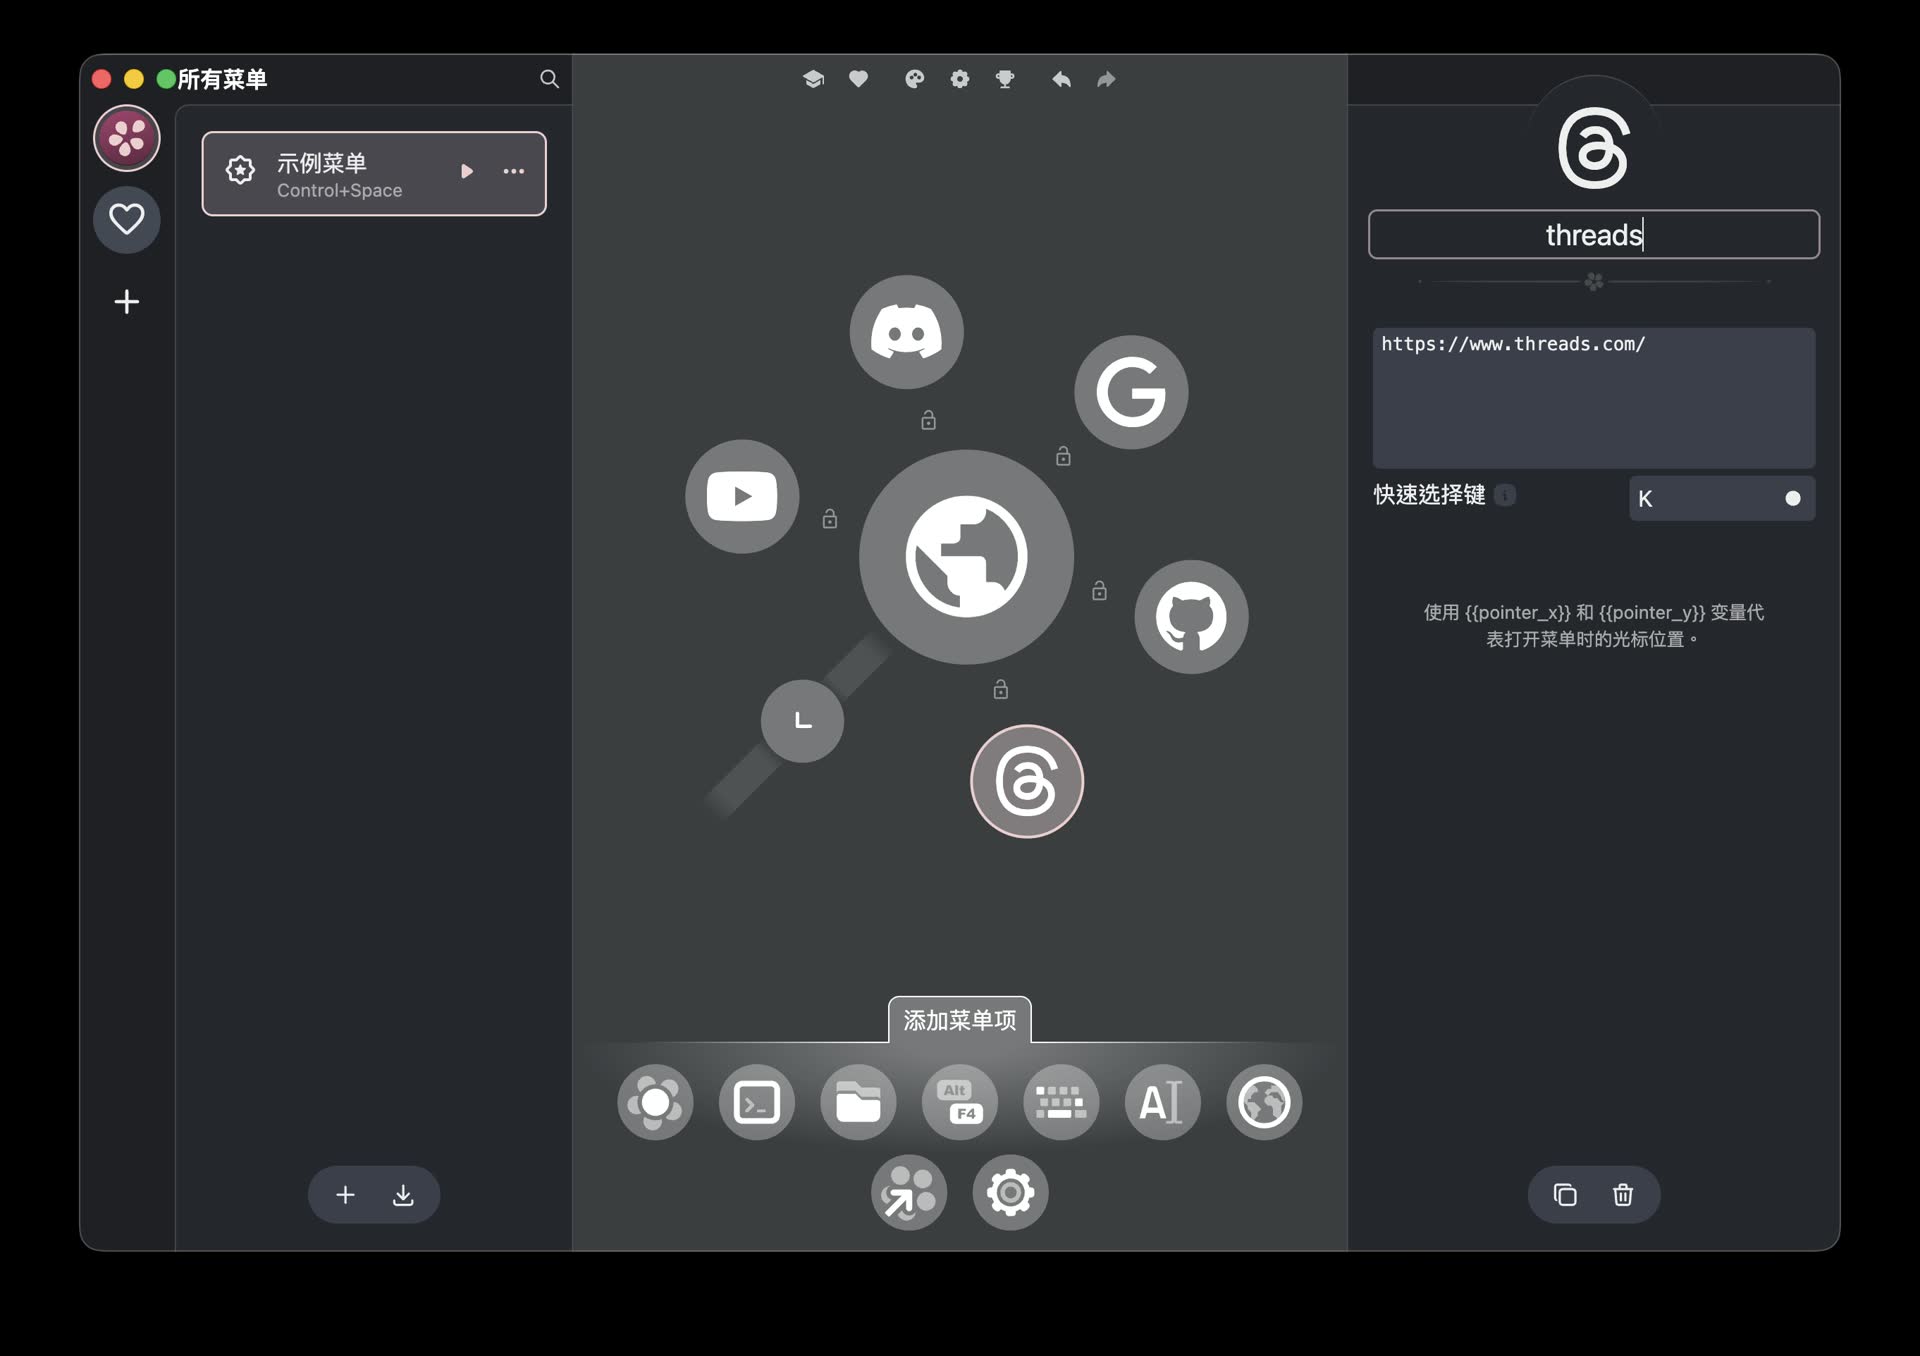
Each node can have its name, action content, and quick selection key edited
The convenient part is that it supports not only website URLs, but also opening apps, files, folders, or performing other actions. The item types listed in the official documentation include Run Command, Open File, Simulate Hotkey, Execute Macro, Paste Text, Open URI, and more. So you can start with something as simple as “open a website,” then slowly turn it into your own automation entry point.
My own usage is still pretty simple for now: I put my most frequently opened apps and URLs into it. Even just that already makes a noticeable difference. I do not need to switch to Spotlight, find something in the Dock, or type a URL. I press Control + Space, drag the mouse in a direction, and I am there.
Icons Can Be Searched and Replaced Directly
I care a lot about visual consistency in this kind of tool, because messy icons become uncomfortable after you use them for a while. Kando does a good job here. You can change the icon for each node directly, and the built-in search is very intuitive.
For example, I searched for and applied the corresponding icon for my Threads node:
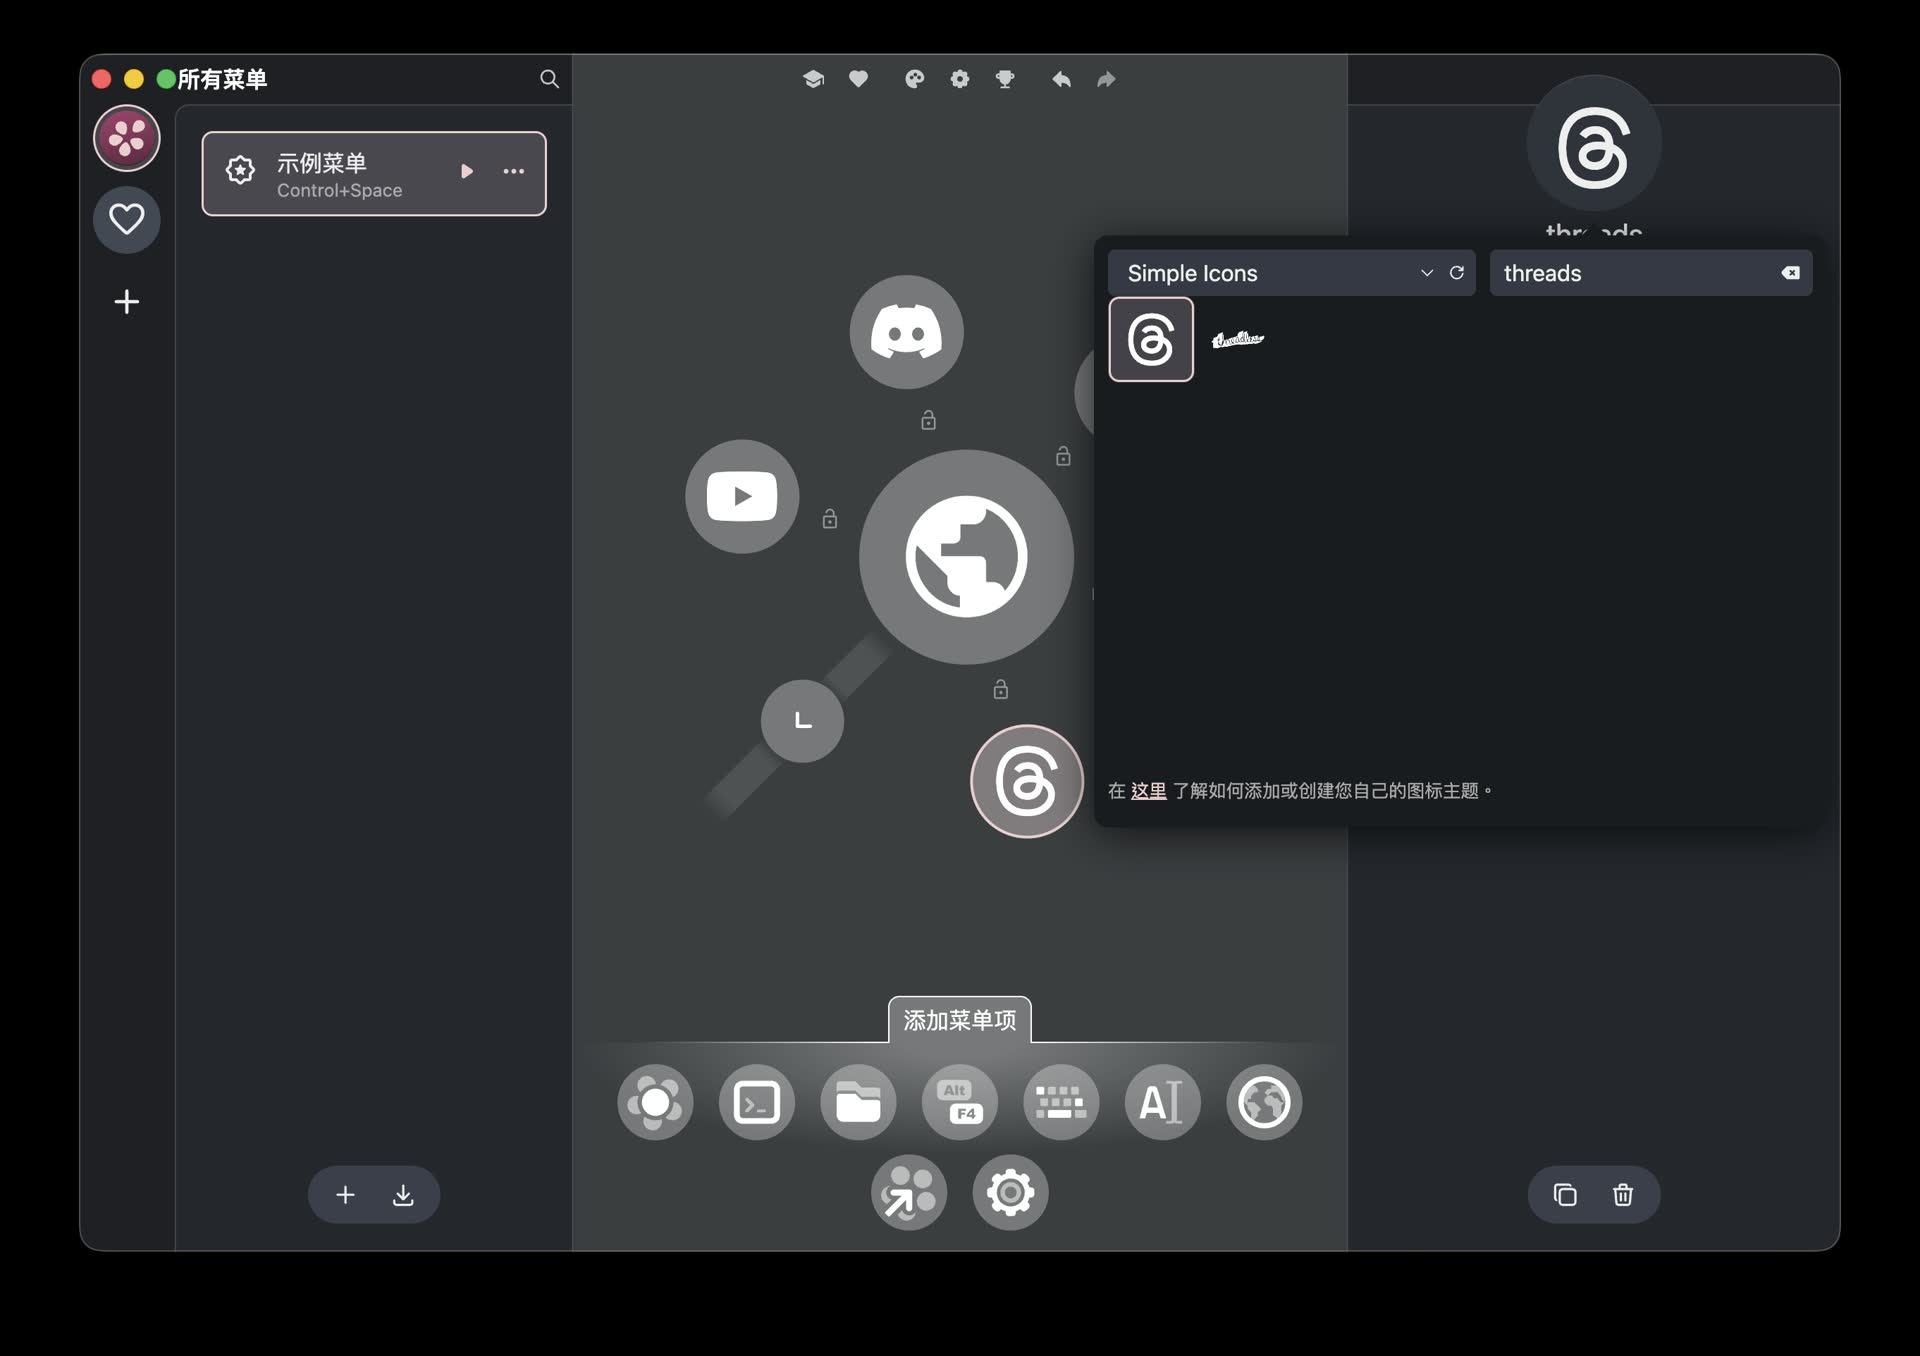
You can search for and apply matching icons to each node, making the menu easier to recognize visually
This small feature matters. For a radial menu to be useful, the key is not stuffing in as many things as possible. The key is being able to recognize each direction at a glance. Good icon choices help gesture memory form faster.
If you are organizing your own menu, I would recommend not overfilling the first level. The official documentation also suggests not putting too many items in a single menu, and using submenus when needed. My experience is the same: put the most frequently used and most directionally memorable things on the first level, then move lower-frequency tools to the next level. The whole thing feels better that way.
The Themes Really Look Good, and My Favorite Is Neon Lights
Another thing I really like about Kando is its theme system. It is not only practical; visually, it also feels polished.
In the small toolbar at the top of the settings screen, there is a palette-like icon. Click it and you can adjust the menu theme. The official website also mentions that Kando supports custom menu themes, icon sets, and even sound themes.
My current favorite is the Neon Lights theme:
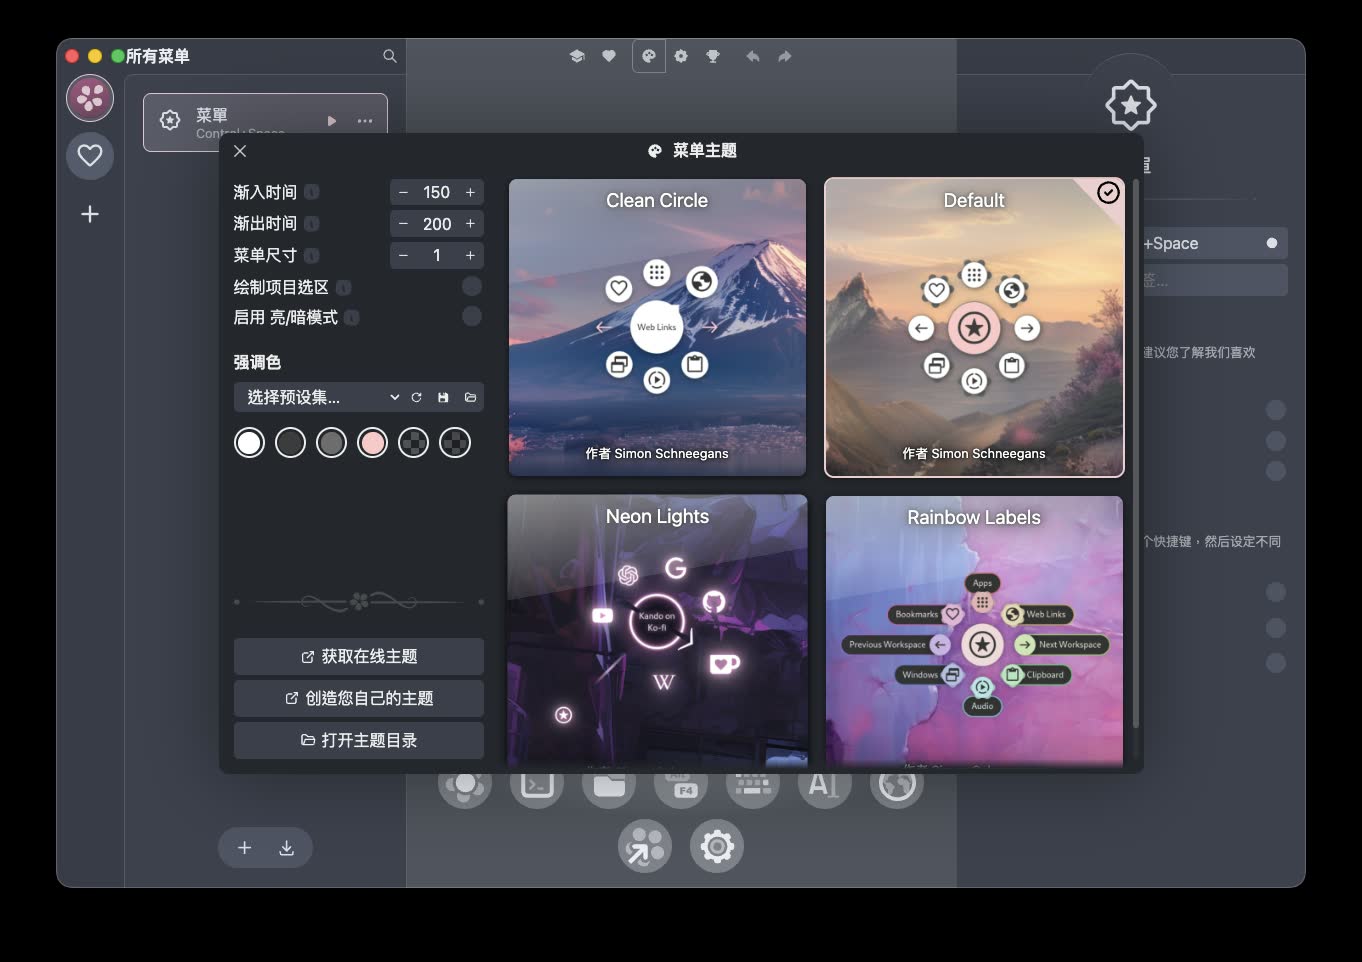
You can switch between different appearances in the theme settings. My favorite is Neon Lights
This theme gives the tool a very “future workspace” feeling, but it is not so flashy that it gets in the way. I think that balance is just right for a productivity tool: it makes you want to use it, open it, and organize your menu, without pulling your attention away from the actual thing you are trying to do.
Installation
Kando’s installation method depends on the platform.
For macOS users, the easiest way is Homebrew:
brew install kando
You can also download the corresponding .dmg or zip file from GitHub Releases. Choose arm64 for Apple Silicon, and x64 for Intel Macs.
Windows users can use winget:
winget install kando
On Linux, there are options such as Flathub, AUR, NixOS, AppImage, deb, and rpm. Most general desktop environments should work, but if you are on Wayland, desktop environments such as GNOME, KDE Plasma, or Hyprland may require some extra setup according to the official documentation.
When launching it for the first time on macOS, remember to grant Kando “Accessibility” and “Screen Recording” permissions. According to the official documentation, Accessibility permission is used to simulate key presses and move the mouse, while Screen Recording permission is used to get the name of the currently focused window. This is similar to many desktop productivity tools. Once you set it up the first time, you do not need to keep dealing with it.
How Would I Recommend Starting?
If you are using Kando for the first time, I recommend not trying to move everything into it from the start. Just make a very small menu first:
- 3 apps you open most often
- 2 websites you use most often
- 1 folder you often open
- 1 common shortcut or macro
First, get used to the rhythm of pressing Control + Space to bring it up and dragging the mouse to select. Once you find that you can slide to the right direction without even looking at the menu, slowly add second-level submenus.
I think Kando is best suited not for “cramming in every feature,” but for shaping a set of work entry points that truly fit how your hand moves. Its strength is full customization, but what makes it useful is that you are willing to configure it with restraint.
Summary
Kando is a tool I have genuinely liked a lot recently. It is free, open source, cross-platform, visually attractive, and more intuitive to configure than I expected. Most importantly, it does not just give you a menu. It lets you turn common actions into gestures.
If you often switch between apps, websites, and folders, and you find it annoying to memorize too many keyboard shortcuts, I highly recommend trying Kando. Start with Control + Space, make a small radial menu, and put in the few entry points you use every day. After a few days, you will probably understand why I like it so much.