

LosslessCut Tested: A 5-Minute, 600 MB Video Cut Almost Instantly
LosslessCut copies media streams through FFmpeg without re-encoding. I tested it with a roughly 5-minute, 600 MB video and documented the free download, I/O shortcuts, and keyframe limitation.
Introduction
I recently needed to keep a few sections from a video. I did not need transitions, subtitles, or color grading. Sending that job through a conventional editor would mean importing the footage, creating a project, exporting, and re-encoding. The setup could take longer than the actual edit.
LosslessCut is a good fit for this kind of “remove what I do not need and move on” job. I tried it with a roughly 5-minute, 600 MB video. After selecting two segments and pressing Export, it felt like the job finished in about half a second—almost as soon as I clicked. This was a quick test rather than a controlled benchmark, and I did not have large RAW footage on hand, but it was clearly different from exporting through a conventional video editor.
The Store Versions Cost Money; GitHub Releases Are Free
LosslessCut is a paid app on both the Mac App Store and Microsoft Store. Store pricing varies by region. When I took the screenshot below, the US Mac App Store listed it at US$18.99.
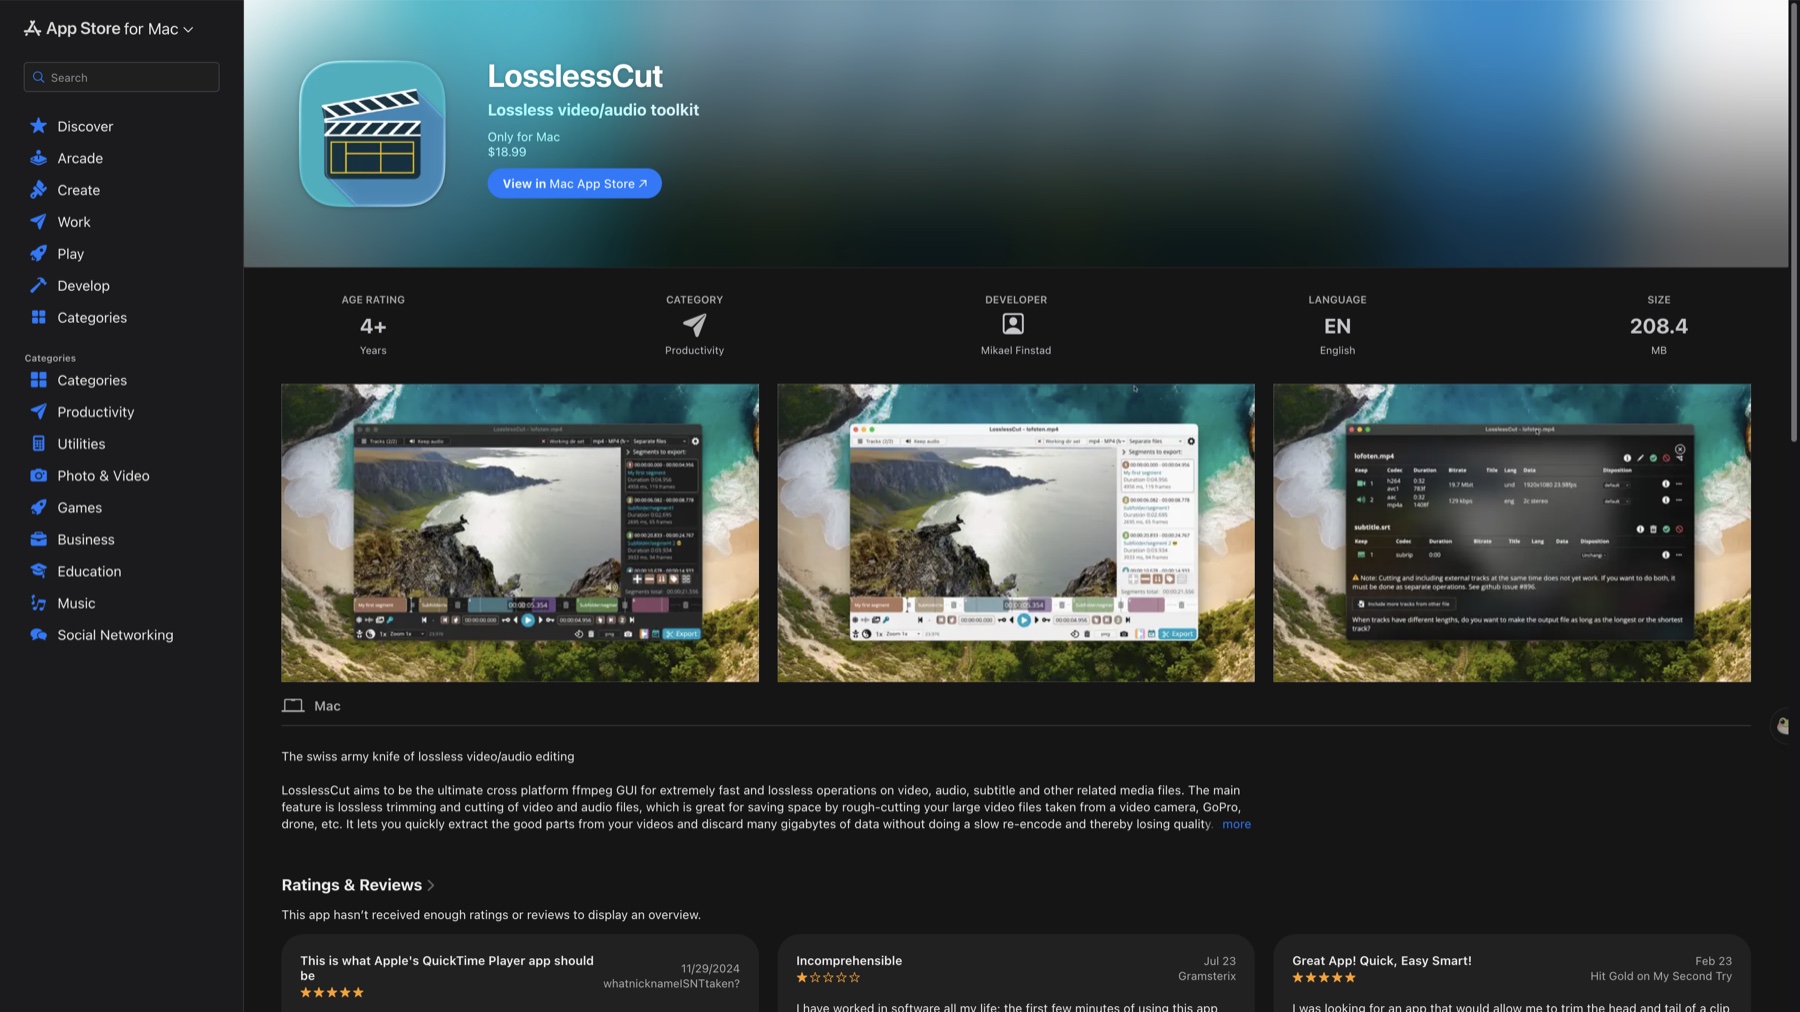
The US Mac App Store listed LosslessCut at US$18.99 when I checked; your regional price may differ
If you do not want to pay, go to the official LosslessCut GitHub Releases page. The executables there are free, and GitHub Releases is one of the official download sources listed by the developer.
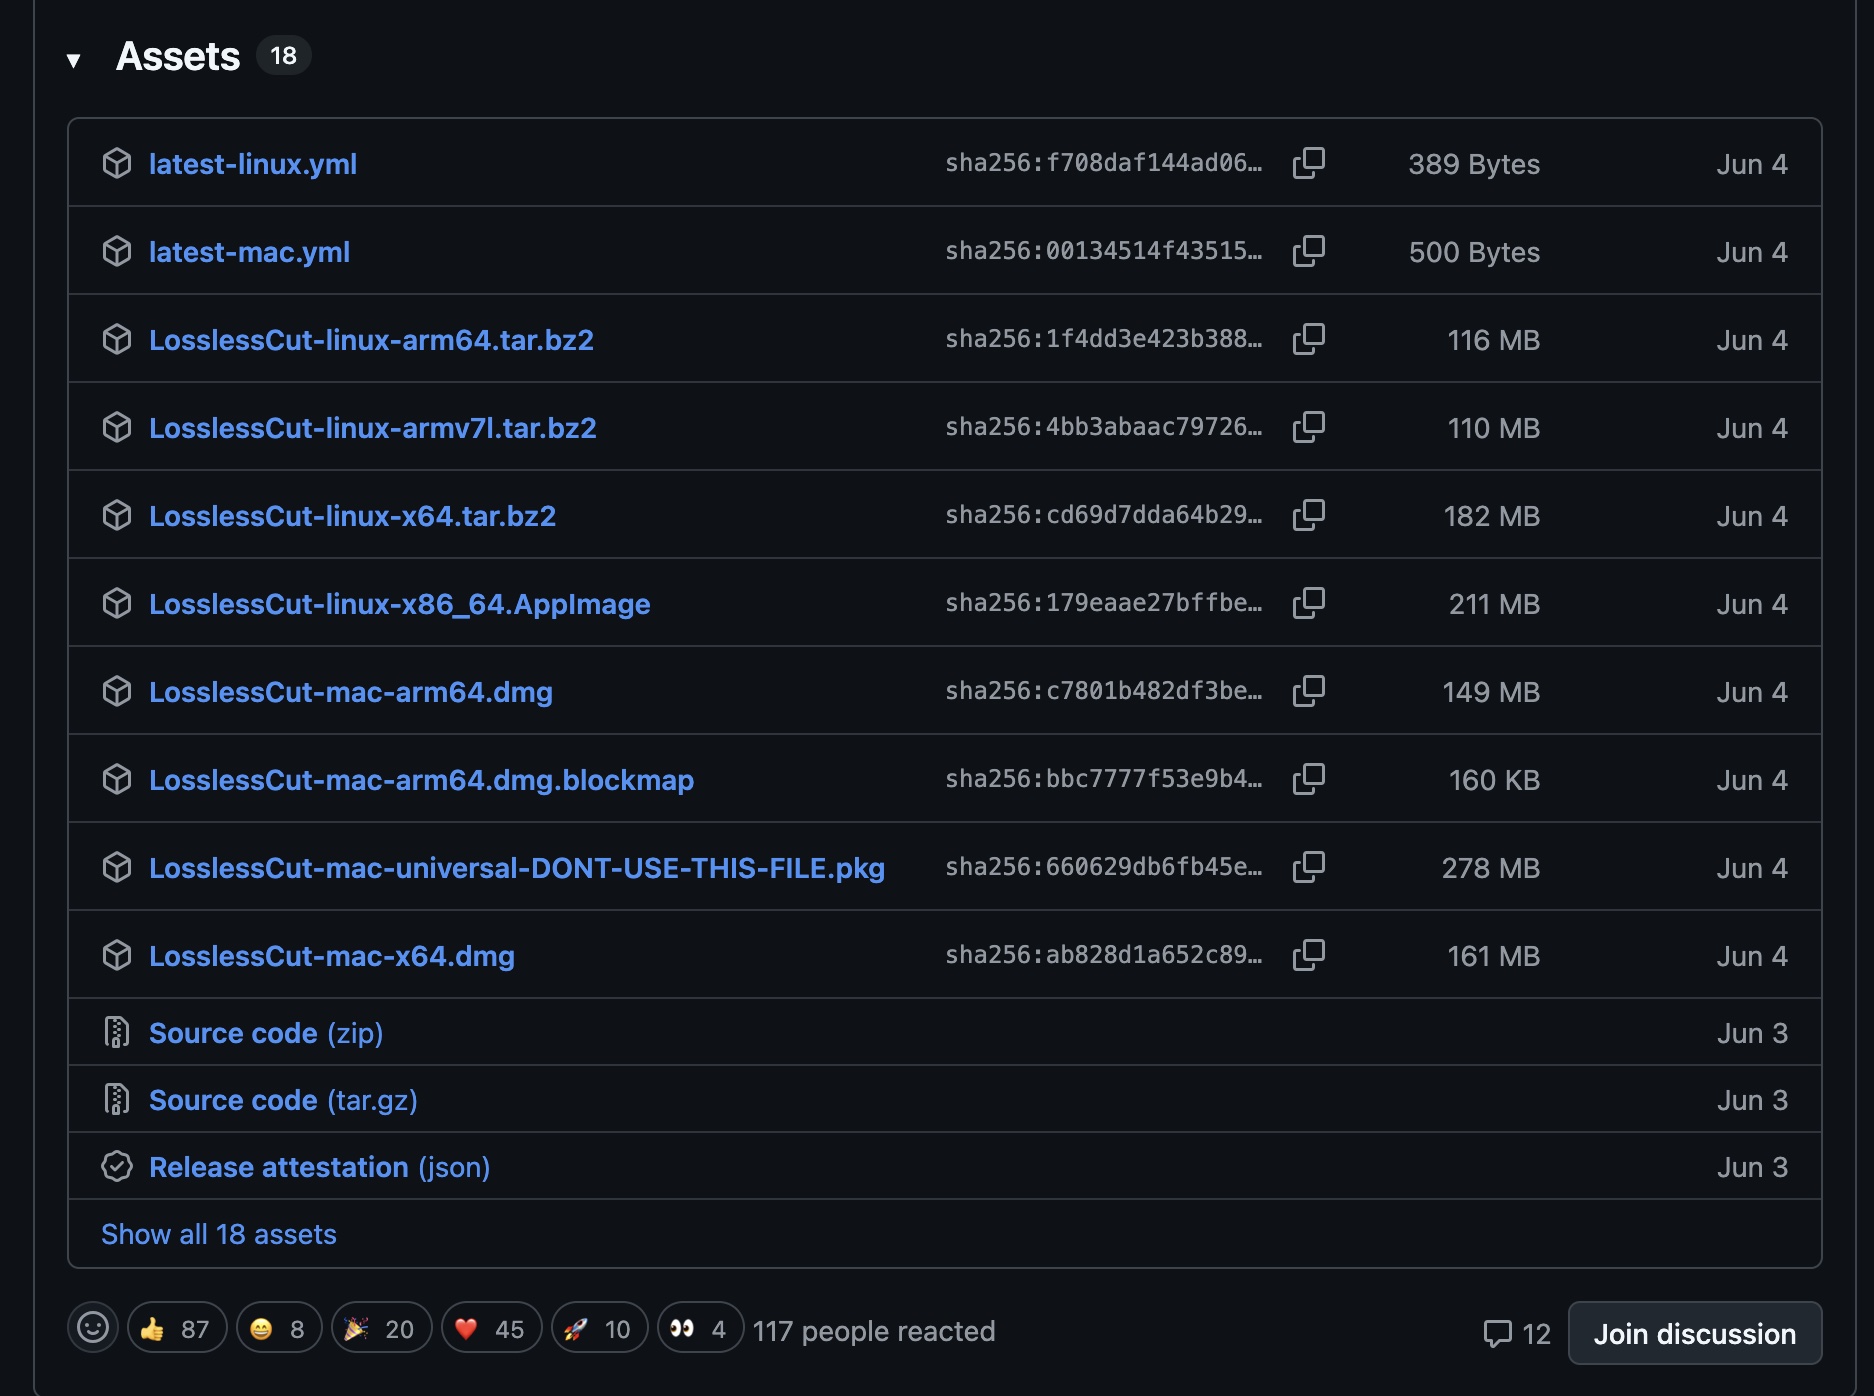
Open the latest release, scroll to Assets, and choose the build for your operating system
On a Mac with Apple Silicon (M1 or later), download LosslessCut-mac-arm64.dmg. Intel Mac users should choose LosslessCut-mac-x64.dmg. Do not download the PKG whose filename contains DONT-USE-THIS-FILE. Windows users should choose the 7z archive for their architecture. On Linux, use the appropriate AppImage or tar.bz2 build.
According to the official FAQ, the two editions have the same in-app features. The store edition mainly provides a simpler, more secure installation process and stable updates. GitHub builds tend to receive features earlier and may behave more like public beta releases. A few differences come from platform restrictions: the Mac App Store sandbox changes how folders are accessed, and Apple does not allow App Store apps to open VOB files.
Switch to Traditional Chinese on First Launch
Click the gear in the top-right corner to open Settings, then choose “繁體中文” under App language. The Settings page is long, but you do not need to understand every advanced option before making your first cut. I would leave the defaults alone and first confirm that a basic export works with your file.
The Shortest Editing Workflow
Drag a video into LosslessCut, then follow these steps:
- Move the timeline to the start of the section and press
Ito set the in point. - Move to the end of the section and press
Oto set the out point. - To keep a second section, press
+to add another segment and set its in and out points. - Click Export in the bottom-right corner, or press
E. - Confirm the output folder, container, and export mode, then press Export again.
By default, LosslessCut exports each selected segment as a separate file. To join several sections into one video, change the export mode from separate files to merge cuts. The source file is not overwritten. Output goes next to the source by default, or you can set a different location with the working-directory control at the top of the window.
Useful Keyboard Shortcuts
| Shortcut | Action |
|---|---|
Command/Ctrl + O | Open a file |
Space | Play or pause |
←, → | Move backward or forward on the timeline |
,, . | Step backward or forward by one frame |
I | Set the current segment’s in point |
O | Set the current segment’s out point |
+ | Add a segment at the current position |
B | Split the segment at the playhead |
Backspace | Remove a cut point or segment |
E | Open the export screen |
C | Capture the current frame |
Shift + / | View and customize all keyboard and mouse shortcuts |
The yin-yang button in the bottom-left corner is also worth knowing. The normal mode keeps selected segments. Toggle it, and LosslessCut instead removes those selections while preserving the parts between them. That is useful for cutting out an ad or a short mistake.
Why Does It Finish Almost Immediately?
A conventional video editor will often decode the source, process every frame, and encode a new file during export. LosslessCut’s regular lossless mode uses FFmpeg to perform something close to a direct data copy. It rearranges the necessary media packets and container without encoding the whole video again.
The amount of data that must actually be copied, storage read/write speed, and container work therefore affect export time more directly than runtime alone. My test kept only two sections from the original 600 MB file and ran on an SSD, which is why the export felt nearly instant at roughly 0.5 seconds. A file measuring tens of gigabytes, a slower external drive, or complicated tracks will still take time, but the operation is usually far faster than re-encoding.
This is also why the app is called LosslessCut: it does not recompress the video and audio streams, so there is no additional generation loss from another encode. It is useful for rough cuts, splitting clips, trimming the beginning or end, removing unwanted tracks, and remuxing into a compatible container. Burning in subtitles, adding transitions, color grading, blurring, watermarking, or changing quality still requires a tool that re-encodes the media.
The Tradeoff: Cuts May Not Be Frame-Accurate
In most compressed video, not every frame can be decoded on its own. Frames between keyframes depend on earlier image data. To avoid re-encoding, LosslessCut usually has to work around those keyframes. The real output may therefore begin slightly before or after the point marked on the timeline. A “cut points may be inaccurate” warning after export does not necessarily mean the file is broken; it describes the tradeoff behind the fast lossless process.
If a cut starts in the wrong place, try toggling Keyframe cut or moving the in point a few frames in either direction before exporting again. LosslessCut also has an experimental Smart Cut mode that tries to handle positions between keyframes, but the official documentation warns that it does not work with every file. Always play important exports before deleting the original footage.
I will keep LosslessCut for jobs where I only need to cut without recompressing. It is not trying to replace a full editor, but when I have footage measuring hundreds of megabytes or several gigabytes and only need a few sections, the saved waiting time is obvious.