

Snapzy Hands-On: A More Complete Free Alternative to macOS Screenshots
Snapzy is a free, open-source native macOS screenshot app with inline annotation, scrolling capture, OCR, screen recording, and built-in editors. I tested its capture-and-annotate workflow and explain how to avoid shortcut conflicts.
Introduction
The built-in macOS screenshot tool is already good, but I have always felt that it stops one step too early. After taking a screenshot, I often want to add an arrow, text, a border, or blur before moving the result into another app.
Snapzy fills that gap. It is a native macOS app built with SwiftUI, AppKit, and ScreenCaptureKit. It feels responsive in use, and it is both free and open source. In addition to screenshots, it includes scrolling capture, OCR, object cutout, screen recording, capture history, and a video editor.
My favorite feature is Capture and Annotate. Once I select an area, the editing tools appear above the screenshot, so I do not need to save the image and open another app first. I tried the other main features without running into obvious problems, but to keep this article focused, I will cover the one setup issue that can be confusing after installation: the conflict with the default macOS screenshot shortcuts.
Download and installation
The easiest option is to download the DMG from the official Snapzy download page, open it, and drag Snapzy into Applications. Follow the onboarding prompts to grant Screen Recording and Accessibility permissions. Snapzy supports macOS 13 or later on both Intel and Apple Silicon Macs.
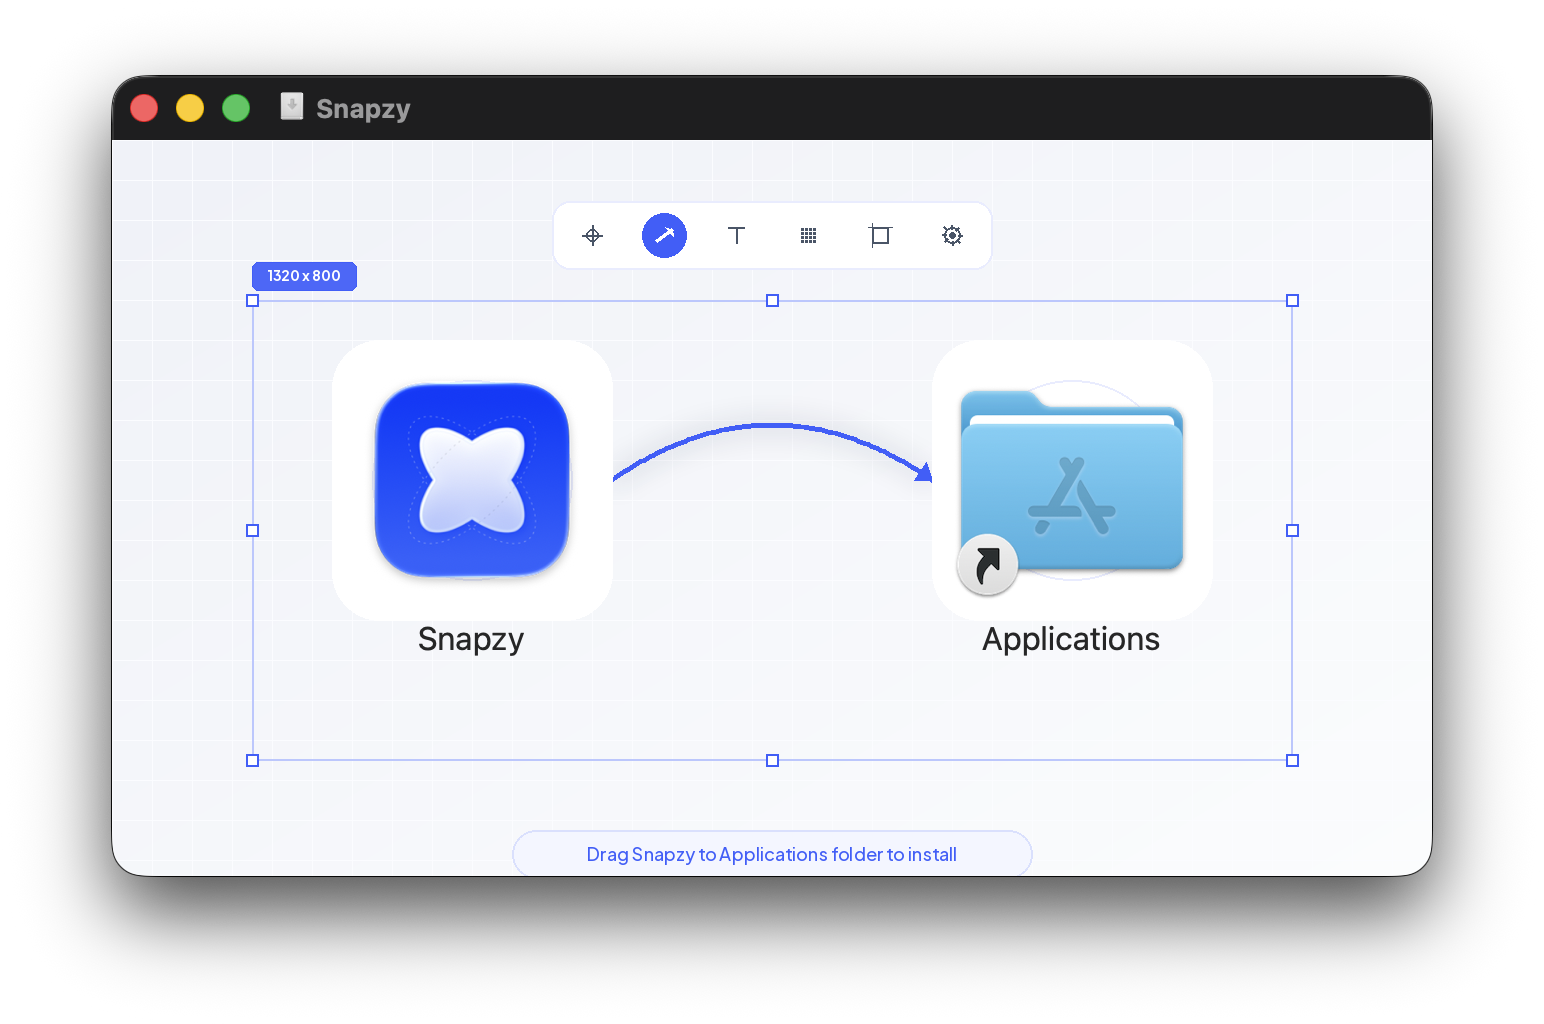
I captured this installer window with Snapzy and added the arrow and selection border directly
If you use Homebrew, installation is one command:
brew install --cask snapzy
The current official build is signed and notarized by Apple, so a normal installation no longer requires removing the quarantine attribute in Terminal. If capturing does not work on the first launch, open System Settings → Privacy & Security, confirm that Snapzy has Screen Recording permission, and restart the app.
Disable the default macOS screenshot shortcuts first
Snapzy assigns full-screen capture, area capture, and screen recording to Shift + Command + 3, Shift + Command + 4, and Shift + Command + 5 by default. Those combinations overlap with the macOS shortcuts, so leaving both enabled can trigger two capture tools at once.
I disabled the built-in shortcuts and let Snapzy take over:
- Open System Settings.
- Select Keyboard, then click Keyboard Shortcuts.
- Select Screenshots in the sidebar.
- Uncheck all five screenshot and recording shortcuts, then click Done.
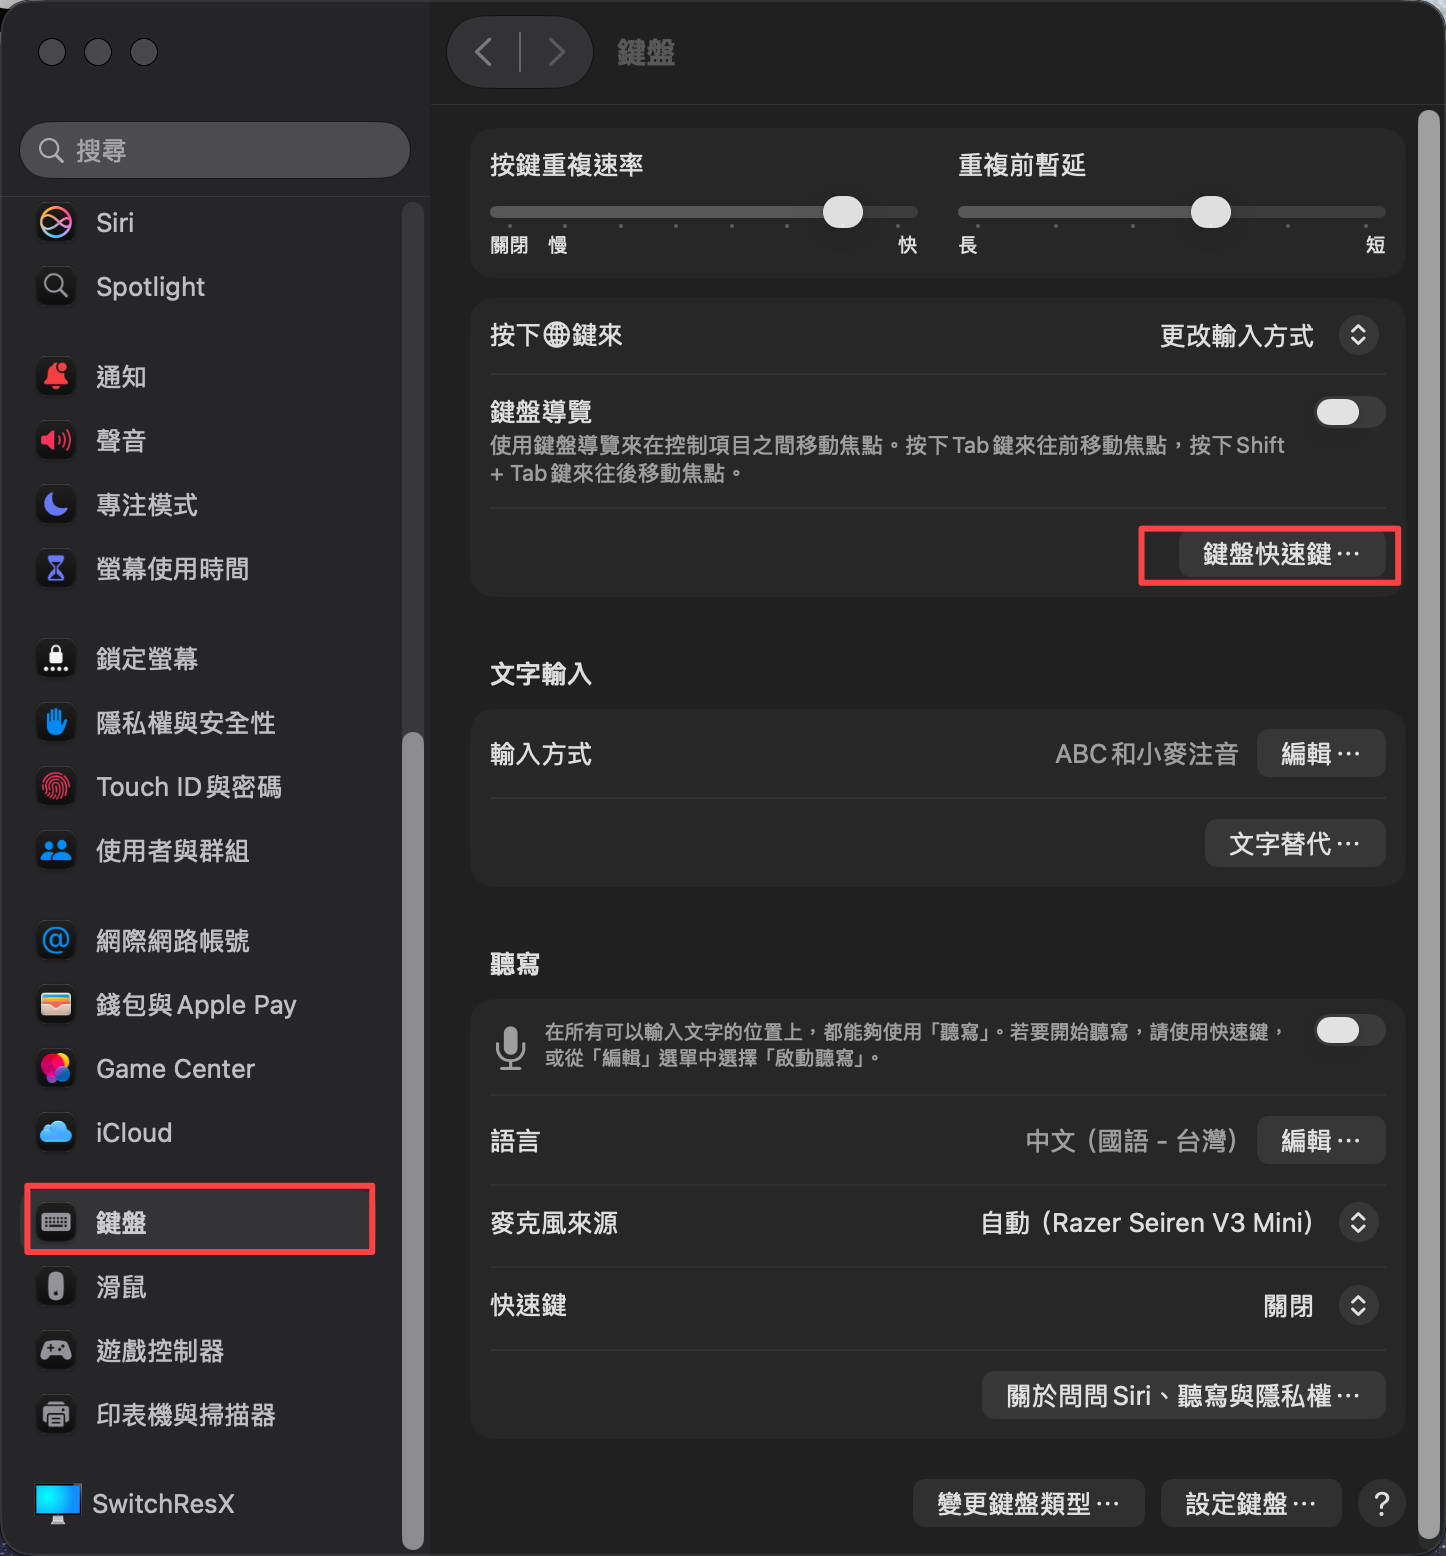
System Settings → Keyboard → Keyboard Shortcuts
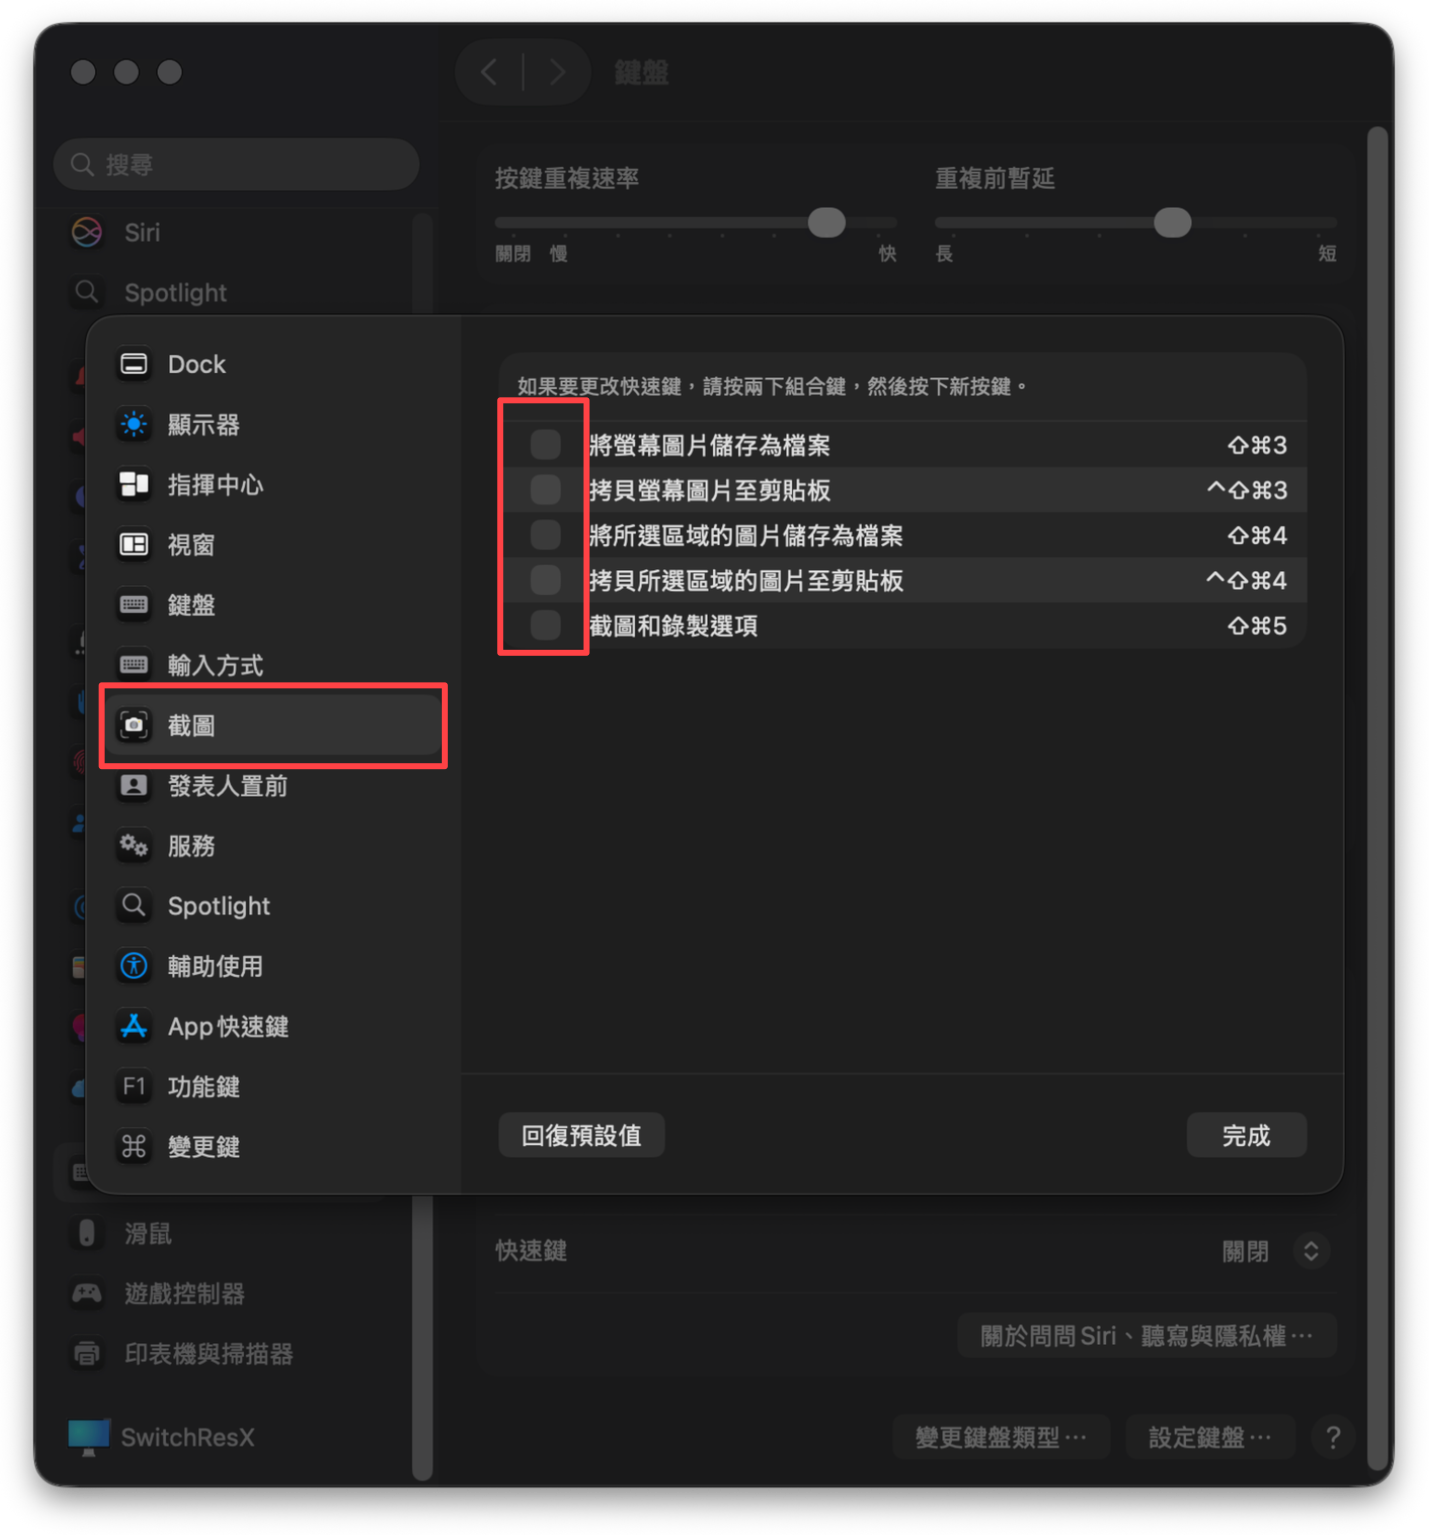
Select Screenshots in the sidebar and uncheck these five entries
This only disables the shortcuts; it does not remove the macOS screenshot feature. If I stop using Snapzy, I can return to the same panel and turn them back on. Another option is to keep the macOS shortcuts and assign different combinations inside Snapzy. I wanted Snapzy to replace the built-in tool completely, so disabling the system shortcuts made more sense for me.
The feature I use most: Capture and Annotate
After finishing the shortcut setup, I press Shift + Command + 7 to start Capture and Annotate. Once I select an area, a toolbar appears on the screen with arrows, text, pixelation, borders, and cropping. I do not have to save the image to the desktop first.
It sounds like a small difference, but it saves time when I am writing a tutorial or answering a question. The two screenshots in this article that highlight Keyboard Shortcuts and the checkboxes were edited directly after capture. When I am done, I can save the result, copy it to the clipboard, or drag it into another app.
Snapzy also supports full-screen and area capture, scrolling screenshots, OCR, transparent object cutouts, screen recording, GIF output, Quick Access, and capture history. It can record system audio and a microphone, while the built-in video editor supports trimming, backgrounds, and custom output sizes. There is a lot here, but a first-time user does not need to learn everything. Setting up Capture and Annotate already makes a noticeable difference.
Can it replace the built-in macOS screenshot tool?
For my workflow, yes. The macOS tool has the advantage of being built in, stable, and ready without configuration. Snapzy connects capture, annotation, history, and recording edits in one workflow. If I regularly need to add arrows or hide information, not opening Preview after every capture is a real improvement.
Snapzy is still under active development and is more complex than the system tool, so it will not be necessary for everyone. But if the only thing missing from the macOS screenshot workflow is a complete editor, Snapzy feels like the upgraded version. After fixing the shortcut conflict, I can use it as my main screenshot app.