RustDesk Open-Source Remote Desktop Test: Controlling macOS from Windows
RustDesk is an open-source remote desktop tool that can control computers across platforms and also supports self-hosted servers. This article records my hands-on flow: downloading from GitHub, logging in, enabling permissions, setting a fixed password, and accepting the first connection.
Introduction
This time I tested RustDesk. It is closer to a full remote desktop tool like TeamViewer or AnyDesk. You can control another computer across networks, and you can also run your own relay server. My test setup was connecting from Windows to macOS, then streaming and controlling the Mac screen directly.
At first I was just looking for an open-source remote control tool. Later I realized RustDesk has a huge presence on GitHub. The official page also mentions 113K+ stars and that it is one of the world's top 100 open-source projects. Not a small project at all.
After testing it, I think the feature set is quite complete. For the first run, it is worth spending a few minutes sorting out the account, permissions, and password settings. Otherwise, you will keep hunting around small windows looking for things.
Who It Is For
RustDesk fits situations where “I really need to control another computer,” not just show my screen to someone nearby.
Better-fit scenarios:
- You have another computer at home or in the office and occasionally need to operate it remotely.
- You need connections between Windows, macOS, and Linux.
- You want an open-source alternative to TeamViewer or AnyDesk.
- Your team has privacy or stability requirements and may want to self-host a server later.
- You need permission controls for keyboard and mouse, clipboard, file transfer, audio, and so on.
Less suitable scenarios:
- You only want to share your screen temporarily on the same Wi-Fi.
- You do not need control, and only want a phone or another computer to view the screen.
- You do not want to deal with permissions, accounts, fixed passwords, or security settings.
- You are just giving a quick presentation, and the receiving side preferably should not install anything.
If you only need simpler screen sharing within the same Wi-Fi environment, I would put RustDesk aside and use Deskreen, which I cover in the next article. Deskreen is more like opening the app, scanning a QR Code, and viewing the screen in a browser. The mental overhead is much lower.
Download Method
This time I downloaded it directly from GitHub Releases. The official website can also take you to the download page, but GitHub Releases has the advantage of laying out the version, platform, and file formats clearly.
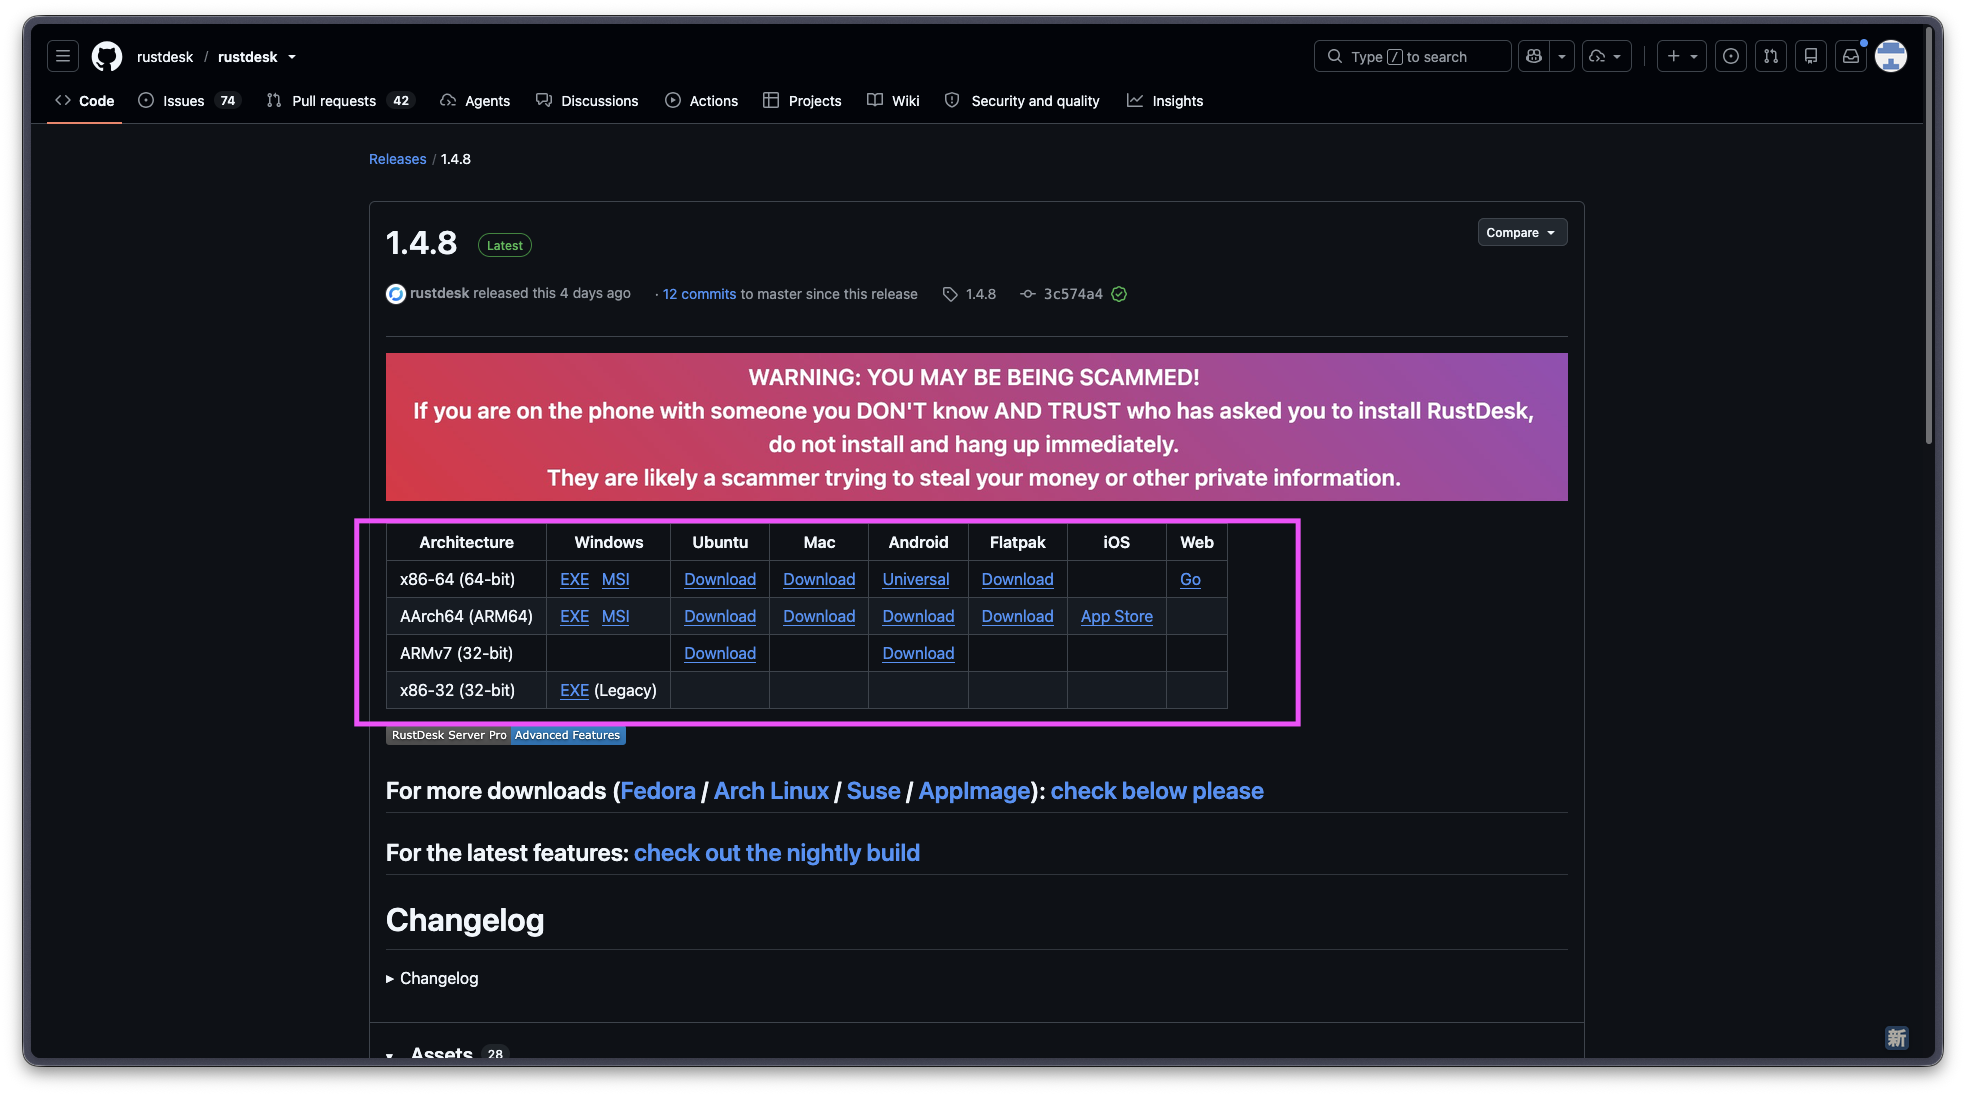
Go to GitHub Releases and choose the version for your own system
When I took the screenshot, the version was 1.4.8, but versions keep updating, so there is no need to hunt for the exact same version number. Just go to the Releases page and choose the file that matches Windows, macOS, Linux, Android, or iOS.
One thing I would pay special attention to here is the warning on the official page: if a stranger calls you and tells you to install RustDesk, then asks you to give them your ID or password, hang up. There is nothing wrong with remote control tools themselves, but they are easily used in support scams. Once you grant access to this type of tool, the other person may genuinely be able to control your computer.
Find Settings First After Opening It
After opening RustDesk, the main screen shows your own ID on the left, and a field for entering the other side’s remote ID on the right. This concept is similar to many remote desktop tools.
But the first place I got stuck was finding the settings entry. It is not placed as a very obvious large button. It is inside the small menu in the top-right corner. That spot is a bit like a hamburger menu, and it is honestly easy to miss if you are not looking for it.

The settings entry is inside the small menu in the top-right corner, which is easy to miss on first use
My suggestion is not to rush into connecting when you open it for the first time. Go into settings first and handle the account and security-related items. With a remote control tool, if you have not thought through permissions, it will feel less comfortable to use later.
Log In for Easier Device Management
After entering settings, the first thing I handled was the account. RustDesk supports login, which makes device management more intuitive. I used my GitHub account to log in here.
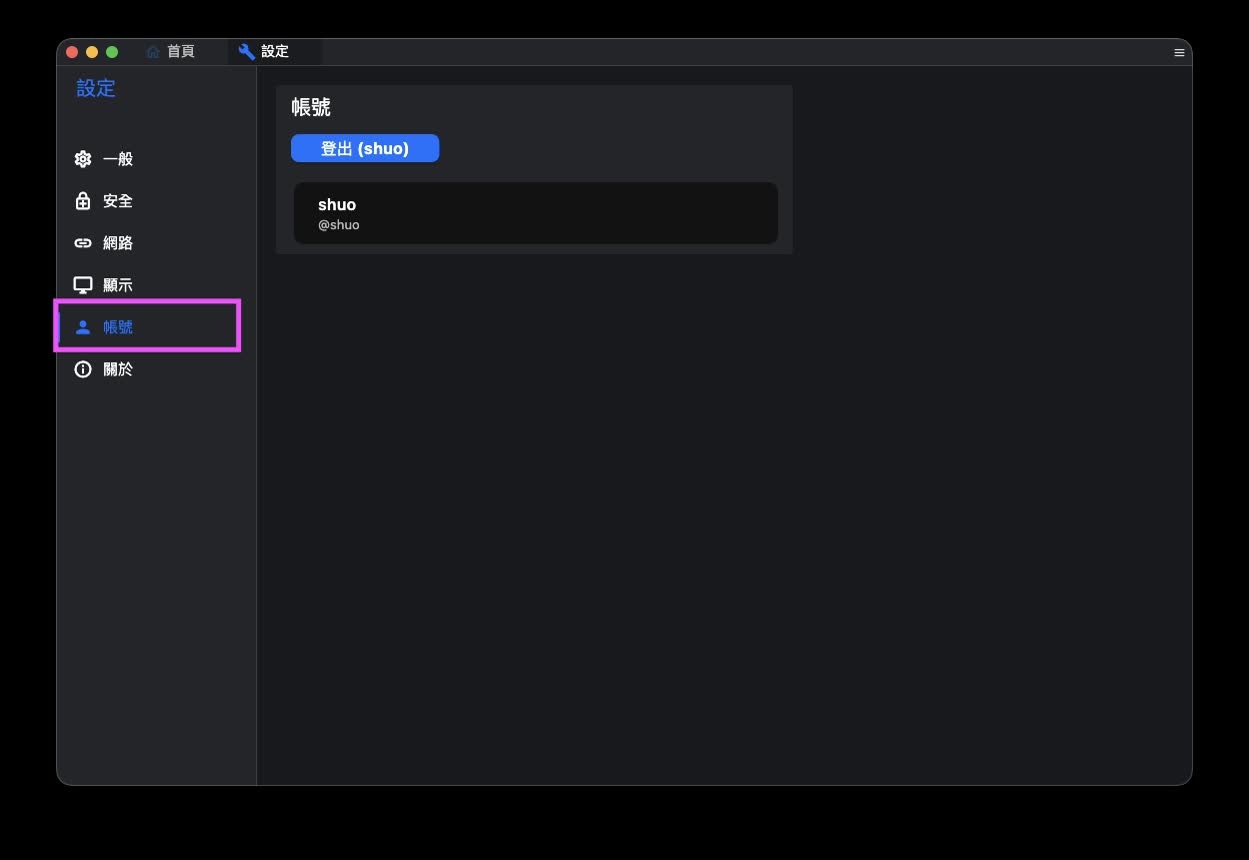
After logging in, managing your own devices later becomes more convenient
If you are only helping someone connect once in a while, it is not impossible to use it without logging in. But if you have several of your own devices that need to connect to each other, I would recommend logging in. That way, you do not need to rely on screenshots or manually copying IDs every time, and the device list is easier to manage.
Do Not Enable Every Permission for Strangers
RustDesk’s security settings can enable many permissions, such as keyboard and mouse, clipboard, file transfer, audio, camera viewing, terminal, TCP tunnel, remote restart, session recording, privacy mode, and more.
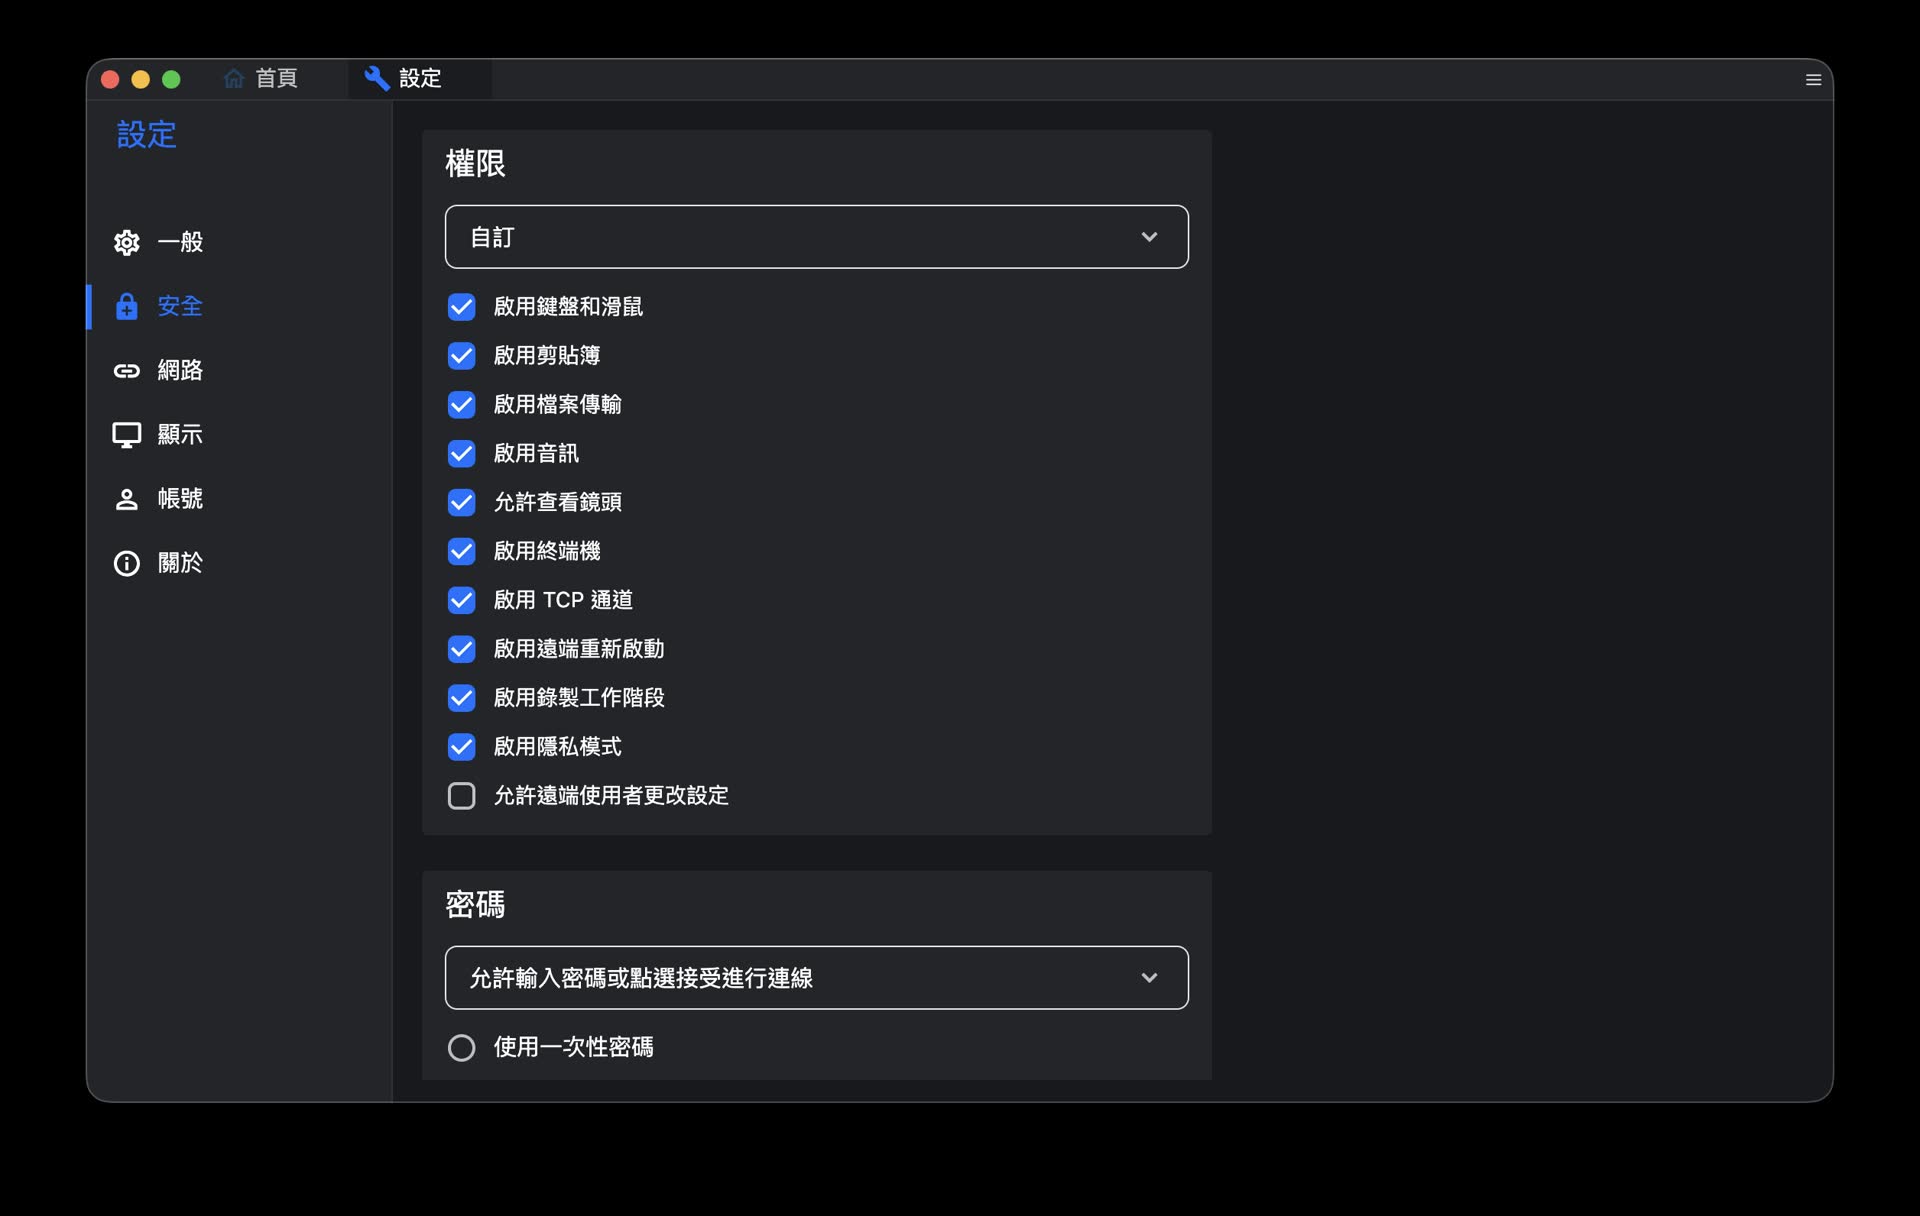
Security settings can split permissions for remote control, clipboard, files, audio, and more
When testing my own devices, I enable more permissions because I know who is connecting. But if you are temporarily letting someone help you, I recommend enabling only what is needed. For example, if you only want the other person to view the screen, do not casually enable file transfer and terminal access. If you only need them to click a few settings for you, you may not need to enable clipboard or privacy mode either.
This is not overthinking it. Once remote desktop permissions are too broad, the other person can do more than you might expect.
Fixed Passwords Are Better for Your Own Devices
RustDesk can set a fixed password. This feature is very convenient because you do not need to wait for the other side to read out a one-time password every time, and you do not need someone sitting in front of that computer to press confirm.
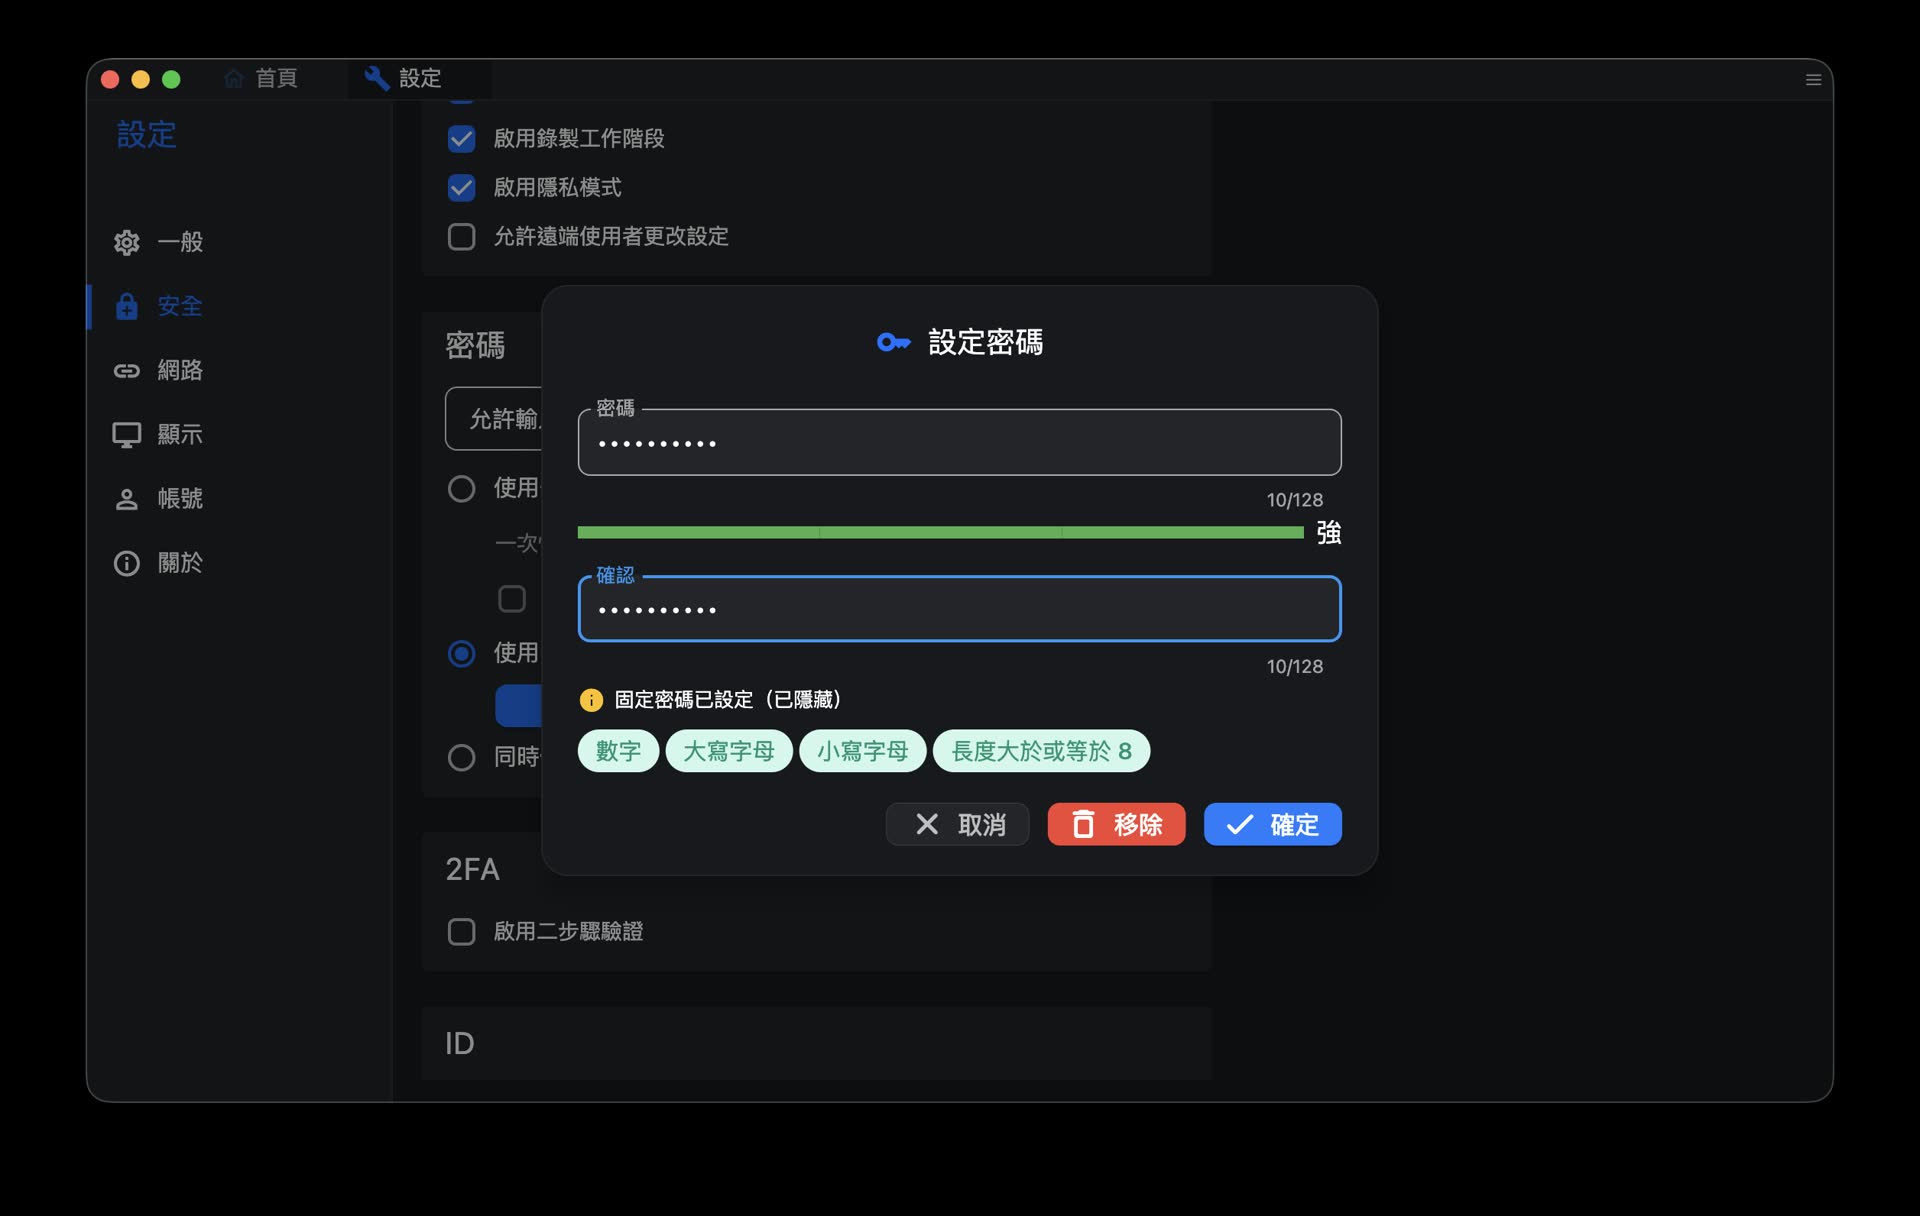
Fixed passwords are suitable for your own devices, but password strength needs to be taken seriously
My view is this: fixed passwords are suitable for your own computers, your own servers, and your own work environment. They are not very suitable for temporarily supporting unknown devices, and they are also not suitable for leaving the same password in chat apps for a long time.
If you enable a fixed password, at least use a long enough password that you do not reuse elsewhere. It is even better if you can combine it with account management and additional verification. RustDesk also has a one-time password mode. For temporary support, I would lean more toward using a one-time password.
Accept the Request on the First Connection
On the first connection, the computer being controlled will see a request window. This step is basically the final manual confirmation.
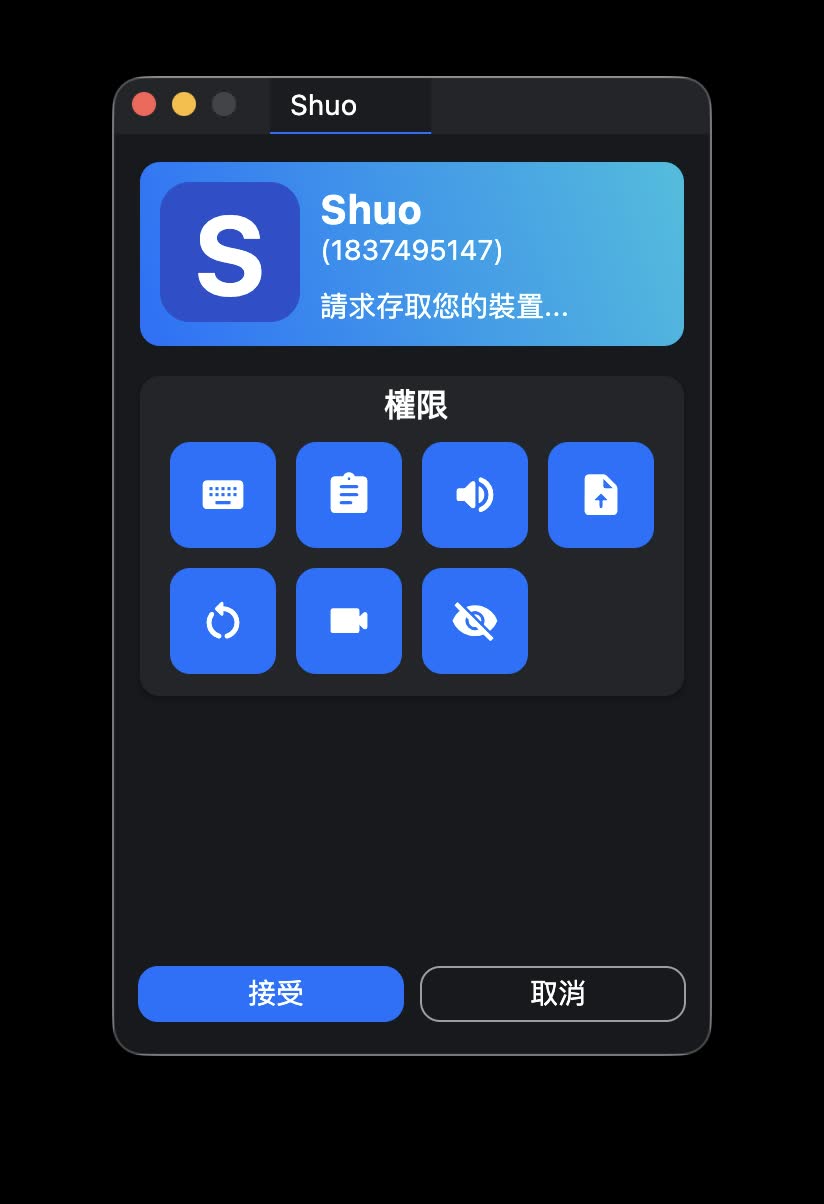
On the first connection, you need to press accept on the controlled side
This time I connected from Windows to macOS. After accepting, I could see the Mac screen on Windows and control the mouse and keyboard. Actual latency depends on network quality, but for normal operations like opening settings and viewing the screen, it felt smooth enough.
There is one more thing to note on macOS: the system itself may require you to enable permissions such as Screen Recording, Accessibility, and Input Monitoring. If you can view but cannot control, or if you see a black screen, usually RustDesk is not broken. It is more likely that the macOS permissions are not complete yet.
About Self-Hosting a Server
One important selling point of RustDesk is that you can self-host a server. The official project provides a free open-source server, and there is also RustDesk Server Pro. This is attractive for teams because you can place relay and device management inside your own infrastructure.
But I did not implement a self-hosted server in this article. The reason is simple: I do not currently need it.
If you are only occasionally connecting to your own devices remotely, testing with the official default service is enough to start. When you actually run into team management, internal network policies, connection stability, data control, or not wanting to depend on third-party services, then it makes more sense to come back and study self-hosting.
I do not really recommend treating self-hosting as a must-do item from the beginning. RustDesk already has plenty of settings. For first use, getting the client workflow running smoothly is less likely to leave you stuck in a pile of networking terms.
Hands-On Notes
RustDesk feels like a very complete tool to me, but not the lightest kind. It fits situations where you really need remote control, cross-platform operation, and maybe even a self-hosted server in the future.
I like that it splits permissions in detail, and it also has fixed passwords and account management. But I also think the first run can feel a bit disorienting, especially around the settings entry, permission items, and password modes. If you are only sharing your screen temporarily, this flow will feel too heavy.
So I would split it like this:
- Need remote control, cross-network access, and operation of another computer: use RustDesk.
- Just need someone to view your screen on the same Wi-Fi: use Deskreen.
These two tools are not really replacements for each other. RustDesk is a full remote desktop tool, while Deskreen is temporary same-network screen sharing. Once you figure out whether you need to “control” or only “view,” choosing the tool becomes easy.
Related Links: